A sample console operator's workflow
BigFix is a powerful and feature-packed program that might seem overwhelming to a new user.
However, when you understand the typical workflow, the operation becomes straightforward and intuitive. Let's run through a sample session:
- Start up the BigFix Console.
- From
the Domain Panel on the left, click the button labeled All Content,
which lets us view all subscribed sites. Then click the Fixlets
and Tasks item at the top of the Domain panel. This then displays
a list of the Fixlet and Tasks that are currently applicable to your
network in the List Panel to the right.
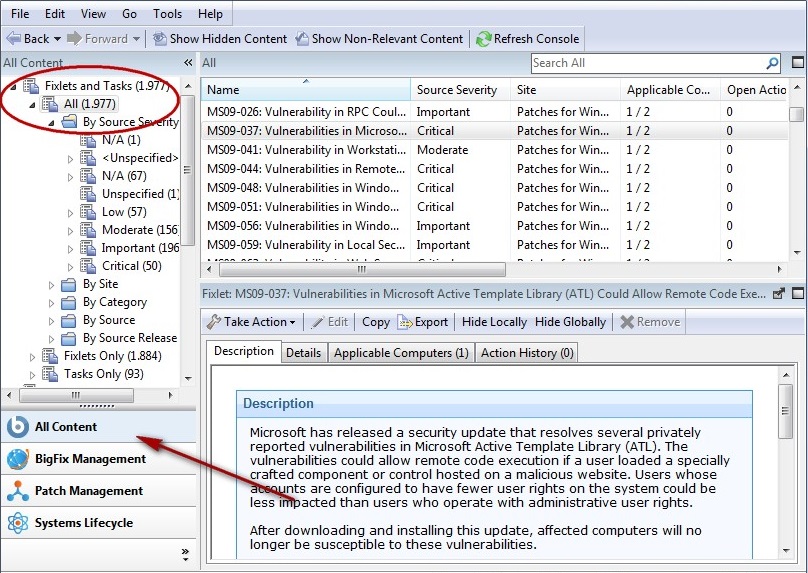
- From the List Panel, click a Fixlet
of interest. The corresponding document opens in the Work Area below
the list. This is the text of the Fixlet, which gives you the information
you need to decide on deployment, along with the specific actions
to take.
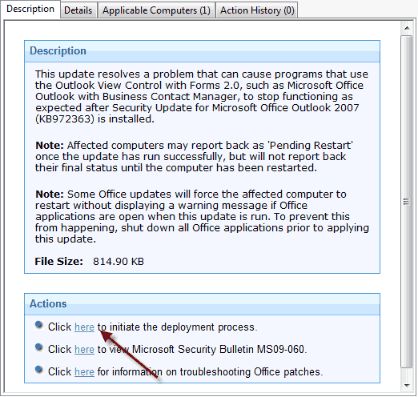
- At the bottom of the message
you find one or more links that initiate actions to fix the affected
computers. Click the action that seems most appropriate. A Take
Action dialog box opens.
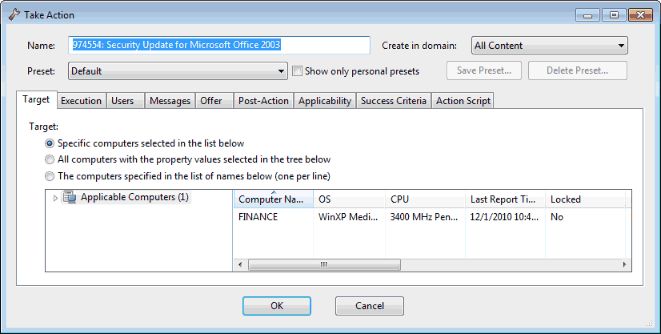
- Use the Target tab to select any subset of affected computers
you want to target with the action. There are several techniques for
deploying actions:
- Specific computers selected in the list below
- The first targeting button lets you select the computers you want from the panel below right, which lists all those computers for which the Fixlet is currently relevant. The right-click menu allows you to select all the computers in the list. This technique limits the Fixlet action to the specified list.
- All computers with the property values selected in the tree below
- Choose the second button to take actions on computers with a set of specified properties. Until the expiration of the action period, whenever a computer satisfies the given properties it is targeted. As with all actions, only the affected computers actually receive the action.
- The computers specified in the list of names below
- Choose the third button to specify a list of computers.
- Use the rest of the tabs to prepare your action, including execution schedules, client messages, extra scripting and more, then click the OK button. For more information, see the article on the Take Action dialog.
- When you supply your password, the Fixlet action is deployed throughout your network, and is applied specifically to each computer that needs it, subject to any filters you put in place.
This is the process that you use for typical computer maintenance and remediation. As you explore the interface, you will discover that it can also help you remediate security issues, inventory your computers, manage your users, and maintain a detailed audit trail of every patch and upgrade. As varied as these tasks are, they are all accomplished with a similar workflow. You should experiment to learn more about the power of this interface.