Creating Custom Sites
You can create a Custom Site to host your own Fixlet messages that are pertinent to your network.
- Select Tools > Create Custom Site.
- You are prompted for a name for your custom site. Enter a name and click OK.
- From the Domain panel, find your
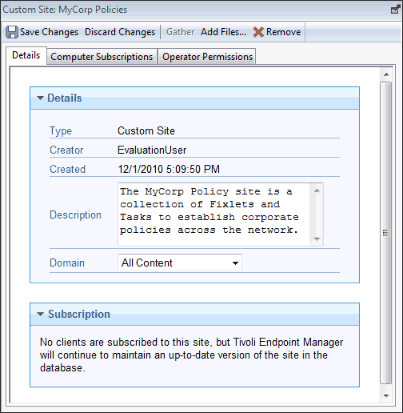
site under Sites > Custom and click it to describe your site.

From the Details tab, enter a description of your site. From the Domain pull-down menu, select a Domain to house your site.
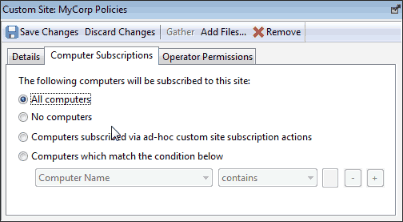
- From the Computer Subscriptions tab, indicate which subset of your BigFix Client computers you want to subscribe to
this site.

There are several choices:
- All Computers. Click this button to automatically subscribe all Clients to this site.
- No Computers. Click this button if you are not yet ready to subscribe any computers.
- Computers subscribed via ad-hoc custom site subscription actions. This choice requires you to create an Action to subscribe relevant computers to the site.
- Computers which match the condition below. This choice allows you to describe a set of criteria that must all evaluate to TRUE before a BigFix Client is subscribed. From the pull-down menu, you can select from dozens of properties to test for inclusion.
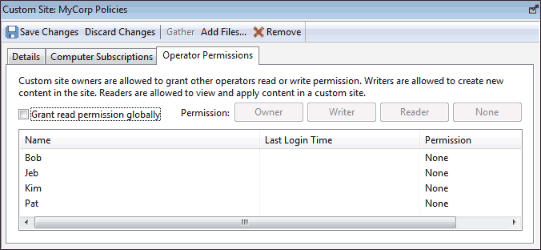
- From
the Operator Permissions tab, you can grant specific access permissions
to specific operators.

There are several options:
- Grant read permission globally. Click this button to provide read permission to all operators.
- Or click specific Operators from the list and assign them specific rights, such as Owner, Writer, Reader, or None.
- Click the Save Changes button above the work area to complete the description of your site. You must enter your password to propagate your new custom site.