Editing Analyses
To edit an Analysis, follow these steps:
- Open the Analyses icon in the Domain Panel navigation tree, and select My Analyses as a filter. In the resultant List Panel, select the Analysis you want to edit. Note that not all Analyses are editable.
- Select Edit > Edit Custom Analysis (or right-click the Analysis and select Edit from the pop-up menu).
- This
opens the Edit Analysis dialog.
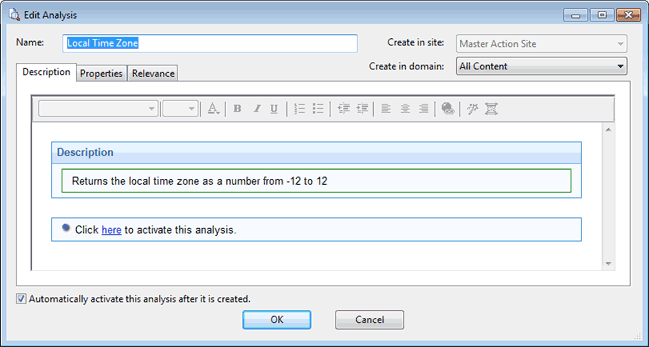
Edit the Name of the Analysis and then select the hosting site and domain from the pull-down menus. Below this, there are three tabs. Click through each tab to customize your Analysis:
- Description: Edit the description of the Analysis, explaining the properties that are being analyzed.
- Properties: This is the core part of the
Analysis.
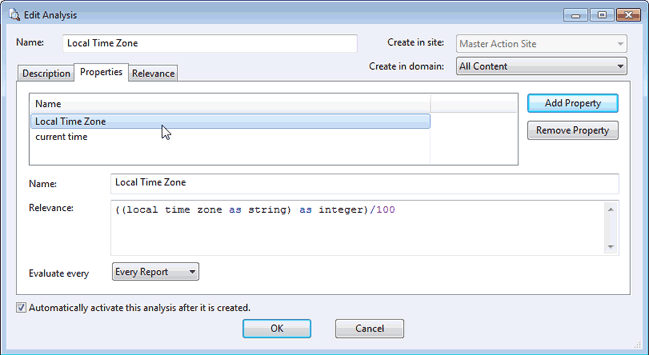
Click Add Property or choose an existing property and the relevance box becomes editable. If you are adding a new property, enter its name and relevance to define it. Otherwise, edit the existing text. The Relevance clause is evaluated to provide the retrieved property value. You can add more properties, or click the Remove Property button to delete the highlighted one.
- Relevance: Here
is where you define a Relevance statement to target specific computers
for your Analysis.

Select All computers or enter an expression that targets a subset of your networked Clients. Otherwise, you can set specific conditions or relevance clauses to limit the application of the Analysis.
- When you are satisfied with your edits, click OK.
- Your Analysis must be propagated, so you are prompted for your private key password. When you enter it and click OK, your edited Analysis is sent to all the Clients.