Web Reputation Proxy Settings
If your endpoints connect to the Internet through a proxy server, you must identify that proxy and provide log-on credentials. The credentials will be used by those CPM clients that you target with this Action to connect to the Internet. Configure the Web Reputation proxy settings using either the Web Reputation Proxy Settings Wizard or the Web Reputation-Enable/Configure Proxy Settings Fixlet.
Configure the Web Reputation Proxy Settings Wizard
- From the IBM BigFix Console, click Endpoint Protection on the lower-left pane.
- From the upper-left navigation pane, go to Core Protection Module > Configuration > Web Reputation Proxy Settings > Web Reputation Proxy Settings Wizard. The Web Reputation Proxy Settings Wizard window opens.
- Click Use the following proxy settings.
- Either provide the necessary proxy settings information or click Use to reload previously configured settings.
- Click Create Configuration Task and deploy the proxy settings to the necessary clients.
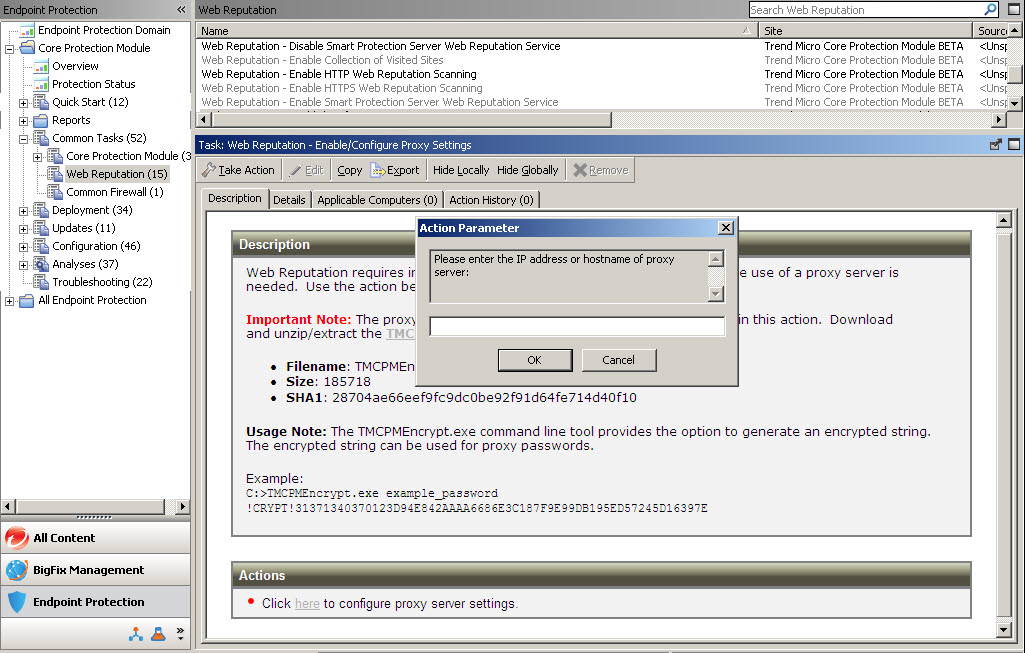
Configure Web Reputation Proxy Settings Using the Fixlet
You will be prompted to provide a password for the proxy server. Be sure to encrypt the password using the utility provided in the Task before deploying the Task (user name and password will be visible in the Action’s Summary Details).- From the BigFix Console, click Endpoint Protection on the lower-left pane.
- From the upper-left navigation pane, go to Core Protection Module > Common Tasks > Web Reputation.
- From the right pane, select Web Reputation - Enable/Configure Proxy Settings. A screen displaying the Task Description tab opens.
- Download and extract the encryption program, which will have a name such as:
TMCPMEncrypt.exeutility tool.- Run the program. At the prompt, type your password in the field.
- Copy the encrypted results (you will be prompted to paste them in later).
- Back in the Task Description window, below Actions, click the hyperlink. At the
prompt, provide the following:
- Proxy IP address or host name.
- Proxy port.
- User name for proxy authentication.
- Encrypted password (paste the password you encrypted).
The Take Action screen opens.
- In the Target tab, a list of endpoints that are running the CPM client appears.
- Select all applicable computers (those that are running WR) and then click OK.
- At the prompt, type your private key password and click OK.
- In the Action | Summary window that opens, monitor the "Status" and "Count" of the Action to confirm that it is "Running" and then "Completed."