Install BigFix MDM Service for Windows
Learn how to install BigFix MDM Service for Windows to provide MDM service on Windows through WebUI.
Before you begin
- You must be a Master Operator to perform this task through WebUI.
- You must have the wnscredentials.json file ready to upload. For the work flow to create this file, see Generating WNS credentials.
- You must have a Trusted CA TLS certificate.
- You must have the required credentials, specifically from the CA cert, the client cert, and the client key that is generated from BESAdmin.sh. For details, see MDM SSL certificates.
About this task
To install BigFix MDM Service for Windows:
- From the WebUI main page, select .
- On the Modern Client Management page, click Admin.
- On the Admin page, from the left navigation, under MDM
Servers, select Install.
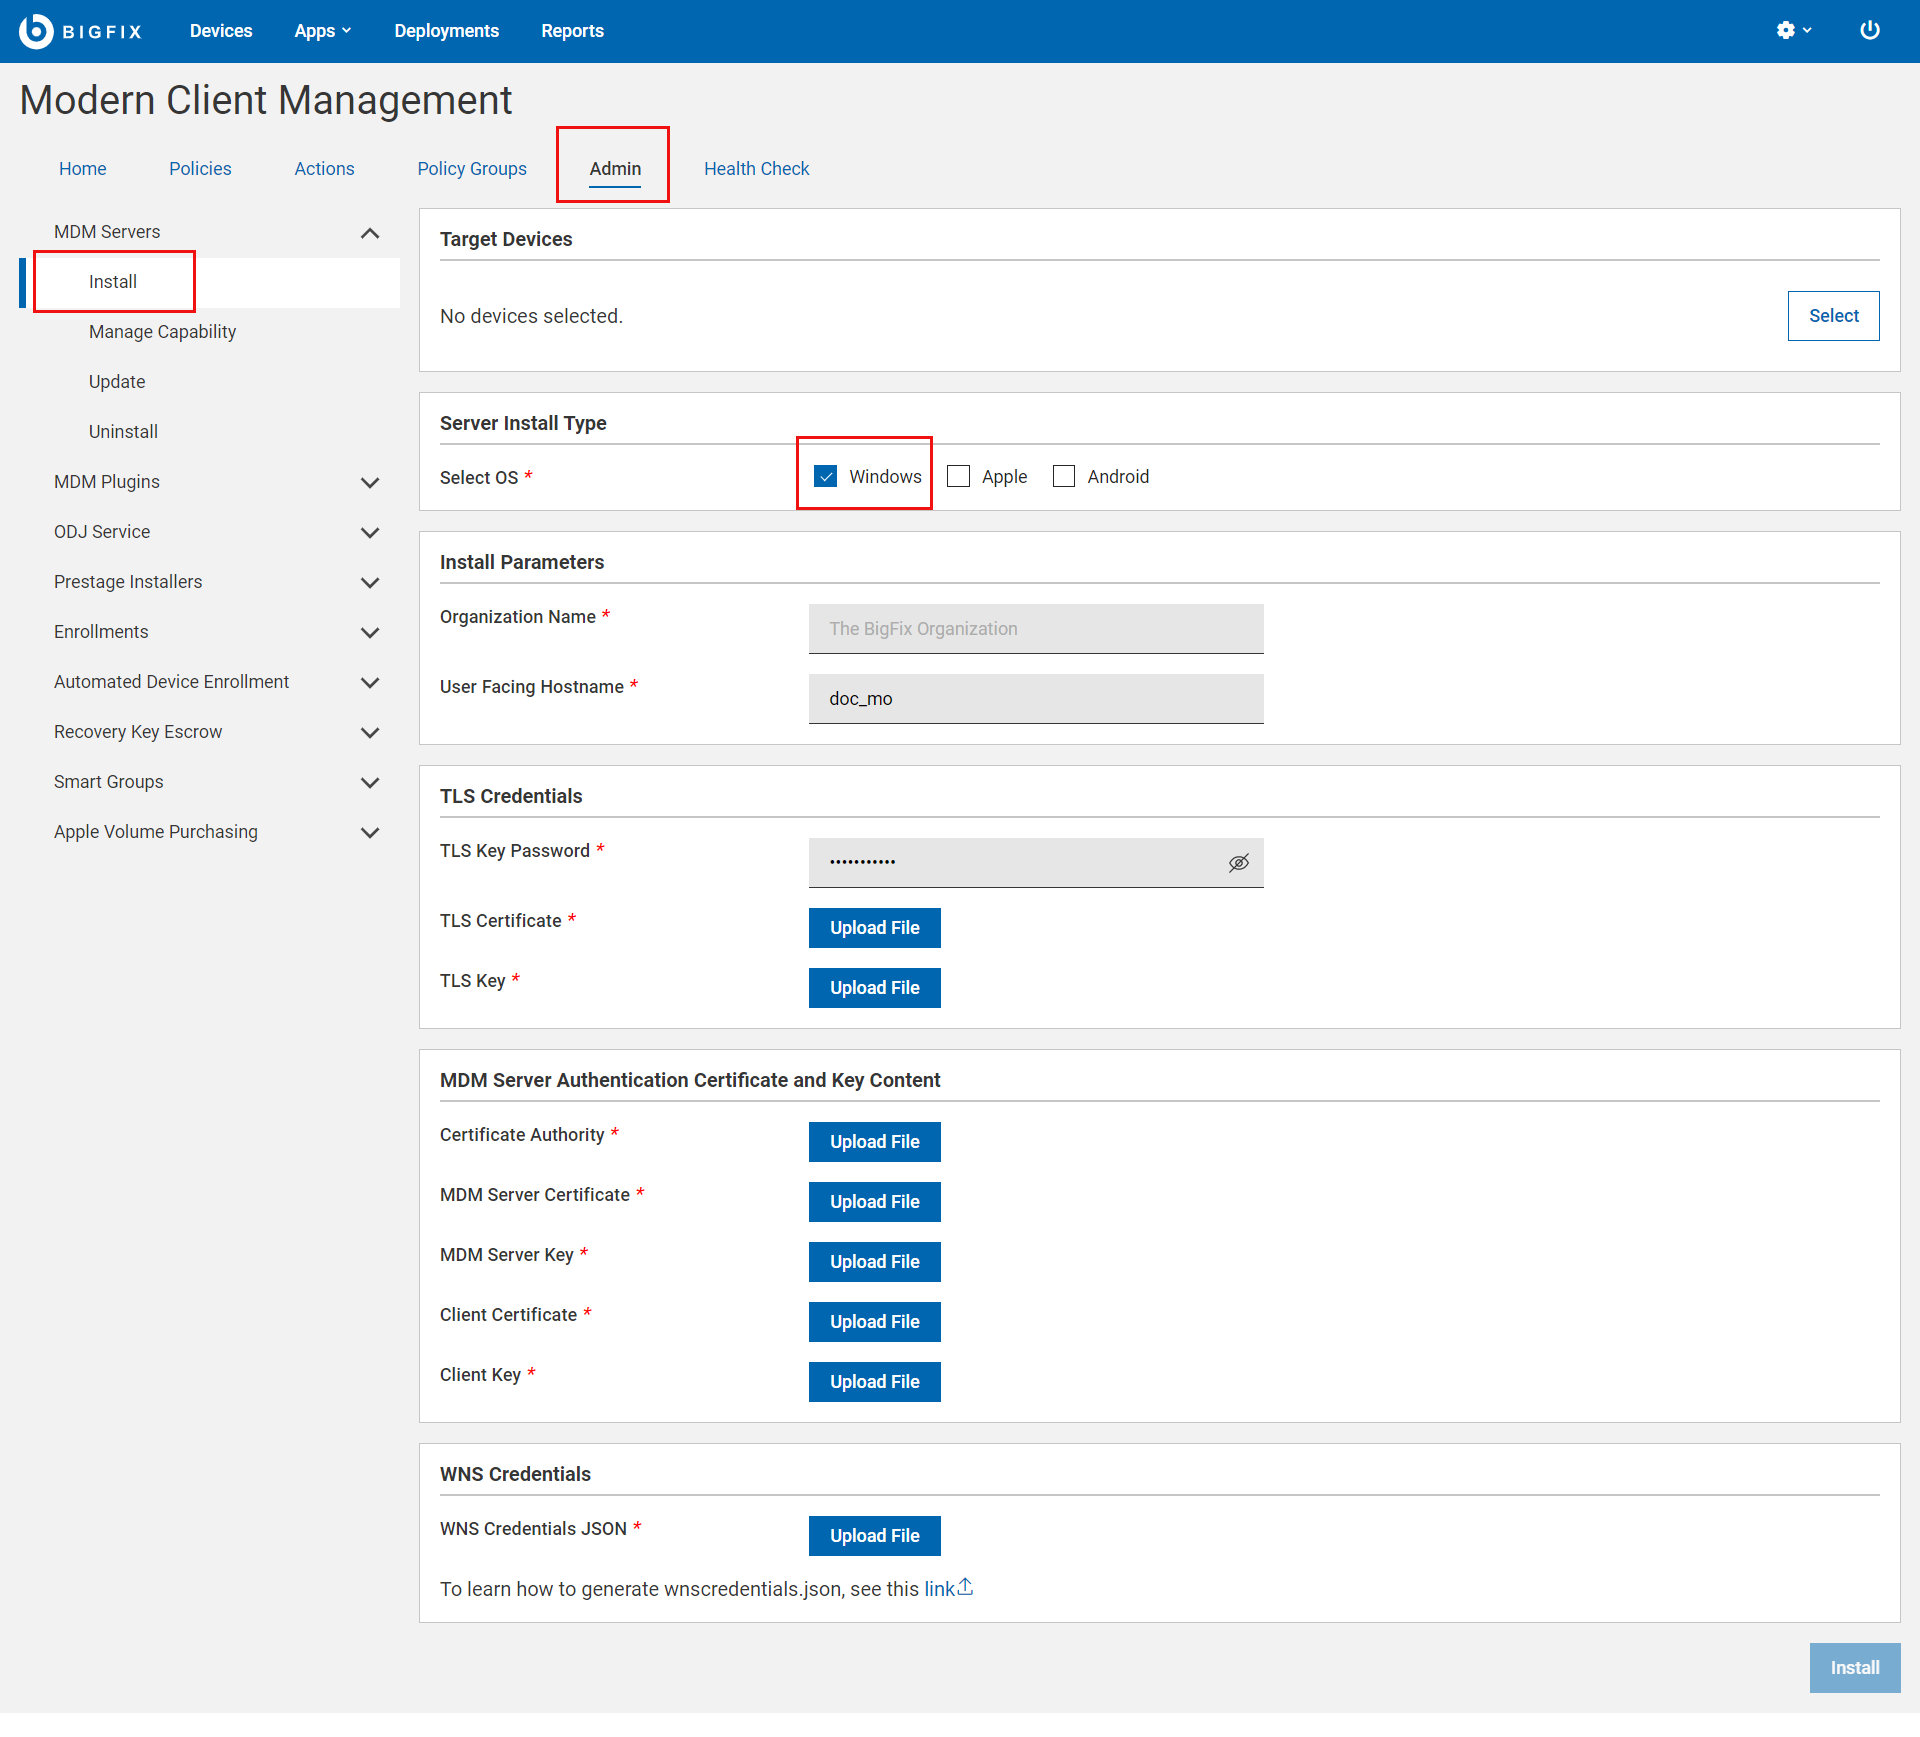
- Select Target Device. Click Select and select an appropriate target on which you want to install the MDM server.
- Server Install Type: For Select OS, select Windows to manage Windows devices.
- Install Parameters:
- Organization Name: Enter a string. While enrolling a device, the organization name entered here is displayed to the end users.
- User Facing Hostname: For over the air
enrolls, this is the hostname of the server where users can visit to
enroll in MDM. The value must be a valid FQDN that is accessible
from the Internet. For example,
mdmserver.deploy.bigfix.com.Note: https:// should not be included here.
- TLS Credentials: Upload the MDM Server TLS certificate and
key files.
- TLS Key Password: Enter a string to set TLS key password.
- TLS Certificate: Click Upload File and browse through the location to select the TLS .crt file.
- TLS Key: Click Upload File and browse through the location to select
the TLS .key file.Important: TLS key must be unencrypted.
- MDM Server Authentication Certificate and Key Content:
Upload the MDM Server authentication certificate and key files.
- For Certificate Authority, click Upload File and browse through the file location to select the ca.cert.pem file.
- For MDM Server Certificate, click Upload File and browse through the file location to select the server.cert.pem file.
- For MDM Server Key, click Upload File and browse through the file location to select the server.key file.
- For Client Certificate, click Upload File and navigate and select client.cert.pem file.
- For Client Key, click Upload File and navigate and select client.key file.
- WNS Credentials: This field appears when you select
Windows as the operating system. Click Upload File and browse through the
file location to select the wnscredentials.json
file.Tip: For more information on how to generate wnscredentials.json file, see Generating WNS credentials.
- Click Install.
Results: This action completes these activities:
- Downloads a set of docker images from software.bigfix.com which is needed for the MDM installation.
- Installs the services and certificates including the Plugin certificates and the TLS certificate on which the server runs.
- Applies all required configurations.