Scan using a Postman Collection
If you have a Postman Collection of requests to your web API, you can import it and use it as the basis for a scan.
Following import, AppScan runs its own Explore stage using the collection, and displays the resulting data in Dashboard and Data views. You choose whether AppScan continues automatically to the Test stage, to complete the scan, or whether you prefer to start the Test stage later.
A sample Postman Collection for scanning the AppScan demo test site is included in the AppScan installation, see Sample files.
To see our short video demo, click the icon below:

Prerequisites:
- The collection must contain only valid requests.
- If the web API requires authorization, the authorization request must be one
of the first requests in the collection. By default, AppScan examines the
first seven requests for the authorization request, but if needed this can
be increased in Configuration > Advanced Configuration > Postman.Limitation: Authentication methods that require user interaction, such as OAuth2 with Prompt User or other 2FA, are not supported.
To import a Postman Collection:
- If custom proxy settings are needed for AppScan to access the web API, configure them first in Configuration dialog box > Communication and Proxy > Proxy > Custom proxy. For details, see Communication and Proxy view.
-
Do one of the following:
- From the menu bar, click File > Import > Postman Collection.
- From the Open file area of the home screen, click Import Postman Collection.
- In Postman collection files area enter the following:
- Postman Collection file: Full URL or path to the JSON
file.Important: The file extension must be .json
- Linked files (Optional): If the collection includes links to
other files, you must include them all in a single ZIP file and
select it here. The following conditions apply:
- File paths must be relative to the collection, and not absolute
- Files must be located within the Postman Collection folder (can be a sub folder), not outside it
- Path must be identical to the path used in Postman
- Postman Environment file (Optional): If your collection uses environment variables, you must provide the full URL or path to the Postman Environment JSON file.
- Postman Globals file (Optional): If your collection uses global variables, you must provide the full URL or path to the Postman Globals JSON file.
- Postman Collection file: Full URL or path to the JSON
file.
- In the Domains area, add all domains you want included in the
scan. Enter each domain in a separate text field. Both these formats are
valid:
https://demo.testfire.net/
demo.testfire.net
Important: Domains not listed will not be scanned. - In the Scan options area, select one of the two options for how
AppScan should proceed when it imports the file:
- Import and Explore only: AppScan will upload the file, run its own Explore stage, and then stop. The Explore data gathered will be shown in Dashboard and Data views. When you want to complete the scan you must click Continue full scan from the toolbar, which will run the Test stage of the scan.
- Import and run a full scan: AppScan will upload the file, run an internal Explore stage, and then automatically continue with the Test stage.
- Click Import.
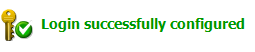
- If your collection includes login credentials, go to
Configuration > Login Management and look for the
green "Login successfully configured" icon to confirm that the login details
were detected.
If the login was not detected, refer to Postman Collection scan troubleshooting.
Working with multiple collections
Currently only one Postman Collection can be imported per scan.
To scan a second collection using the same configuration as the first:
- After configuring and saving a scan with your first collection, go to: File > New scan from current configuration and import the second collection.