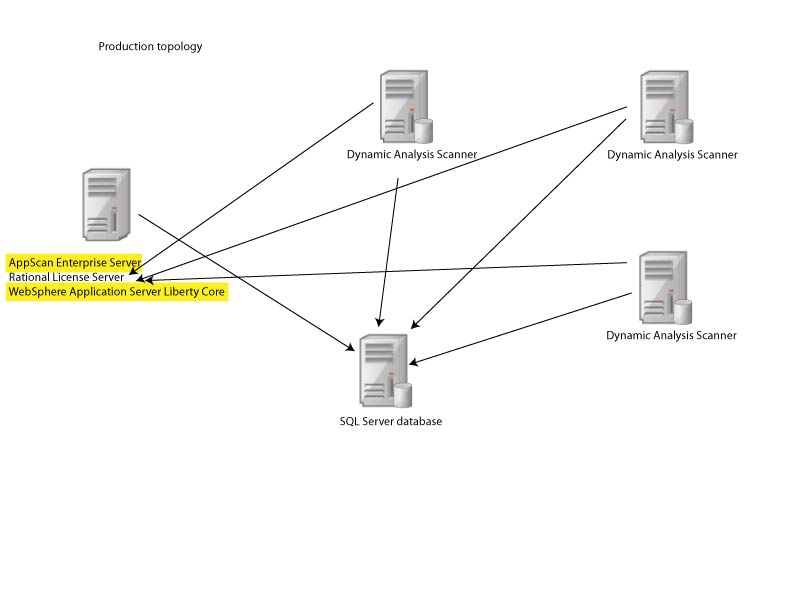
Installing all required components on one computer
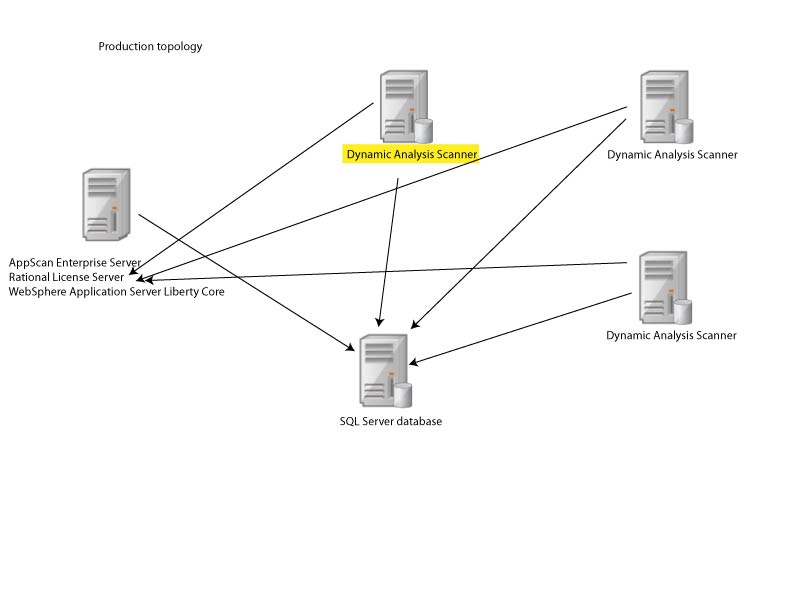
In this scenario, all components are installed on one computer. This type of deployment is best suited for demonstration or training deployments, not full production environments.
About this task
- Installing HCL Rational License Key Server
- Installing HCL AppScan Enterprise Server
- Running the Configuration wizard
- Running the Default Settings wizard
- Installing HCL Dynamic Analysis Scanner
- Running the Configuration wizard
- Verifying the installation of the Enterprise Console
- This scenario assumes that the SQL Server database is installed and configured so that key information is available during configuration of AppScan Enterprise Server.
- If you already have a Rational License Key Server that is deployed on your network, skip to the Installing HCL AppScan Enterprise Server task.
- If you are upgrading from a previous version of AppScan Enterprise, read Replacing Jazz Team Server with WebSphere Liberty - Frequently asked questions before you begin upgrading.
- To migrate Jazz Team Users users to this new authentication method, export a .csv file of users by using the cd <install-dir>\Appscan Enterpise\JazzTeamServer\server\ repotools-jts.bat -exportUsers toFile=C:\users.csv repositoryURL=https://<hostname>:9443/jts before you begin upgrading to v9.0.1. Then follow the steps in this topic: Configuring a basic user registry for the Liberty profile to import the users into Liberty.
Installing HCL Rational License Key Server
The Rational License Key Server is used for hosting your AppScan Enterprise Server license. If you do not have a Rational License Key Server on your network, you can install it locally when you install AppScan Enterprise Server.
About this task
Procedure
Results

Installing HCL AppScan Enterprise Server
Use this procedure to install the User Administration component and Enterprise Console for reporting and user administration tasks.
Before you begin
About this task
Procedure
Results
Running the Configuration wizard
After you install or upgrade the Server or Scanner, you must configure each installed component and run the Configuration wizard on all instances and on all servers.
Before you begin
- During configuration, you define the name and location of the SQL Server database to be used, and the service account name and password. The user who runs the configuration wizard must be able to create a database and grant rights.
- If you encounter an error "**WARNING** Unable to configure virtual directory "ase" for local directory "C:\Program Files (x86)\HCL\AppScan Enterprise\WebApp". Ensure IIS is configured properly and try again. ", consider disabling your antivirus software while you are running the configuration wizard. If you do not want to disable the antivirus software, you can exclude the AppScan Enterprise folder from the antivirus configuration, and run the configuration wizard again.
Procedure
- In the License
Server window, specify the Rational License Server to use for licenses.
See License Server.
 Do not check the AppScan Source standalone evaluation check box.
 - In the Server Components window, select
the components that you want to configure. The components available
to you depend on your license. See Server Components. If
you are installing the components on one machine, select all the check
boxes, even if you have installed one of the components previously.
- In the Instance Name window, specify
the name of the instance you want to configure. See Instance Name.
- In the Service Account window, enter
the Domain/Username Service Account and password,
and click Next. See Service Account.
- In the Database Connection window, enter the SQL Server name, port number,
and the name of the database you are connecting to. You can click Test
Connection to make sure you can connect to the SQL Server. The configuration wizard does
not proceed until the connection is successful. When AppScan Enterprise Server creates the database in SQL Server, it automatically configures the
collation for it.
 Note:
Note:- The syntax for the SQL Server name has changed with the introduction of Liberty support. ".\SQL_SERVER_NAME" no longer works. Use "HOSTNAME\SQL_SERVER_NAME" instead.
- If you are upgrading an existing database from v8.6 or earlier, enter the Database Master Key Password on the next screen to access it. Keep this password in a secure location.
- If your environment uses a named SQL Server instance for the AppScan Enterprise database, make sure that TCP/IP is enabled in the SQL Server configuration manager, and restart the SQL services for SQL Server. Use the port number of the named SQL Server instance instead of the default port number (1443).
- In the Server
Certificate window, choose a certificate specific to your
organization. This step helps you deploy a secure AppScan Enterprise in your environment. See Server Certificate.
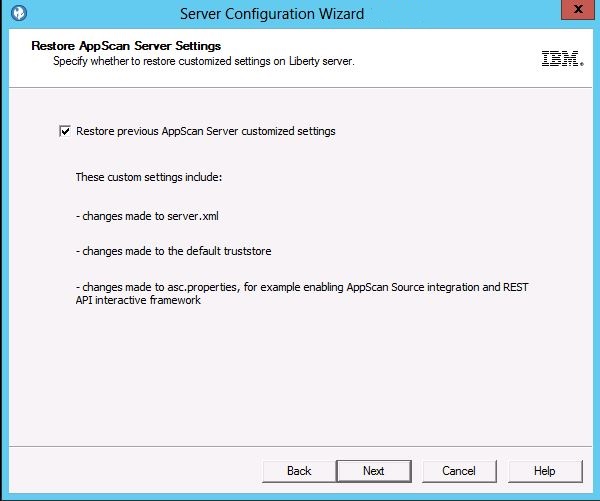
-
(Upgrade only). In the Restore AppScan Server Settings screen, you can
choose to restore previous AppScan Server customized settings on the Liberty Server (default). This
screen appears once upon upgrade; if you run the configuration wizard later, this screen won't
appear. See Restore AppScan Server settings.
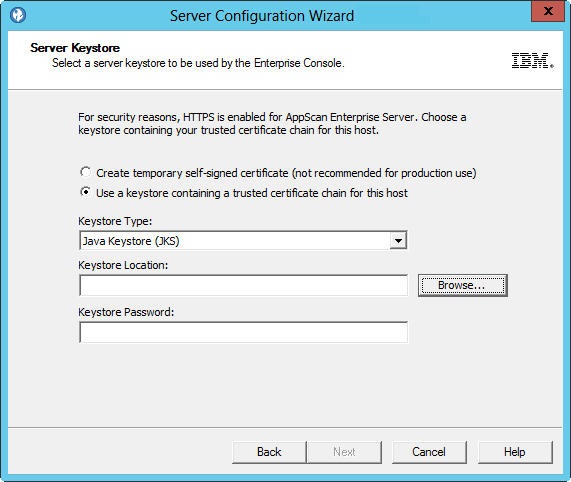
- In the Server Keystore screen, select a server keystore to be used by
the Enterprise Console. If you exported a .pfx file, select Public key cryptography
standards #12 (PKCS #12). Browse to the location where you saved the .pfx file, import it
and enter the password you created when you exported the file. See Server Keystore.
- In the Authentication
Mechanism window, select an Authentication Mechanism to
use to log in to the Enterprise Console. The default is to authenticate
via Windows. To use LDAP,
see Authentication Mechanism.
 Note: If you need to authenticate with the Common Access Card (CAC), make sure you choose LDAP as your authentication mechanism. Once AppScan Enterprise is configured, follow the instructions in Authenticating with the Common Access Card (CAC) to authenticate with CAC.
 - In the Server Configuration window,
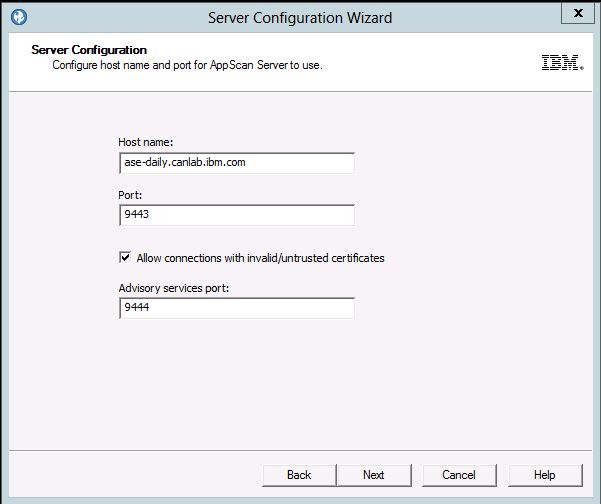
- Configure the host name and port of the Liberty server for AppScan Server to use. If you are using Windows authentication, prefix the host name with your domain name.
- While it is not a recommended practice, you can allow SSL connections with invalid or untrusted certificates during scanning. When the option is disabled, messages will appear in the scan log to indicate that the insecure server could not be reached for scanning. This option also affects the Manual Explore functionality.
-
 : Configure the Advisory services port
(installed with the Enterprise Console). This port runs over HTTP and is used by the node.js server
to provide advisories and fix recommendations. The advisories appear in the About this
Issue page for the application issues, and provide fix recommendations. You can select a
different port if 9444 is already used.
: Configure the Advisory services port
(installed with the Enterprise Console). This port runs over HTTP and is used by the node.js server
to provide advisories and fix recommendations. The advisories appear in the About this
Issue page for the application issues, and provide fix recommendations. You can select a
different port if 9444 is already used.
- (upgrade only) In the Database Encryption Changes window,
click Help to learn how to protect the SQL
Server where the database is located. If you decide not to enable
TDE, select the check box so you can continue configuration.
 Note: AppScan Enterprise uses transparent data encryption (TDE) technology that is available in SQL Server 2008 and later. TDE encrypts the data that is stored in the database or in backups on physical media. If you are using an older version of SQL Server, any data that is contained in that database is at risk of compromise by unauthorized access.
 - In the Product Administrator window,
specify a user as Product Administrator. This user is licensed separately;
if you want to reassign the Product Administrator license, you must
rerun the configuration wizard. See Product Administrator.
Running the Default Settings wizard
This wizard helps you install sample data in by providing defaults for a number of configurable options. You can create users, add security test policies, create scan templates, add pre-created dashboards, and configure defect tracking integration with Rational Quality Manager or Rational Team Concert.
About this task
Procedure
Installing HCL Dynamic Analysis Scanner
Use this procedure to install the agents that are used for scanning and testing your website applications.
Before you begin
- Make sure you read Required user account information during installation and configuration so that you know which user account to use during installation.
- Any technologies that you use on your website must also be installed with the Scanner. For example, if you use Flash on any web pages, you must have the correct version of Flash installed.
Procedure
Results
Running the Configuration wizard
After you install or upgrade the Server or Scanner, you must configure each installed component and run the Configuration wizard on all instances and on all servers.
Before you begin
- During configuration, you define the name and location of the SQL Server database to be used, and the service account name and password. The user who runs the configuration wizard must be able to create a database and grant rights.
- Running the wizard after you install the AppScan Enterprise Server sets up the database on the SQL Server and does the initial setup of the component.
- Running the wizard after you install the Dynamic Analysis Scanner registers the Scanner with AppScan Enterprise Server.
Procedure
- In the License
Server window, specify the Rational License Server to use for licenses.
See License Server.Do not check the AppScan Source standalone evaluation check box.
- In the Server Components window, select
the components that you want to configure. The components available
to you depend on your license. See Server Components. If
you are installing the components on one machine, select all the check
boxes, even if you have installed one of the components previously.
- In the Instance Name window, specify
the name of the instance you want to configure. See Instance Name.
- In the Service Account window, enter
the Domain/Username Service Account and password,
and click Next. See Service Account.
- In the Database Connection window,
enter the SQL Server name, port number, and the name of the database
you are connecting to. You can click Test Connection to
make sure you can connect to the SQL Server. The configuration wizard
does not proceed until the connection is successful. Enter the database
name. When AppScan Enterprise
Server creates the database in SQL Server, it automatically configures
the collation for it.Note:
- If you are upgrading an existing database from v8.6 or earlier, enter the Database Master Key Password on the next screen to access it. Keep this password in a secure location.
- If your environment uses a named SQL Server instance for the AppScan Enterprise database, make sure that TCP/IP is enabled in the SQL Server configuration manager, and restart the SQL services for SQL Server. Use the port number of the named SQL Server instance instead of the default port number (1443).
- (upgrade only) In the Database Encryption Changes window,
click Help to learn how to protect the SQL
Server where the database is located. If you decide not to enable
TDE, select the check box so you can continue configuration. Note: AppScan Enterprise uses transparent data encryption (TDE) technology that is available in SQL Server 2008 and later. TDE encrypts the data that is stored in the database or in backups on physical media. If you are using an older version of SQL Server, any data that is contained in that database is at risk of compromise by unauthorized access.
Verifying the installation of the Enterprise Console
After the installation process is complete, you can verify the installation of the Enterprise Console.