Flowchart workspace overview
The flowchart workspace provides the tools and space to design flowcharts for marketing campaigns.
You can open just one flowchart at a time. If you attempt to open another flowchart while one is already open, you are prompted to save your changes. To open two flowcharts at the same time, see Viewing two flowcharts side-by-side.
The flowchart window consists of the following elements.
| Element | Description | |
|---|---|---|
 |
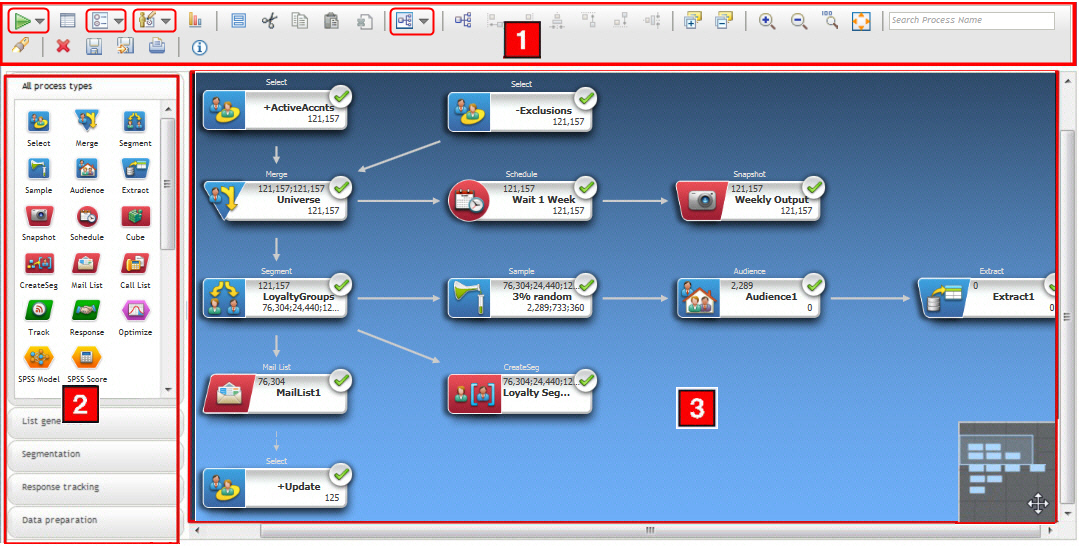
Toolbar menus | The circled items are menus. Rest your mouse over a menu to see its name. To open a menu, click the arrow next to it.
|
|
|
Toolbar icons |
The toolbar provides options to work with flowcharts. Rest your cursor over each icon to see what it does. Some of the more commonly used options are described below. For example:
|
 |
Palette | The palette at the left side of the window contains processes that you use to build your flowchart. Drag a process from the palette to the workspace, then configure and connect processes in the workspace. By default, all process types are displayed. Use the category buttons (List generation, Segmentation, Response tracking, Data preparation) to view a subset of processes by category. |
 |
Workspace |
The workspace is where you configure and connect processes to determine the workflow and behavior of the flowchart. To configure a process, double-click it. To connect one process to another, rest the cursor over a process box until four arrows display, then drag a connection arrow to another process box. Right-click any process box to open a menu of options. Right-click the workspace to see more options. Use the panning area (the small area in the lower right corner of the workspace) to highlight the portion of the flowchart that you want to see. This visual representation of the workspace is useful when not all of the process boxes fit on the screen at the same time. |