Installing HCL Domino Connector for SAP Solutions
About this task
The HCL Domino Connector for SAP® Solutions installation program is supplied as an executable file, sapconnSetup.exe. The installation program guides you through the installation process.
If you are running HEI using a remote Domino server, ensure that the Domino server is running before you begin the installation process.
The connector is supplied as download from the HCL Web site as a self-extracting .exe
file containing documentation, the readme.txt, and the install executable.
Note: See
the HCL Domino Connector for SAP Solutions
release note for required operating system and software versions.
The following steps are instructions for installing the HCL Domino Connector for SAP Solutions on the supported Windows 64 bit, and Linux 64 bit operating systems:
Procedure
-
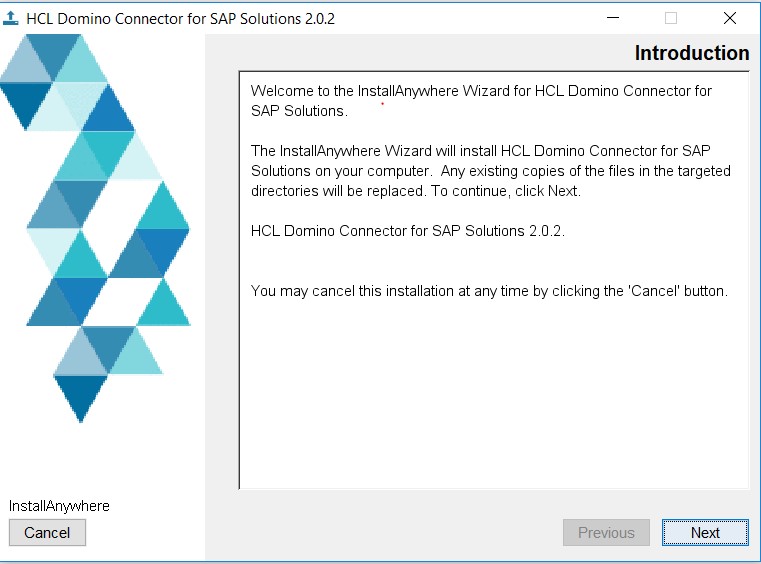
Read the Welcome screen and click Next to
continue.
Note: Installation on a UNIX machine requests the Domino name of the UNIX user. Enter the UNIX user name and click Next.
-
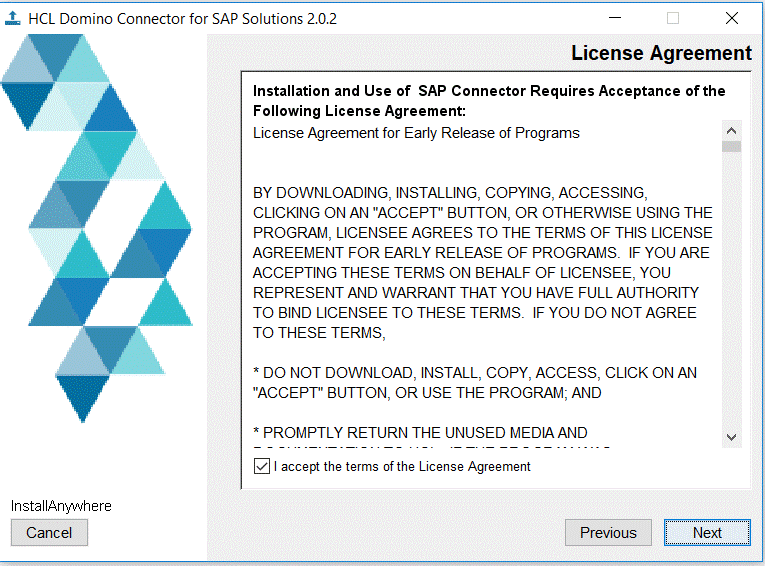
Accept or decline the license agreement. If you choose not to accept the
agreement, installation ends here. To accept and proceed, click the "I accept
the terms in the license agreement" option and then click
Next.
-
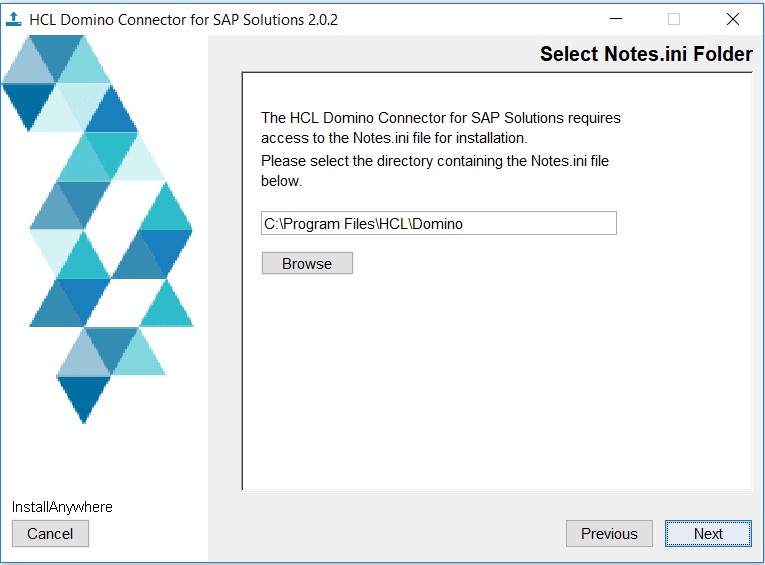
The Notes.ini screen appears. Select the directory containing the notes.ini and
click Next.
-
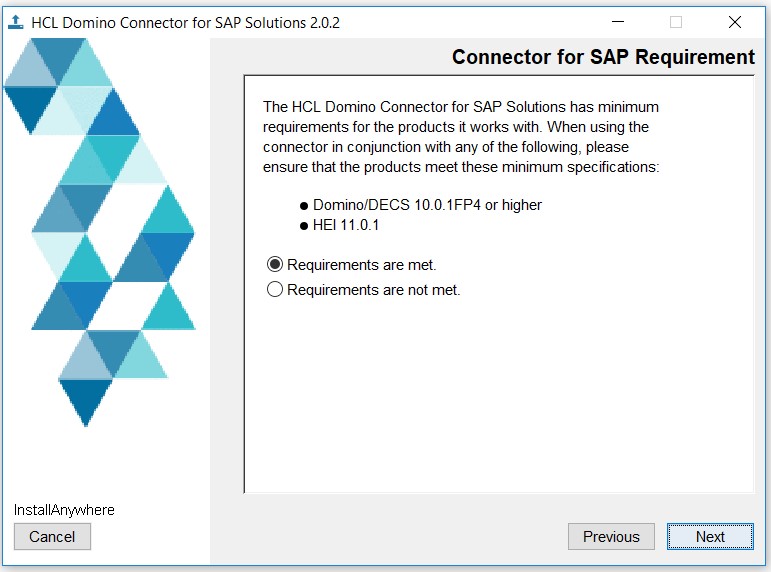
A version requirements screen appears. If your system meets the minimum
requirements, click "Requirements are met" and then click
Next.
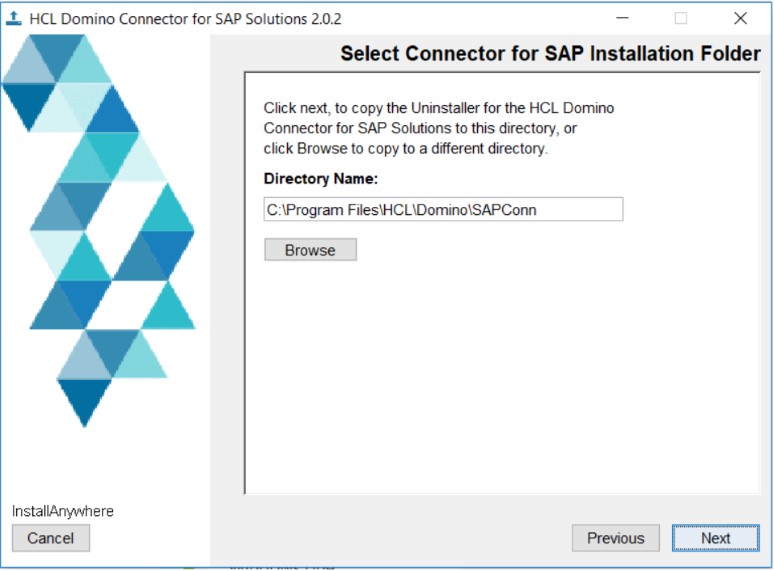
-
A dialog box appears specifying which directory the Uninstaller files are
copied to. Accept the default or specify a different location in which the
Uninstaller files are copied. Click Next.
-
A Standard or Custom Installation choice screen appears, enabling you to
specify an installation method. Select either Standard
Installation or Custom Installation and
click Next.
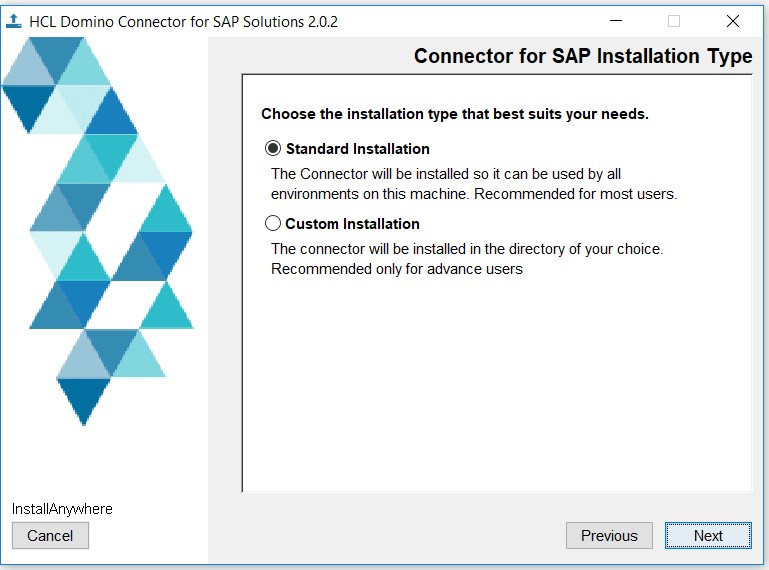
Note: If you are a new or infrequent user, choose the Standard Installation method. You should have an excellent working knowledge of your system configuration and operating system if using the Custom Installation method.Note: If you selected Custom, a dialog box appears containing selected features based on what the installer has discovered about your system. Specify which directory to install into or accept the defaults and click Next. -
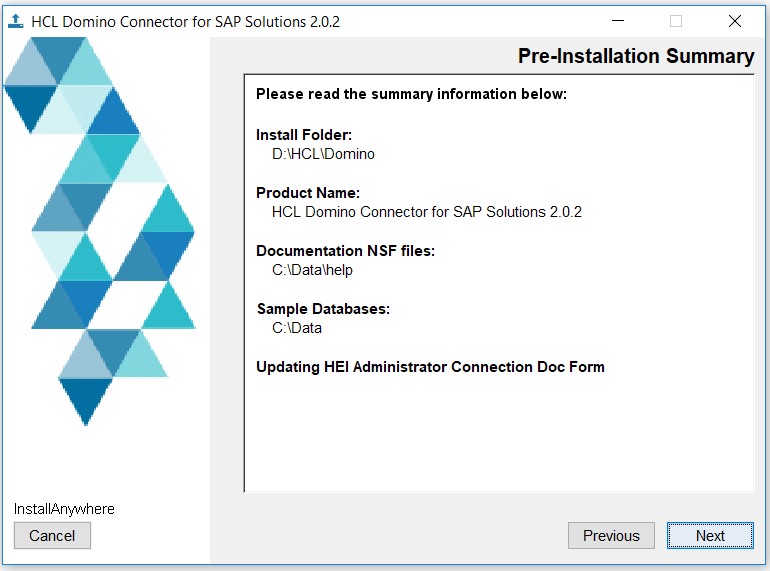
Read the summary screen and click Next.
-
Read the installation complete summary screen and click
Done.
Note: If an error occurs during installation, the installer generates a log file in the install directory.
