Configuring MongoDB for Sametime
This topic guides you through the steps for configuring MongoDB on Windows and Linux.
Before you begin
About this task
To configure MongoDB on Windows and Linux, perform the following steps:
Procedure
-
Update the MongoDB schema version value to version = 3. Depending on the version of MongoDB, this value may not be present. From the MongoDB console, run the following commands.
> use admin> db.system.users.remove({})> db.system.version.find()Note: These are three separate commands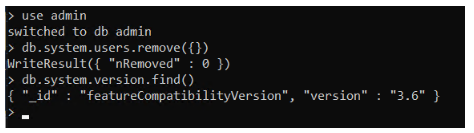
-
If only the featureCompatibiltyVersion is returned, without authSchema
Example:
{“_id”: "featureCompatibilityVersion", "version”: "3.6"}Use the following command to insert the correct authSchema value:
> db.system.version.insert({ "_id" : "authSchema", "currentVersion" : 3
          })
If the featureCompatibilityVersion and authSchema are both returned,
Example:
{“_id”: "featureCompatibilityVersion", "version”: "3.6”}{“_id”: "authSchema", "currentVersion”: 4}Then the following commands will update the authSchema value to the required version of 3.
> var schema = db.system.version.findOne({"_id": "authSchema"})> schema.currentVersion = 3> db.system.version.save(schema)Note: These are three separate commands -
Create sametimeUser in MongoDB with the following command from the MongoDB console.
Note: The user and password specified below are examples and can be changed at this time if desired. If changing, use the new values when you configure the Sametime Community server in a later step.
> use admin
> db.createUser({user: "sametimeUser", pwd: "sametime", roles:[{role:"readWrite", db:"chatlogging"},{ role:"readWrite", db:"mobileOffline"},{role:"userAdminAnyDatabase", db:"admin"}]})
Note: These are two separate commands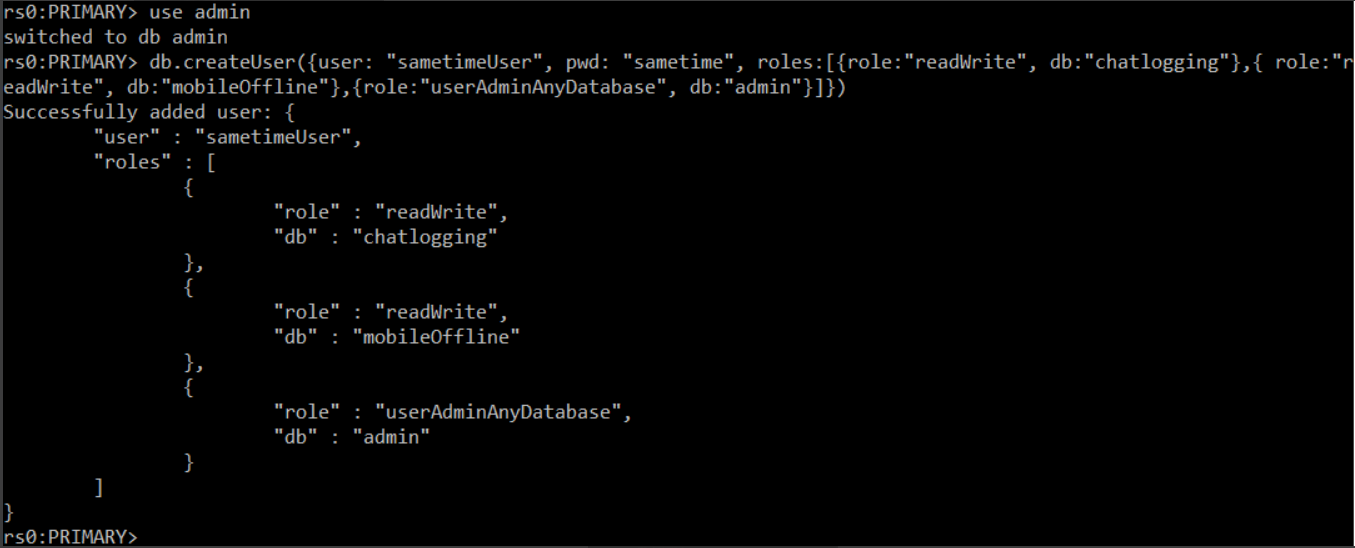
The expected output will be a successfully added user message and details.
-
Create the chatlogging database with events and sessions collections in MongoDB with the following command from the MongoDB console.
> use chatlogging> db.events.insertOne({"_id" : "dummy"})> db.sessions.insertOne({"_id" : "dummy"})Note: These are three separate commands.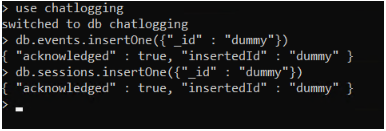
-
On Windows, create the configuration file
mongod.cfgin the path referenced in the MongoDB installation path (C:\Program Files\MongoDB\Server\3.6\). On Linux, the configuration file already exists (/etc/mongod.conf).Windows:
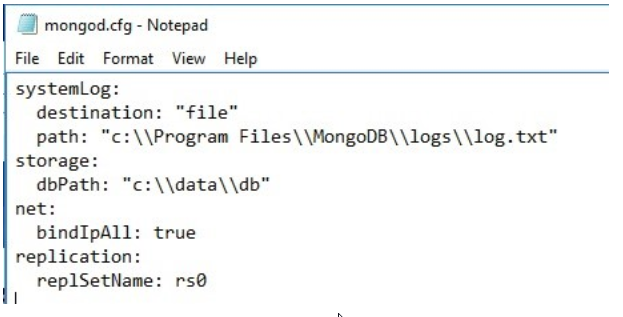
Add the following contents:
systemLog:
  destination: "file"
  path: "c:\\Program Files\\MongoDB\\logs\\log.txt"
storage:
  dbPath: "c:\\data\\db"
net:
  bindIpAll: true
replication:
  replSetName: rs0
Linux:
Add the following contents (at the bottom)
replication: replSetName: rs0Note:- You can copy/paste the instructions from the document. However, the format of the instructions is critical and must remain the same. The indentations are two spaces, not a “tab” and there can be no trailing spaces at the end of each line. See screen shot with text highlighted to help confirm.
- If the MongoDB log and data/db were different from the default values, this file needs to reference the changes.
Example of mongod.cfg file showing no spaces at the at the line ends.
Note: Make sure the file is not saved as a .txt when saving. -
*Windows only requirement*
Create MongoDB service using the Windows sc.exe. This can be run from any location and the command provided assumes the default installation path. The result will be “[SC] CreateService SUCCESS”.
sc.exe create MongoDB binPath="\"C:\Program Files\MongoDB\Server\3.6\bin\mongod.exe\" --service --config=\"C:\Program Files\MongoDb\Server\3.6\mongod.cfg\"" DisplayName= "MongoDB" start= "auto"Results of successfully creating a MongoDB service.
 Note: The above default installation path should not have any line breaks.
 -
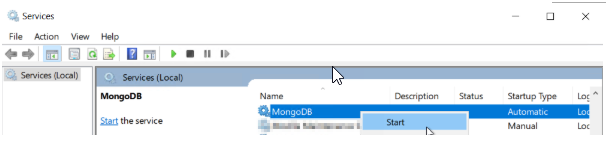
Start the MongoDB service from the Windows Services panel on Windows or from a command prompt on Linux.
Windows:
Linux:
Start MongoDB: >service mongod start