Debugging custom code
This example demonstrates debugging custom code by adding a breakpoint. It provides sample code to add a breakpoint. This way of debugging custom code is applicable only for a schedule.
Procedure
- Start HCL OneTest™ Performance and create a performance test project MyProject.
- Create an HTTP test, MyTest, by
recording a visit to http://<hostname>:7080/.
Note: Before accessing the URL, ensure that HCL OneTest™ Performance is running. The URL returns an HTTP 404 error, which is expected.

- Expand the first request and click the response element.
- In the Test Element Details section, right-click in the Content field and click Create Field Reference.
- Type the reference name and click OK.
- Click the first page, and then click .
- In the Arguments section of Test Element Details, click Add.
- Expand the data source for the search results page, select the reference name that you created in step 5, and click Select.
- Click Generate Code.A new tab with the generated code is displayed.
- Insert the following the code into the
exec()method:ITestLogManager history = tes.getTestLogManager(); if (args.length > 0) { if (args[0].indexOf("Invester Relations") != -1) { history.reportMessage("First page failed. Bail loop!"); tes.getLoopControl().continueLoop(); } }Important:- Fix the double quotation marks, if any, so they are straight and the compiler no longer gives warning.
- To resolve complier warnings related to importing a class, press Ctrl + Shift + O.
The code will look like this: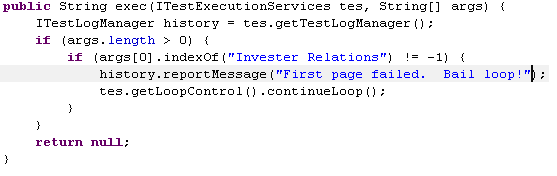
- To set a breakpoint, click anywhere on the
args[0].indexOfline. Move the pointer to the left-most portion of the text editor window and double-click with the pointer horizontally on the same line. A blue button is displayed in this left-most portion of the window indicating the breakpoint is set.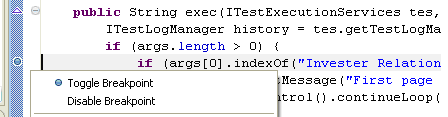
- Save the custom code and then the test.
- Create a new schedule, Schtest.
- In the Test Navigator, right-click debuglocation and click Open.
- Click the General Properties tab and click Add.
- In the Property name field, type RPT_VMARGS and
in the Property value field, add the following
values each separated by a space.
-Xdebug
-Xnoagent
-Djava.compiler=NONE
-Xrunjdwp:transport=dt_socket,server=y,suspend=y,address=8000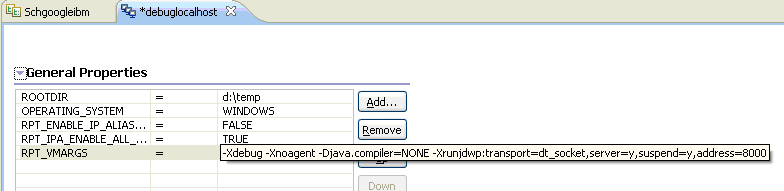
- Save the location.
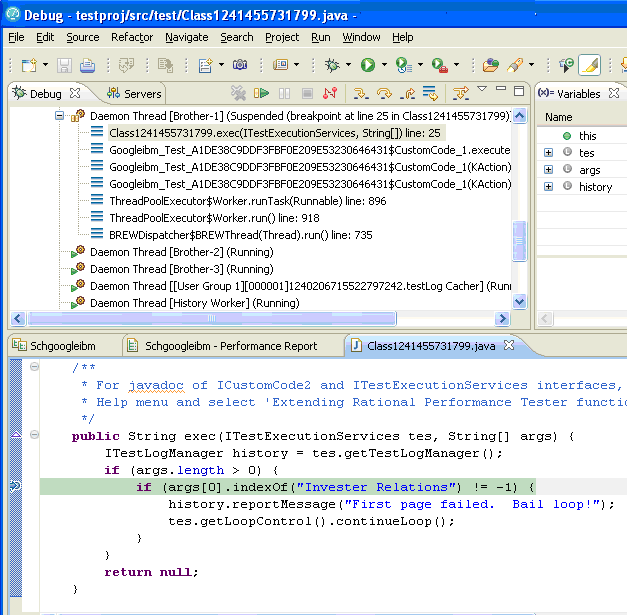
- Attach the debugger to the schedule execution process.
- If you are doing it for the first time, you might need
to provide the source location to see the custom Java code. You do
this by taking the following steps:
- Click Edit Source Lookup Path and click Add.
- Click .
- Now, expand MyProject, select the src folder, and click OK.
The schedule run stops at the specified breakpoint.
- If you are doing it for the first time, you might need
to provide the source location to see the custom Java code. You do
this by taking the following steps: