Formatting a message with MIME, S/MIME, DIME, and multipart content
When you are working with messages that can contain multiple parts, you must format the message as a Multipurpose Internet Mail Extensions (MIME) message. You can also apply a MIME or a Direct Internet Message Encapsulation (DIME) schema to the message. You can apply the secure MIME (S/MIME) standard to encrypt or digitally sign outbound messages.
- Applying the MIME schema
- Applying the DIME schema
- Adding parts to multipart MIME nodes
- Adding records to DIME nodesAdding binary content to multipart nodes in a MIME message
- Adding Form-Data file to MIME messages
- Adding security to MIME messages
- Signing MIME messages
- Decrypting MIME messages
- Removing signatures from MIME messages
- Using Content-Transfer-Encoding
Before you perform any of the tasks, you must ensure that you have opened the message that you want to format.
Applying the MIME schema
About this task
- Byte Array
- Text
Procedure
-
Perform the following steps if you selected the Byte Array option as the message formatter:
-
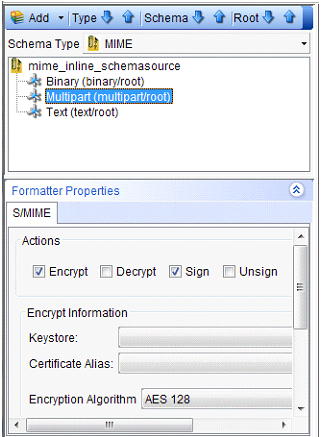
Click the Schema Type list and select .
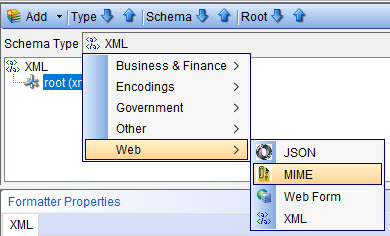
The MIME Schema Type is selected.
-
Select one of the following roots:
- Binary
- Multipart
- Text
Figure 1. MIME Schema applied for the binary root 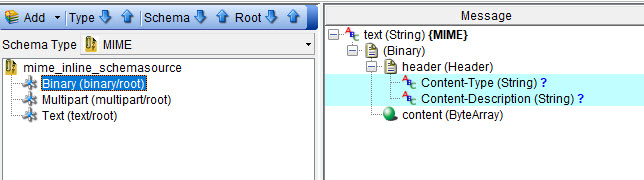
Figure 2. MIME Schema applied for the multipart root 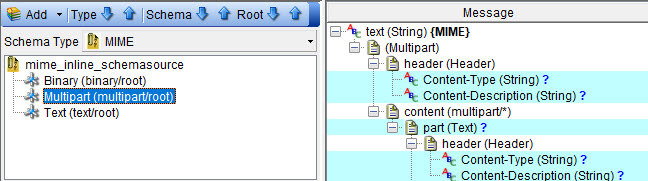
Figure 3. MIME Schema applied for the text root 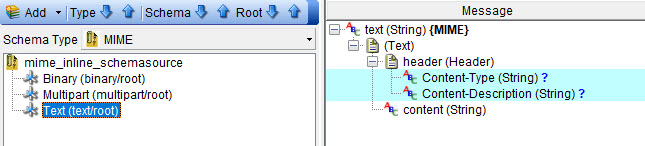
-
Click the Schema Type list and select .
-
Perform the following steps if you selected the Text option as the message formatter:
-
Click the Schema Type list and select .
The MIME Schema Type is selected.
-
Select one of the following roots:
- Binary
- Multipart
- Text
Figure 4. MIME Schema applied for the binary root Figure 5. MIME Schema applied for the multipart root Figure 6. MIME Schema applied for the text root
-
Click the Schema Type list and select .
Applying the DIME schema
You can apply the DIME schema to messages that have the formatter set as Byte Array.
Procedure
-
Right-click the Byte Array node of the message, and then click Schema.
The Schema Selector dialog is displayed.
-
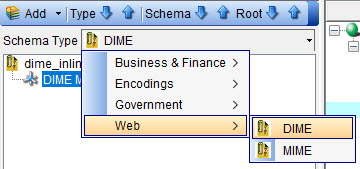
Click the Schema Type list and select .
The DIME Schema Type is selected.
 A sample message is displayed with the DIME schema applied for the Byte Array root.
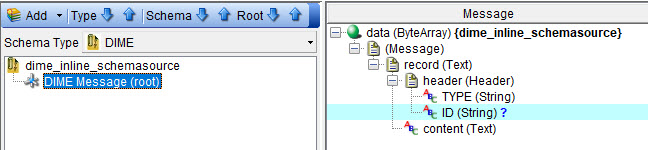
- Click OK to save the schema applied to the message and return to the messaging action window.
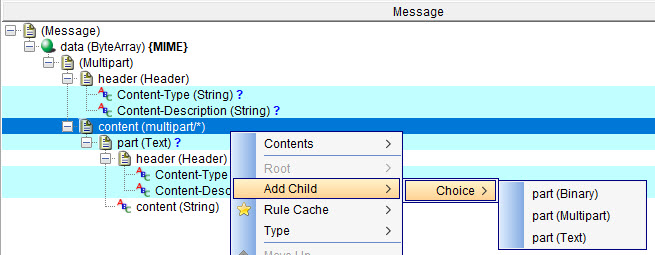
Adding parts to multipart MIME nodes
You can add parts to a multipart MIME message from the message panel in the messaging action window so that you can attach files, images and so on, as parts to the multipart message.
Procedure
- Right-click the content (multipart/*) node.
-
Click .
-
Select one of the following part types:
- Binary
- Multipart
- Text
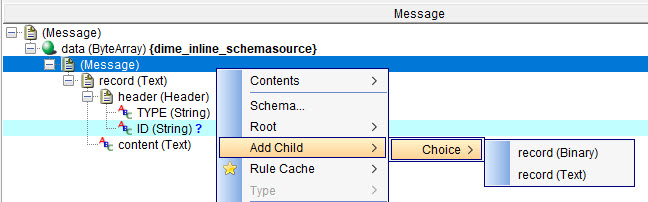
Adding records to DIME nodes
You can add records to a DIME message from the message panel in the messaging action window.
Procedure
- Right-click the message node.
- Click .
-
Select one of the following record types:
- Binary
- Text
Adding binary content to multipart nodes in a MIME message
You can paste text content such as JSON into the Multipart node. The added binary content is expanded and displayed as a tree. You can add Binary content such as file data by editing the ByteArray node.
Procedure
-
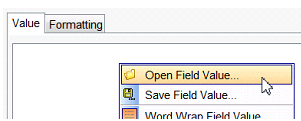
Right-click the node and select Open Field Value.
- Browse and select the file that you want to load in the message.
Adding Form-Data file to MIME messages
When you are sending MIME messages over an HTTP transport, you must add the Form-Data Content-Type to the header in the messages so that the HTTP server or client can interpret and transport the messages.
About this task
Procedure
- Set the node to multipart/form-data.
- Add the message text.
- Configure the headers to identify the content type and a name.
- Set the node to application/pdf to describe the data.
- Right-click the node, and then select .
-
Enter a name for the Content-Disposition node in the field editor window by setting the value as shown in the following example:
form-data; name="file"; filename="Readme.pdf"
- Edit the node by changing the type to ByteArray and use the Open Field Value menu option to pull in the file data.
- Set the node to multipart/form-data.
- Add the message text.
- Configure the headers to identify the content type and a name.
- Right-click the node, and then select .
-
Enter a name for the Content-Disposition node in the field editor window by setting the value as shown in the following example:
form-data; name="body"
-
Edit the node to include the inline data.
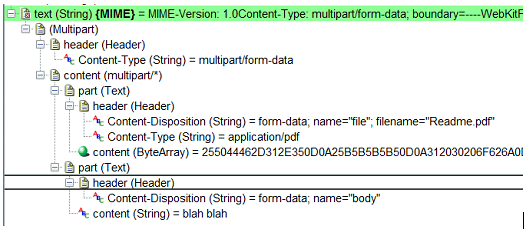
An example message that contains two items of form data that is named body and file is shown:
S/MIME messages
When you want to secure the MIME messages, you can encrypt the messages, digitally sign the messages, or enable both. You can encrypt or decrypt MIME messages by using any of the supported encryption algorithms. You can also add your digital signatures by using any of the supported signature algorithms.
Adding security to MIME messages
To secure MIME messages, you can encrypt the messages by using any of the supported encryption algorithms. You can also add your digital signatures by using any of the supported signature algorithms.
Procedure
- Open the message in the message editor by double-clicking the message in the Test Factory perspective message tree.
-
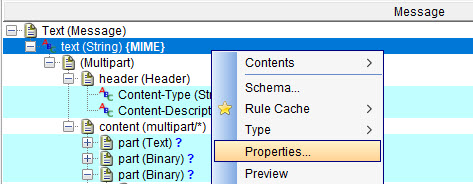
Right-click the text (String) {MIME} or data(ByteArray) {MIME} node, and then click Properties.
-
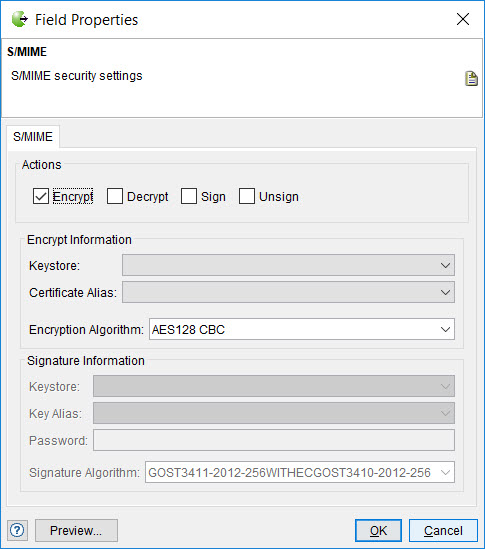
Select the Encrypt check box on the S/MIME security settings dialog.
The fields in the Encrypt Information panel are enabled. Although the Signature Information panel is displayed, the fields are disabled.
-
Perform the actions indicated in the following table:
Field
Action
Keystore
Select the Keystore that contains the certificates that you have created or added.
Certificate Alias
Select the certificate from the Keystore that is used to encrypt the message.
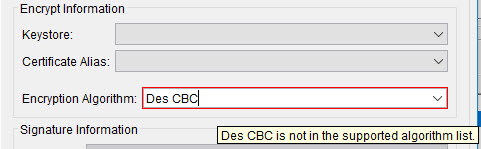
Encryption Algorithm
You can perform any of the following actions:
- Select the standard algorithm from the list that you want to use for encrypting the MIME messages.
- Enter the complete name of the standard algorithm in the Encryption Algorithm field.
Ensure that the name must be an exact match of the standard algorithm in the list. A warning is displayed if the entry you make does not match with the standard algorithm or is incomplete.
- Click Preview to view the message with the configured settings.
-
Click OK to save your configuration.
Note: If you apply the MIME schema to a message, you can also apply the S/MIME properties at the same time, through the Schema Selector window.
Signing MIME messages
To secure MIME messages, you can add your digital signatures by using any of the supported signature algorithms.
Procedure
- Open the message in the message editor by double-clicking the message in the Test Factory perspective message tree.
-
Right-click the text (String) {MIME} or data(ByteArray) {MIME} node, and then click Properties.
-
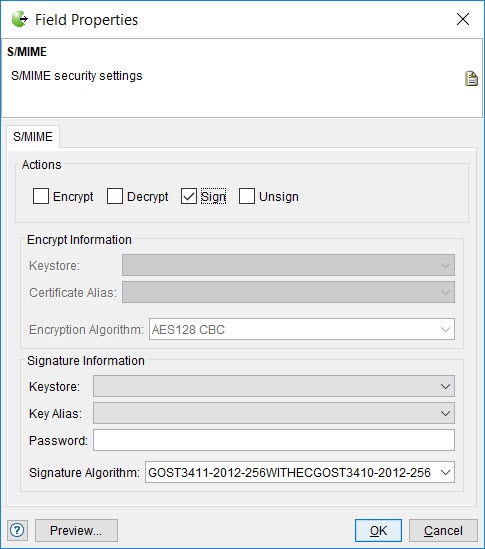
Select the Sign check box on the S/MIME security settings dialog.
The fields in the Signature Information panel are enabled. Although the Encrypt Information panel is displayed, the fields are disabled.
-
Perform the actions indicated in the following table:
Field
Action
Keystore
Select the Keystore that contains the keys and certificates that you have created or added.
Key Alias
Select the key from the Keystore that is used to sign the message.
Password
Enter the password of the keystore.
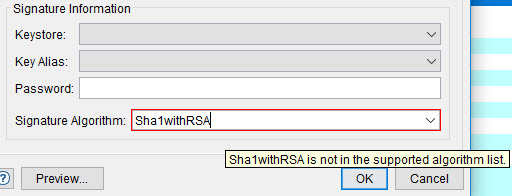
Signature Algorithm
You can perform any of the following actions:
- Select the standard algorithm from the list that you want to use for signing the MIME messages.
- Enter the complete name of the standard algorithm in the Signature Algorithm field.
Ensure that the name must be an exact match of the standard algorithm in the list. A warning is displayed if the entry you make does not match with the standard algorithm or is incomplete.
- Click Preview to view the message with the configured settings.
-
Click OK to save your configuration.
Note: If you apply the MIME schema to a message, you can also apply the S/MIME properties at the same time, through the Schema Selector window.
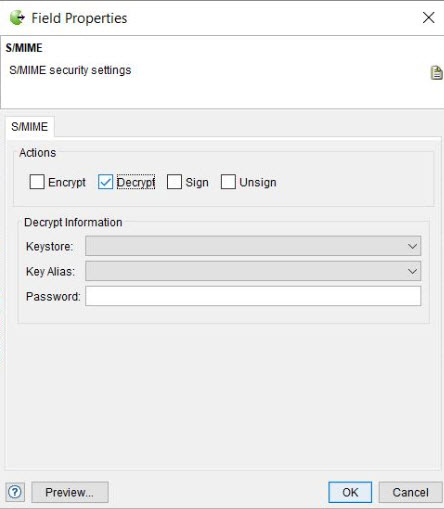
Decrypting MIME messages
You can configure the MIME messages that are received to be decrypted and then displayed in HCL OneTest™ API. You can either decrypt the message separately or use decryption in combination with the Unsign option, if the messages are also signed digitally.
Procedure
- Open the message in the message editor by double-clicking the message in the Test Factory perspective message tree.
-
Right-click the text (String) {MIME} or data(ByteArray) {MIME} node, and then click Properties.
-
Select the Decrypt check box on the S/MIME security settings dialog.
The fields in the Decrypt Information panel are enabled.
-
Perform the actions indicated in the following table:
Field
Action
Keystore
Select the Keystore that contains the keys and certificates that you have created or added.
Key Alias
Select the key alias from the Keystore that must be used to decrypt the message.
Password
Enter the password of the keystore.
- Click Preview to view the message with the configured settings.
- Click OK to save your configuration.
Removing signatures from MIME messages
You can configure the MIME messages that are received so that the digital signatures are removed from the messages and then displayed in HCL OneTest™ API. You can either use the Unsign option for message separately or use the option in combination with the decryption option.
Procedure
- Open the message in the message editor by double-clicking the message in the Test Factory perspective message tree.
-
Right-click the text (String) {MIME} or data(ByteArray) {MIME} node, and then click Properties.
-
Select the Unsign check box on the S/MIME security settings dialog.
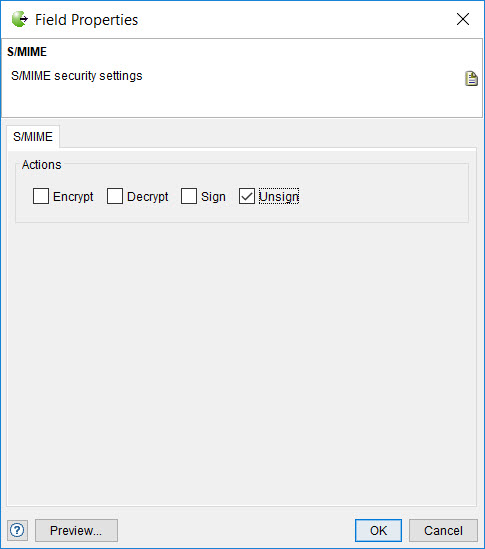
- Click Preview to view the message with the configured settings.
- Click OK to save your configuration.
Using Content-Transfer-Encoding
The Content-Transfer-Encoding header is a MIME header that controls how the content must be encoded for transmission. HCL OneTest™ API chooses an encoding based on the content and the type of root node that the MIME message is built on. If the MIME message is built on a Text node, then it is assumed that the content is required to be 7-bit data and is encoded by using 7 bit, base64, or quoted-printable encoding. If the MIME message is built on a ByteArray node, then binary encoding is chosen, which is suitable for protocols without a 7-bit restriction such as HTTP and AS2.