Creating Eclipse plug-in project
You need a plug-in project to hold the Java™ class file and other resources.
About this task
To create an Eclipse plug-in project, use the New Project wizard, do the following steps:
Procedure
- Create an Eclipse workspace. Note: You can work in an existing workspace, but you are going to be changing some settings that might affect other plug-in development.
- Select from the File menu.
The New Project wizard is displayed.
- Select , then click Next.
The Plug-in Project screen is displayed.
- Enter a value in the Project
name field.
This value is the projects name as well as the plug-ins ID. For our example, enter com.samples.functions.dateformat.
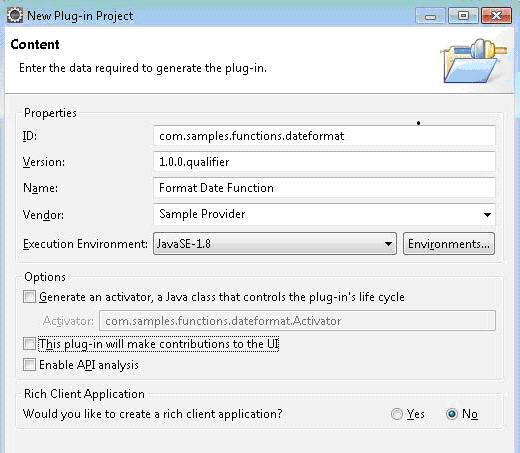
- Click Next and enter
the following values in the Plug-in Content screen.
Option Value/Setting Plug-in ID This ID must be a unique ID for your plug-in. If you are developing more than one plug-in, make sure that they have different IDs. Plug-in Version The version of the plug-in (for example, 1.0.0). Plug-in Name A descriptive name for the plug-in (for example, Format Date Function). Plug-in Provider The name of the company/individual who provided the plug-in, normally the name of your company (for example, Sample Provider). Classpath Enter a "." (dot) to add the root of your plug-in to the classpath. Plug-in Options Disable both options. Rich Client Application? Select "No" for this option. 
- Click Finish.
- If you are prompted to switch to the Plug-in
Development perspective, click No.
A plug-in project is created in your workspace. Additionally, a plug-in project exists in your Package Explorer and Eclipse opened the plug-ins manifest (MANIFEST.MF) in the Manifest Editor.