Project settings
You can view the project settings by selecting from the main HCL OneTest™ API menu. You can view and edit the properties for project, server settings, date formats, change management, quality management, permission settings, permissions, results publishers, and APM preferences. You can also create an email publisher or switch users on a project.
The following dialog box is displayed where you can view or edit various properties and settings for the current project.
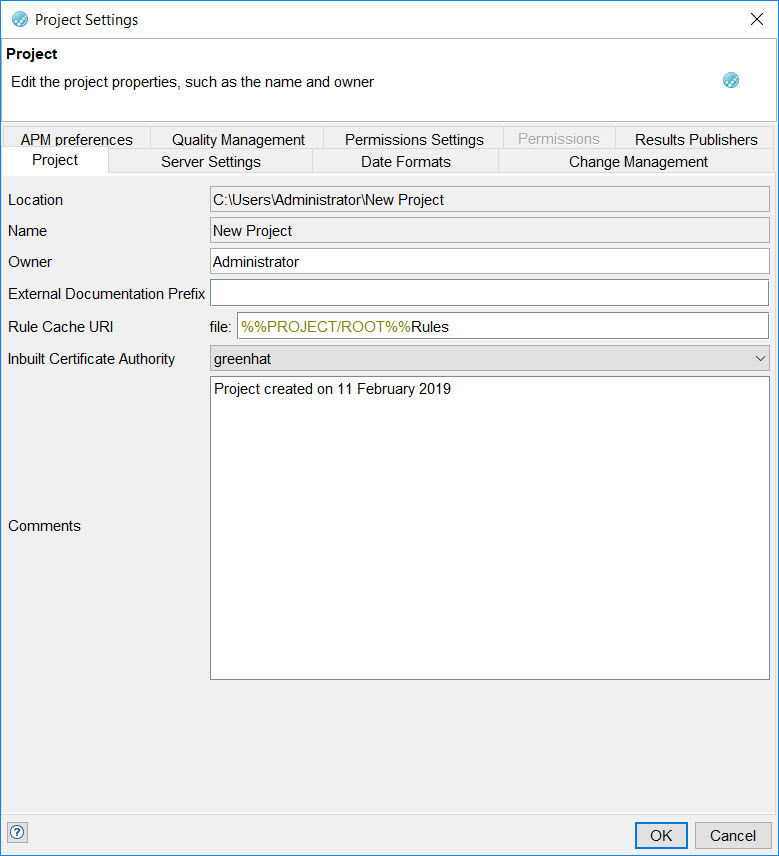
Project properties
The Project tab contains summary information about the current project.
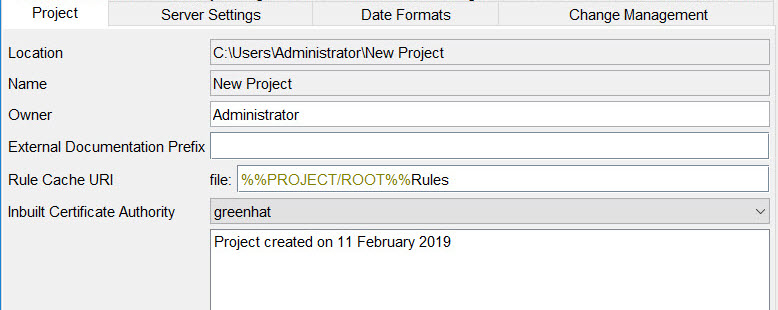
The fields in the Project tab are described in the following table:
| Location | The full path where the project can be found. |
| Name | A meaningful name to help identify the project. |
| Owner | The project’s creator or owner |
| External Documentation Prefix | The root directory where external documentation for HCL OneTest™ API artifacts is stored. |
| Rule Cache URI | The location where validation rules are stored for the project (%%PROJECT/ROOT%%Rules, by default). |
| Inbuilt Certificate Authority | The internal certificate authority for the project. |
| Comments | User-defined comments that can be used to enter information that might be relevant to the project. |
Server Settings
Use the Server Settings tab to configure the servers that will be used for your project. You can manage the JDBC connection details for the results database, which can be specified when you are creating the project, or configure the HCL Quality Server URL. You can also specify the project on the HCL OneTest™ Server to which you want to publish the test reports for tests run in HCL OneTest™ API.
Use the fields under Results Database to create or modify a database connection. Select the provider, and enter the connection details about where and how the database is set up for HCL OneTest™ API. For more information on the specification of database URLs when using IP literal addresses, see IP literal address.
To test the provider and connection settings, click Test Connection. If the test is successful, no further configuration is required. If the test is unsuccessful, you must verify that the connection settings are correct and try again.
Under HCL Quality Server, specify the URL for the server. The server URL
(https://localhost:5443/RTCP, by default) must point to the base URL of the server
instance that runs published stubs and manage scheduled execution (for more information, see HCL OneTest Virtualization overview). Optionally,
click Open to open an instance of the server.
- Trust all certificates
- Use this option to accept any certificate that is presented by the server.
- Trust certificates signed by the inbuilt certificate authority
- Use this option to accept any certificate presented that was signed by the inbuilt certificate authority.
- Trust specific trust store
- Use this option to select a specific Java™ keystore within the project, which contains the trusted certificates that can be used to verify the certificate that is presented by the server.
Use the fields under HCL OneTest™ Server to configure the connection to the HCL OneTest™ Server. Enter the host name of the server, and paste the Offline User Token that you generated on the HCL OneTest™ Server. Click Test to test the connectivity to the server. You can click SSL to specify the SSL connection details for the HCL OneTest™ Server.
Select the project on the HCL OneTest™ Server that you want to access and publish the test reports for tests run on HCL OneTest™ API to HCL OneTest™ Server by selecting the Publish results after execution check box.
Date formats
By using the Date Formats tab, you can define the output format of certain date and datetime tags in HCL OneTest™ API (for example, TEST / START_DATE).
For more information, see Formatting and parsing date-time patterns.
Quality Management settings
The Quality Management tab is used to manage quality management systems that can be used with HCL OneTest™ API.
HCL OneTest™ API can be integrated with IBM® Rational® Quality Manager.
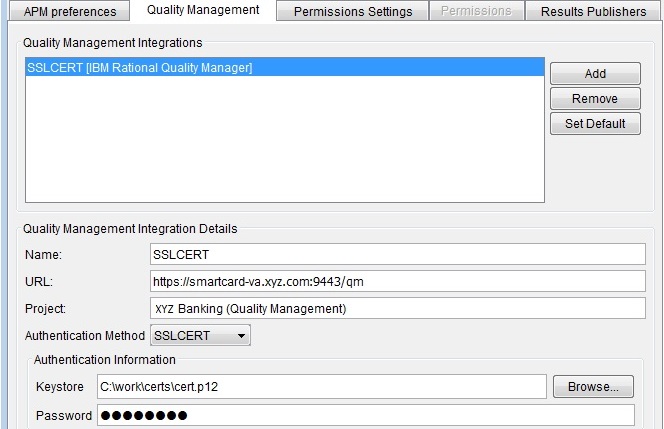
For more information about these project settings fields see, Configuring Rational Quality Manager integration.
Change Management settings
The Change Management tab is used to manage change management systems that can be used with HCL OneTest™ API.
HCL OneTest™ API can be integrated with several change management tools including IBM® Rational® Team Concert™.
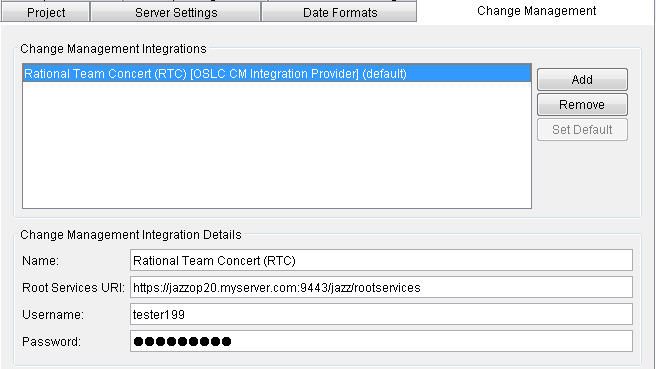
For more information about these project settings fields see, Setting up the integration with the change management tools.
APM preferences settings
The APM preferences tab is used to manage connection to APM servers that can be used with HCL OneTest™ API.
HCL OneTest™ API can import service or transaction data from IBM® Tivoli® Composite Application Manager for Transactions.
For more information about these project settings fields see, Using the HCL OneTest API UI to import data from Tivoli Composite Application Manager for Transactions.
Permission settings
The Permissions Settings tab is used to manage whether permissions are enabled for the project. You can select from three options: (none), HCL Quality Server, or Active Directory. If you choose HCL Quality Server, follow the instructions that are provided on that panel. If you choose Active Directory, then set values including the host information, and the password for the project administrator. You can add or modify the password of the project administrator by entering it in the Admin password and Confirm fields. The password that is entered in each field must match. Also see Specifying data masking permissions.
Permissions
The Permissions tab is used to manage which users have access to the project and the areas of the project to which they have access.
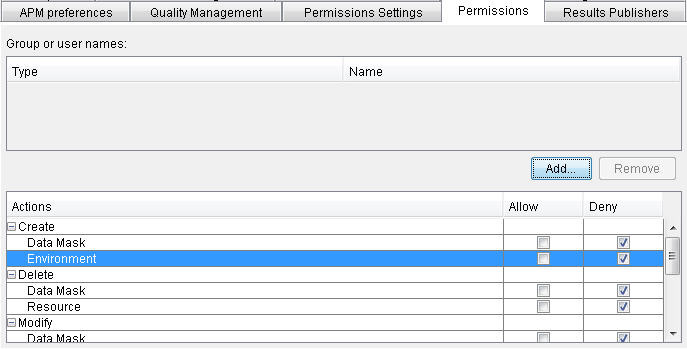
Users can be added to the project by clicking Add and locating the users in the search dialog that is displayed.
Enter a search string (multiple strings can be used, separated by semicolons) and click Search. To add any of the located users or groups to the project, select them and click Add Selected.
For users or groups that are added to the project, permission to perform certain actions must be explicitly allowed or denied. Use the appropriate check box to do so. Permissions can be set for multiple users at the same time.
To remove a user or group from the project, select its entry in the current list and click Remove.
Also see Specifying data masking permissions.
Results publishers
The Results Publishers tab is used to manage results publishers that can email test suite results or publish results to a configured CentraSite server. Details about configuration within a test suite can be found in Test suites: Overview and tasks. For more information, see Testing with Software AG CentraSite.
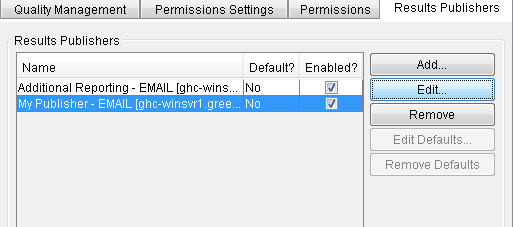
For each publisher in the list, the following details are displayed:
- Name: the name that is given to the publisher when it was created (the name cannot be modified once the publisher is created) and the publisher type
- Default: which publisher (if any) is designated as the default for all test suites (the default publisher cannot be set here, but it can be removed)
- Enabled: whether the selected publisher is enabled for use in test suites
Click Add to create a publisher. To modify the configuration of the selected publisher, click Edit (see Creating an email publisher for more information on publisher configurations). To delete the selected publisher, click Remove.
To modify the publication settings of the default publisher, select it and click Edit Defaults (see Results publisher settings for more information).
To remove the "default" designation of the default publisher, select it and click Remove Defaults.This action does not delete the publisher. To designate a new default publisher, use test suite editor.
Publishing can be enabled or disabled on a project-wide basis by toggling the results publishing icon HCL OneTest™ API main toolbar.