Using the Column Selection window
The Table button displays the Column Selection window. You can use the Column Selection window to build queries by selecting tables and columns. The ipload utility inserts the selected columns and tables into the appropriate text boxes of the Query-Definition window.
About this task
To use the Column Selection window:
Procedure
-
Select a table.
After you select a table, the right pane displays a list of the columns in that table. The following query shows the Column Selection window with the customer table selected.
Figure 1: The Column Selection window after selecting a table 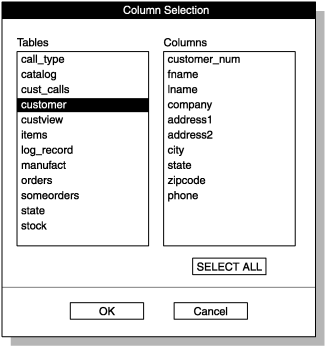
-
Select one or more columns to use in the query.
- To select a single column, select that column.
- To select all columns, click Select All.
- To select consecutive columns, select the first column. Move to the final column and hold down SHIFT while you select that column.
- To select nonconsecutive columns, select a column. Hold down CONTROL while you select additional items.
The following figure shows the Column Selection window with several columns selected.Figure 2: Columns selected from a table 
-
Select the Select text
box or the Where text box.
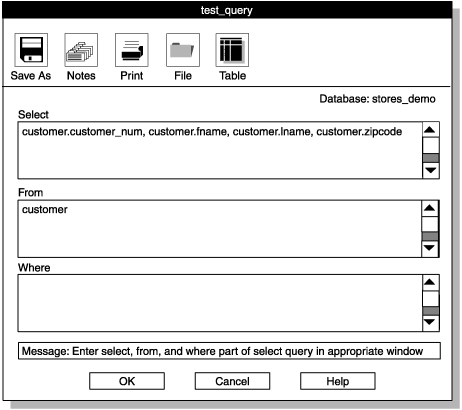
The following figure shows columns inserted into the Select text box. The ipload utility also inserts the table name into the From text box.
Figure 3: The Query-Definition window after using the table button