Creating an application
This topic gives a general overview of the application creation process, from opening the HCL Domino Volt interface to launching a completed application.
About this task
The following steps are a general overview of the lifecycle of an application.
Procedure
- Log on to Domino Volt. By default you see the My Applications window which displays the New Application button, any previously created applications, and any applications to which you have edit permissions.
-
Click New Application.
A dialog will open, which provides a choice to create an application from a blank canvas or an Excel spreadsheet, or to import an app from an existing Volt file. The rest of this topic describes how to create an application from a blank canvas. For a topic covering creating applications from spreadsheets, see Creating an application from an excel spreadsheet.
-
Click From Blank. Enter the name of the new application, and (optional) a description or tags for the application. Click Create.An application opens with a blank new form created automatically. On the left of the form is a palette of items, and on the side is a panel for properties.
-
To continue building the form, add items from the Palette to build the form.
- The grid automatically expands as you add form items, and automatically aligns items in the cells.
- You can change the size of columns or rows in the grid. Right-click on the edge of the grid to reveal row or column properties.
- The structure of the application and all of its parts may be seen at the top of the palette. You can insert additional pages to a form by clicking the ellipses icon and selecting Add Form Page. Page order is flexible, and you can reorder the pages in your form by dragging dropping them to your preferred order.
- Many form items can be edited directly on the grid. Click the title of a form item to edit it.
- You can modify the properties of each form item by selecting the widget - the Properties panel appears on the side of the screen, and contains tabs that allow the creation of rules, web service calls, or event triggers.
- You can save and preview the form at any time by using the Save and Preview icons.
You can also include app pages in your application. App pages provide a free-form app building canvas, and allow authors to build anything from simple welcome pages to complex dashboards. App pages differ from forms, which provide a canvas that specifically defines an interface to collect and store data with a built-in function to submit a record and move it through workflow stages. A single line entry widget placed on a form defines data as well as the display and retrieval of user input. A single line entry widget placed on an app page does not define data storage, and instead allows the application builder to obtain and set its value either programmatically or through a service. An app pages are suited to providing data entry or a display for service based data.Editing app pages is similar to editing forms. App pages provide most of the same widgets on the palette, although a few (page navigation, tables, and attachments) are omitted because of the non-data definition nature of app pages. Because they do not define data, app pages do not participate on the View Data page, nor do they have corresponding charts. - Click the Style tab to customize the appearance of your application. Select or customize a theme or add your own custom CSS to change the style of your application.
-
Use the Access tab or Workflow tab to
define user roles, such as
Administrator
,Supervisor
, orRecord Owner
.You can add as many users as required for your application to function. For example, when a user completes a vacation request form, the form is sent only to the user’s supervisor. You can also add groups of users to specific roles. For example, you might have a time sheet application that is sent to a group of supervisors upon submission. For more information, see Security overview. -
Use the Workflow tab to define stages within a form.
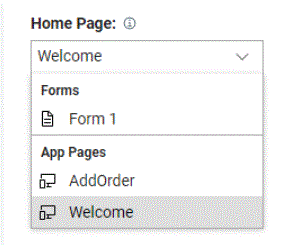
You can create as many stages as required for your form or workflow. For example, an employee completes a vacation request form. The employee does not see the part of the form where the supervisor approves or rejects the request. When the supervisor receives the form, the next stage is visible, and the request is granted, or refused. You can also use stages to set buttons at specific points in your form. For more information, see Adding Stages to an application.If you have multiple forms or app pages in your application, you can set the "home page" for the application on the Settings tab, where you can select any of the forms or app pages. Volt launches the home page when the user enters the URL provided in the Home Page launch setting on the manager page or deployment dialog. If you do not select an option here, Volt launches the first form in the application under these circumstances.
- Click the Validation tab to check your application for errors.
- Save your application.
- After an application is built, use the breadcrumbs to navigate back to the My Applications tab. You must now deploy the application. Click Deploy.
- Adjust the Deployment Settings and click Start.
-
Click Launch to view the live application
in a web browser.
The link URL is what is sent to users so they can access the application.Note: As an application creator, you can edit an application at any time. If you edit a live application, you must redeploy and relaunch it after your changes are saved. If a user is entering data into an application as you redeploy, their work is not saved.