Mounting the CIFS share on a Windows™ server
Instead of NFS, you can use CIFS Shared storage that is exported from Windows for the HCL Docs components to share document data. These specific procedures are required only if you are using one of the Windows servers as an CIFS server.
About this task
The Conversion server, Docs server and Viewer server need access to the shared storage to be able to exchange the document data. If the Conversion server, Docs server and Viewer server are installed on Windows, the shared data folders will need to be mounted as Windows shares on those servers and provide the proper access for reading and writing from these shares.
To mount the CIFS share on Windows, use the following procedure to mount the shared directory between Docs and Conversion servers, and mount the shared directory between Viewer and Conversion servers.
Procedure
- Use DocsSharedFolder as the shared directory for Docs, and ViewerSharedFolder for Viewer.
- On CIFS client, Docs, Viewer and Conversion servers, start the command console as the administrator (Click . Right-click the command prompt and select Run as administrator).
- On Conversion server, Docs server and Viewer server, run
the following command:
CMDKEY /add:CIFSServer /user:username /pass:passwordNote:If the node and server are configured to start automatically along with the Windows Operating System, there will be system services running with a user of SYSTEM. Check the services with the Task Manager, the user name for java.exe will show SYSTEM. In this case, the"CMDKEY" command must also be done with a user of SYSTEM. Otherwise, cifs_auto_mount.bat will not run successfully.
In order to run the CMDKEY command with a user of SYSTEM :- Create a batch file, for example, C:\IBMConversionCIFS\addcmdkey.bat, and
type
CIFSServer is the name of the CIFS server. If the CIFSServer value contains spaces, use quotation marks around the value, from \\ to the end of the value (for example, \\CIFSServer \ShareFolder). The value can be 1 to 15 characters long. You can also use the IP address as the value. username and password are the user and password that are used to access the shared folder.CMDKEY /add:CIFSServer /user:username /pass:password CMDKEY /list - Click
- Click .
- Click General, and type add_cmd_key for Name. In Security options, click Change User or , and select SYSTEM. Then select Run with highest privileges.
- Click , select At startup for Begin the task. Click OK.
- Click , select C:\IBMConversionCIFS\addcmdkey.bat and click OK.
- Click OK.
- Select this task item and run it.
- Create a batch file, for example, C:\IBMConversionCIFS\addcmdkey.bat, and
type
- Change registry to increase the performance of CIFS access. Open Regedit and navigate to the following branch: HKEY_LOCAL_MACHINE\SYSTEM\CurrentControlSet\Services\LanmanWorkstation\Parameters
- In the main window, right-click and select . Set the name as FileInfoCacheLifetime.
- Create two more DWORD Values named FileNotFoundCacheLifetime and DirectoryCacheLifetime.
- Double-click FileInfoCacheLifetime, FileNotFoundCacheLifetime and DirectoryCacheLifetime, set the value as 0 and the base as Decimal respectively.
- Close Regedit.
- In order to mount the share automatically with windows
restart:
Note:
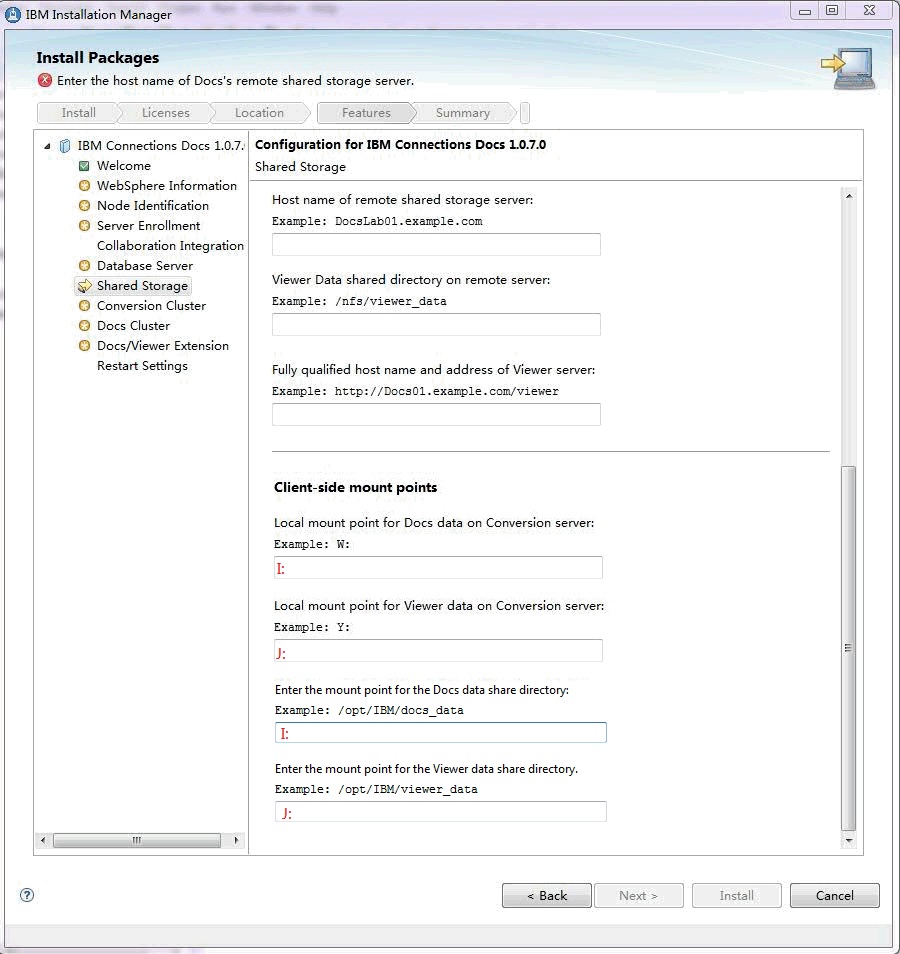
- The client-side mount points on the Shared Storage panel will use above mounted drivers as the values.
- If the node and server are configured to start automatically along with the Windows Operating System, they will be system services running with a user name of SYSTEM. Looking at the services with the Task Manager, the user name for java.exe will show SYSTEM. In this case, the mount must also be done with a user of SYSTEM (as previously shown) or the CIFS shares will not be able to be accessed from the node or server.
- To verify the SYSTEM user has access to the mounted drive. Download the tool PSEXEC from following link: https://blogs.technet.microsoft.com/askds/2008/10/22/getting-a-cmd-prompt-as-system-in-windows-vista-and-windows-server-2008. This tool will start a command prompt as SYSTEM user, and you can change directory to the mounted drive in the command prompt to check the accessibility.
- If the mount action is done using a user name of SYSTEM, the CIFS shares will be able to be
accessed regardless of what user name the node or server is running as.