Post-installation tasks for Connections PDF Export
PDF Export requires the wkhtmltox binary package in order to render PDF documents. This is a binary dependency that needs to be deployed on your HCL Connections server. The necessary installation steps are outlined below.
Downloading and Installing
1). Download and install the wkhtmltopdf binary package.
The binary package is available to download here: https://wkhtmltopdf.org/downloads.html. Please use the latest stable version 0.12.6 for installation.
Ensure to download the package according to your server operating system. Common examples are listed below, all distributions can be found via above link.
| OS | Type |
|---|---|
| Windows | 64-bit 32-bit |
| RHEL 7 / CentOS 7 | x86_64 i686 aarch64 ppc64le |
| RHEL 8 / CentOS 8 | x86_64 aarch64 ppc64le |
Once downloaded, install the package according to your system's requirements.
RHEL/CentOS:
rpm -Uvh wkhtmltox-0.12.6-<version>.rpmWindows:
Download
wkhtmltox-0.12.6-<version>.exeExecute binary file to run installer
Install tool at appropriate location
2). Configure the PDF Export feature on WebSphere to leverage wkhtmltopdf binary
In order for the PDF Export feature to use the wkhtmltopdf library, it needs to be able to invoke the tool via the system's command line. There are two ways to ensure this is the case.
2.1). Configure the system path to allow execution of the
wkhtmltopdf command.
PDF Export tries to execute the command
wkhtmltopdf [args]on the system's command line (cmd on Windows,
shell/bash on Linux). This can be enabled by adding the
wkhtmltopdf to the system's path variable. To test this, try to execute above
command on the system's command line. If the command is not recognized, this is not
configured correctly. Otherwise PDF Export is now ready and can be used.
Note: The command needs to be executable by the same user that will start the WebSphere servers/JVMs.
2.2). Configure PDF Export to invoke wkhtmltopdf in the correct install location
If wkhtmltopdf is not available by invoking the command listed in 2.1, you can instead make the PDF Export aware of what execution command is necessary to invoke it instead. E.g. if you have installed the feature at location
/opt/HCL/Connections/wkhtmltox/bin/wkhtmltopdfyou can add this via WebSphere configuration. Perform the following:
Enter the WebSphere administrative console (e.g.: https://your.dmgr.host:9043/ibm/console) and navigate to
Resources
                            > Resource Environment > Resource Environment
                    entries
Look for the
ic360resource environment entry and click on itNavigate to
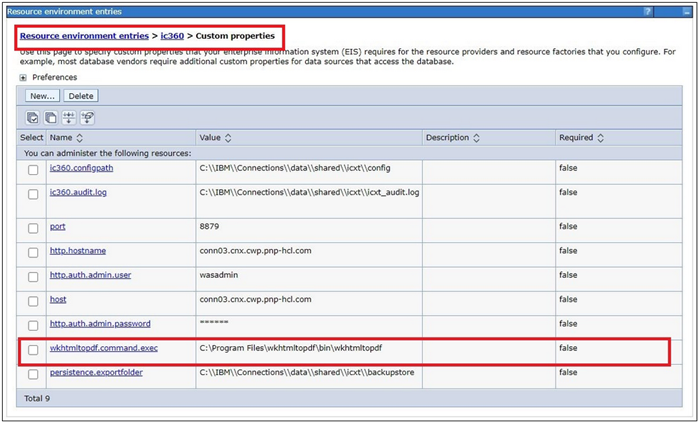
Additional Properties > Custom
                    properties
Click New... to create a new property
Enter the name
wkhtmltopdf.command.execand the path to the wkhtmltopdf binary (including its name) as the value, e.g.C:\Program Files\wkhtmltopdf\bin\wkhtmltopdf.exeon Windows or/opt/HCL/Connections/wkhtmltox/bin/wkhtmltopdfon Linux.Click Apply and OK.
Save the changes to the master configuration.
Restart ICXT server.
Note: In case of a clustered environment, this library needs to be installed the same way on all nodes of the cluster.
Server side fonts
Without installed fonts, the PDF rendering may result in unsatisfactory result. If there are no font sets installed, we recommend to install DejaVu fonts.
Note for CentOS or RHEL, the library wqy-microhei-fonts
should additionally be installed to support Chinese and Japanese.
RHEL or CentOS:
sudo yum install dejavu-sans-fonts
sudo yum install wqy-microhei-fonts
To verify that the Dejavu fonts have been properly installed, run the command
fc-list | grep "DejaVu Sans"
Sample output:
/usr/share/fonts/TTF/DejaVuSansCondensed.ttf: DejaVu Sans,DejaVu Sans Condensed:style=Condensed,Book
/usr/share/fonts/TTF/DejaVuSans-BoldOblique.ttf: DejaVu Sans:style=Bold Oblique
/usr/share/fonts/TTF/DejaVuSansMono.ttf: DejaVu Sans Mono:style=Book
/usr/share/fonts/TTF/DejaVuSansCondensed-Oblique.ttf: DejaVu Sans,DejaVu Sans Condensed:style=Condensed Oblique,Oblique
/usr/share/fonts/TTF/DejaVuSansMono-Oblique.ttf: DejaVu Sans Mono:style=Oblique
/usr/share/fonts/TTF/DejaVuSansCondensed-BoldOblique.ttf: DejaVu Sans,DejaVu Sans Condensed:style=Condensed Bold Oblique,Bold Oblique
/usr/share/fonts/TTF/DejaVuSans-ExtraLight.ttf: DejaVu Sans,DejaVu Sans Light:style=ExtraLight
/usr/share/fonts/TTF/DejaVuSans-Oblique.ttf: DejaVu Sans:style=Oblique
/usr/share/fonts/TTF/DejaVuSansMono-Bold.ttf: DejaVu Sans Mono:style=Bold
/usr/share/fonts/TTF/DejaVuSansCondensed-Bold.ttf: DejaVu Sans,DejaVu Sans Condensed:style=Condensed Bold,Bold
/usr/share/fonts/TTF/DejaVuSansMono-BoldOblique.ttf: DejaVu Sans Mono:style=Bold Oblique
/usr/share/fonts/TTF/DejaVuSans.ttf: DejaVu Sans:style=Book
/usr/share/fonts/TTF/DejaVuSans-Bold.ttf: DejaVu Sans:style=Bold
AIX: Binaries can be found at http://www.perzl.org/aix/index.php%3Fn%3DMain.Dejavu-fonts
Windows:
The fonts can be found at https://dejavu-fonts.github.io/Download.html
The documentation at https://support.microsoft.com/en-us/help/314960/how-to-install-or-remove-a-font-in-windows can be used for reference when installing the fonts. Generally, the required steps are:
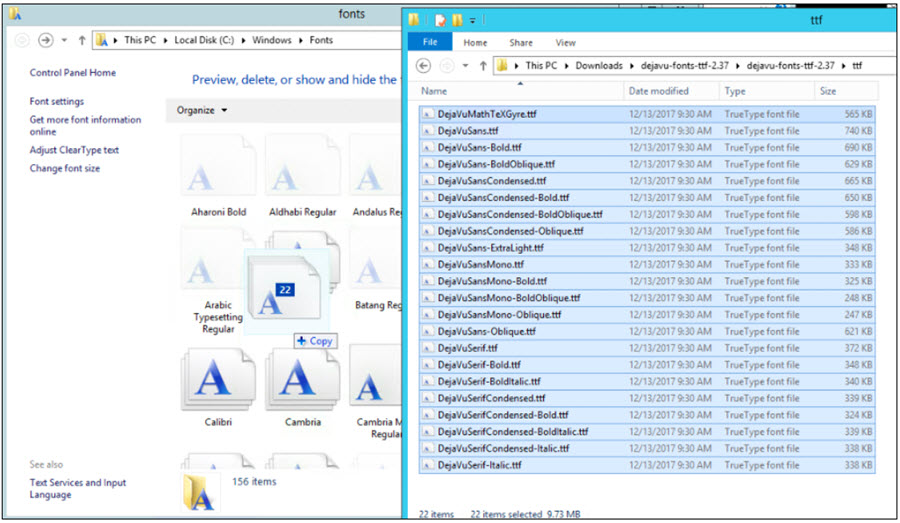
Download and unzip the latest DejaVu fonts ZIP archive
Login as Administrator and Click "Start"
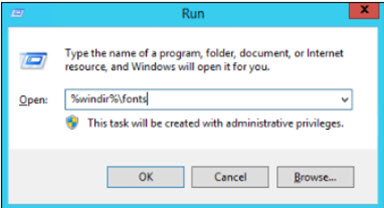
Search for "run"

Enter
%windir%\fonts
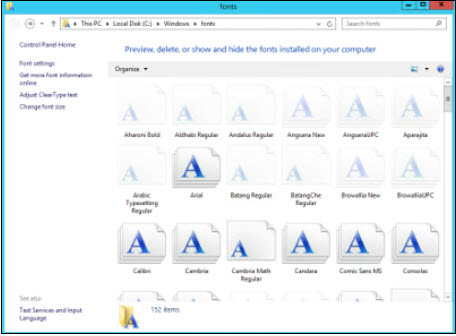
Drag and drop the extracted fonts from the ttf folder to the Fonts config window