Installing Customizer Lite
This topic describes how to install Customizer Lite. There are two deployment options, hereby referred to as Customizer Lite and Customizer Lite HA. Customizer Lite – the most basic deployment using a single Docker node running a single instance of each required service, and Customizer Lite HA – a more resilient deployment using a pair (or more) of Docker nodes all running instances of each required service with requests load balanced across available nodes.
Before you begin
- System requirements
- Docker
- Docker registry
- Docker compose
- Setting up a reverse proxy
System Requirements
For Customizer Lite (with a single Docker instance), a single virtual machine (4 CPU, 2.x GHZ, 8GB memory, and at least 100GB disk) with a x86_64 Linux OS. Use two (or more) of these virtual machines to configure for Customizer Lite HA deployment.
Customizer Lite has been validated to run on RHEL 7.6/CentOS 7.6 using: Docker 17.03.x configured with devicemapper storage Docker-Compose version 1.22.
Docker
yum
                                    install
command:yum-config-manager --setopt="docker-ce-stable.baseurl=https://download.docker.com/linux/centos/7/x86_64/stable" --saveFor more details, see Rancher issue and Docker issue.
Docker Registry
- Create shared directories for TLS certificates.Run the following commands (adopt the paths to your directory) to create directories where the self-signed certificates for the Docker registry will be stored:Note: For Customizer Lite HA, choose a directory on an NFS share or similar to make the certificates in the directories available on all Docker servers.
mkdir -p /opt/HCL-Shared/docker-registry mkdir /opt/HCL-Shared/docker-registry/{auth,certs,registry} - Encrypt the password for the Docker registry "admin" user using
httpasswd:docker run --entrypoint htpasswd registry:2.7.0 -Bbn admin '[ADMIN USER PASSWORD]' > /opt/HCL-Shared/docker-registry/auth/htpasswd docker system prune -aNote: "registry:2.7.0" was the last Docker registry image version, where the httpasswd command was still included. Thus, we explicitly use this version to create the httpasswd file and delete that image afterwards. - Create self-signed certificates for the Docker registry:
- Create a working
directory:
mkdir -p /opt/INSTALL/docker-reg cd /opt/INSTALL/docker-reg - Create self-signed certificates for the Docker registry that
will be valid for 999 days by running the following
commands:
openssl genrsa -des3 -passout pass:[SECRET PASSPHRASE] -out docker-reg.keypair.key 4096openssl rsa -passin pass:[SECRET PASSPHRASE] -in docker-reg.keypair.key -out docker-reg.keyopenssl req -new -key docker-reg.key -out docker-reg.csrCountry Name (2 letter code) [XX]:AT State or Province Name (full name) []: Locality Name (eg, city) [Default City]:Vienna Organization Name (eg, company) [Default Company Ltd]:Example Company Organizational Unit Name (eg, section) []: Common Name (eg, your name or your server's hostname) []:customizer.example.com ...
Questions when running the above command can be answered with the defaults.openssl x509 -req -days 9999 -in docker-reg.csr -signkey docker-reg.key -out docker-reg.crt - Copy certificates to shared
directory:
cp docker-reg.crt /opt/HCL-Shared/docker-registry/certs/
cp docker-reg.key /opt/HCL-Shared/docker-registry/certs/
- Create a working
directory:
- Add the newly created self-signed certificates to the Linux certificate
trust store so that Docker can use
them:
cp /opt/HCL-Shared/docker-registry/certs/docker-reg.crt /etc/pki/ca-trust/source/anchors
update-ca-trust
Note: For Customizer Lite HA, this step needs to be done for each Customizer Lite server. - Restart Docker so it accepts the new
certificates:
systemctl restart docker - Create and start the Docker registry using the following command. If you
modified the paths in step 1, you need to change them for this command
as well.If no Docker registry is installed, Docker will automatically pull the most recent version of "registry:2" from the Docker repositories.
docker run -d -p 5000:5000 --restart=always --name registry -v /opt/HCL-Shared/docker-registry/auth:/auth -v /opt/HCL-Shared/docker-registry/certs:/certs -v /opt/HCL-Shared/docker-registry/registry:/var/lib/registry -e "REGISTRY_AUTH=htpasswd" -e "REGISTRY_AUTH_HTPASSWD_REALM=Registry Realm" -e "REGISTRY_AUTH_HTPASSWD_PATH=/auth/htpasswd" -e "REGISTRY_HTTP_TLS_CERTIFICATE=/certs/docker-reg.crt" -e "REGISTRY_HTTP_TLS_KEY=/certs/docker-reg.key" registry:2 - Verify that the Docker registry is running using
docker
                                    ps
, as follows:docker ps CONTAINER ID IMAGE COMMAND CREATED STATUS PORTS NAMES 8564329b0258 registry:2 "/entrypoint.sh /etc…" 5 seconds ago Up 3 seconds 0.0.0.0:5000->5000/tcp registry
Docker Compose
- Check the release updates for the newest version of Docker. The Customizer Lite Docker Compose script requires a minimum version of 1.22.
- Download the current Docker Compose binary to
/usr/local/bin/docker-compose:
sudo curl -L "https://github.com/docker/compose/releases/download/1.29.2/docker-compose-Linux-x86_64" -o /usr/local/bin/docker-compose - Make
docker-composeexecutable:sudo chmod +x /usr/local/bin/docker-compose - Check the version of the installed Docker
Compose:
docker-compose --version
docker-compose version 1.27.4, build 40524192
Setting up a reverse proxy
Customizer Lite HA requires the use of a reverse proxy. The following is an example using NGINX.
Refer to steps 4 through 10 in Configuring the NGINX proxy server for Customizer.
About this task
The following steps provide the instructions for installing Customizer Lite and the configuration changes required for Connections to enable Customizer.
If deploying Customizer Lite, the files can be installed on the local storage of the single virtual machine.
If deploying Customizer Lite HA with multiple Docker nodes, place the files on a shared volume (such as NFS for Linux or SMB for Windows) so that all Docker nodes can mount and share the same Docker images and service configuration files. Mount the shared volume into the file system of each virtual machine before making the changes outlined below. Steps 1-7 below should only need to be performed once if directories are shared and mounted properly on each Docker node. Step 8 is repeated on all nodes to start the services.
Procedure
- Copy the Customizer Lite archive onto the required storage volume (either local or shared). For example, to /opt/install.
-
Extract the archive into the storage location. The archive will create
a subdirectory customizerLight. For
example:
mkdir -p /opt/hcl
cd /opt/hcl
yum -y install unzip
unzip /opt/install/IC-CustomizerLite-1.0.zip
There should be four subdirectories as shown below:
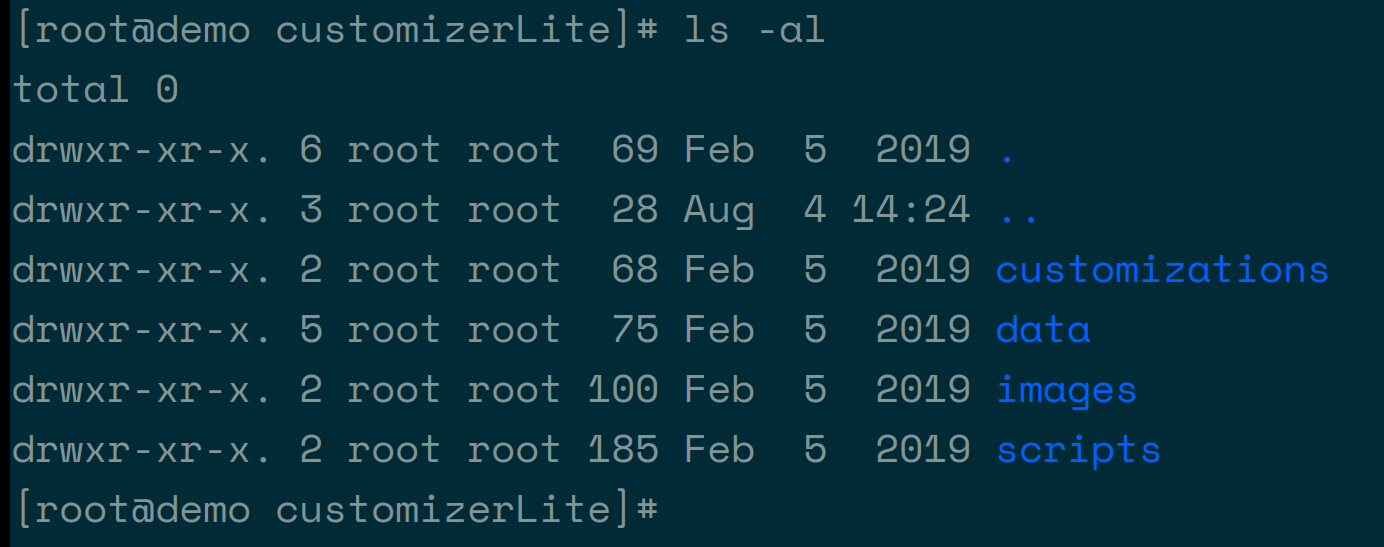 Where:
customizationsis where the customization files are placed. Initially, it will contain three files. These are required by Customizer and should not be deleted or moved.datais where application settings get saved.imagesis the directory for the three Customizer images.scriptsare scripts for deploying, starting, and updating Customizer.
- Set the read permissions on the customizerLite directory chmod -R 700 /opt/hcl/customizerLight.
-
In the customizerLite directory, change the
permissions of the following directories.
- chmod -R 005 customizations
- chmod -R 005 data
- chmod -R 007 data/settings
-
From the scripts directory, run the
setupImages.sh script. This will load all
three of the Customizer images into the Docker registry. To run the
script, execute the following:
Where:
./setupImages.sh -dr Docker_registry -u Your_user_name -p Your_password -st cs_lite- "Docker_registry" is the hostname of your Docker registry server (include port if applicable, for example, "dockerregistry.example.com:5000" or "localhost:5000").
- "Your_user_name" is your Docker registry user name, for example "admin".
- "Your_password" is your Docker registry password (for details, see the Docker registry section).
- "cs_lite" param. This does not change. It must be
cs_lite.
-
Run
docker imagesand make note of the full repository name for each of themw-proxy,appregistry-serviceandappregistry-client. For example, from the following:
You would extract:- localhost:5000/connections/appregistry-client
- localhost:5000/connections/appregistry-service
- localhost:5000/connections/mw-proxy
-
Edit the scripts/.env file.
Note: Files starting with a "." are hidden by default on Linux. Use
ls -a scriptsto list that file as well.- Set the two environmental variables in the .env file
as appropriate:
- "CONNECTIONS_URL" should be set to the FQDN of
the IBM HTTP Server (IHS) of your Connections
environment. For example,
cnx-ihs.example.comor simplyconnections.example.com - "NGINX_URL":
- For Customizer Lite HA environments, this
should be set to the hostname of the NGINX server
of your Connections environment, for example
cnx-nginx.example.com - For Customizer Lite installations, this should
point to the IBM HTTP Server (IHS) of your
Connections environment, for example
cnx-ihs.example.comor simplyconnections.example.com
- For Customizer Lite HA environments, this
should be set to the hostname of the NGINX server
of your Connections environment, for example
So, for example:- CONNECTIONS_URL=cnx-ihs.example.com
- NGINX_URL=cnx-nginx.example.com
- "CONNECTIONS_URL" should be set to the FQDN of
the IBM HTTP Server (IHS) of your Connections
environment. For example,
-
For each of the following sections replace the *_IMAGE values in the .env file with the corresponding repository name that you extracted from the
docker imagecommand earlier. For example:- MW_PROXY_IMAGE=localhost:5000/connections/appregistry-client
- APPREGISTRY_SERVICE_IMAGE=localhost:5000/connections/appregistry-service
- APPREGISTRY_CLIENT_IMAGE=localhost:5000/connections/mw-proxy
Important: If deploying Customizer Lite HA, the interval at which theappregistry-servicenodes check and sync their customization data cache can be modified by changing the value of this parameter (specified in milliseconds, default = 30 seconds):APPREGISTRY_SERVICE_CACHE_CHECK=30000
- Set the two environmental variables in the .env file
as appropriate:
-
NOTE: (Customizer Lite HA only) Edit the
scripts/docker-compose.yml file and in the
mw-proxyenvironment section, add the following line to ensure that the mw-proxy service accesses theappregistry-servicevia load balancer using this URL:APPREGISTRY_SERVICE_PROXY: ‘http://${NGINX_URL}’The environment section should then look similar to this:environment: USE_SSL: 'true' MW_REVERSE_PROXY: '${NGINX_URL}' CUSTOMIZER_INTERSERVICE_HOST: '${CONNECTIONS_URL}' CUSTOMIZER_INTERSERVICE_PORT: '443' IS_PRIVATE_CLOUD: 'true' REDIS_INSTALLED: 'false' LOCAL_DIRECTORY: '/mnt' ROARR_LOG: '${MW_PROXY_LOGGING_ENABLED}' APPREGISTRY_SERVICE_PROXY: 'http://${NGINX_URL}' -
Assuming all the prerequisites are in place and Connections is
configured, Customizer can now be started in two ways:
- The command
docker-compose up, which will output logs to the terminal. - Running the script update-all-services.sh, which will return the command prompt.
Docker-compose upmust be run from within the scripts directory.Important: For Customizer Lite HA only, this step is repeated on each of the Docker nodes to start the services on each. - The command