Preparing for installation
Configure Single Sign-On and install an iFix for Connections 6.0 installations. Then, edit the installation properties file before running the installation program for HCL Connections Engagement Center.
Before you begin
Single Sign-On integration between HCL Connections applications must be configured. See Configuring Single Sign-On. Single Sign-On for the Windows desktop with Kerberos is also supported, but is optional.
Procedure
- On the Deployment Manager where you will install Connections Engagement Center, log on as root (AIX, Linux) or the system administrator (Windows).
-
If you're running HCL Connections 6.0, download and install iFix: HCL Connections: 6.0.0.0-IC-IFLO92684. The ifix is not needed
for Connections 5.5 environments.
For information on installing an iFix, see Installing interim fixes in interactive mode.
- Create a directory to contain installation files; for example: /opt/software/icec-installer.
- Download the Connections Engagement Center installation package and extract it to the new directory.
-
Open and edit the install.properties file to configure settings for your
environment.
- Enter WebSphere Application Server environment names. Note that the
profilePathisn't the full path, but just the part afterwasRoot. For example: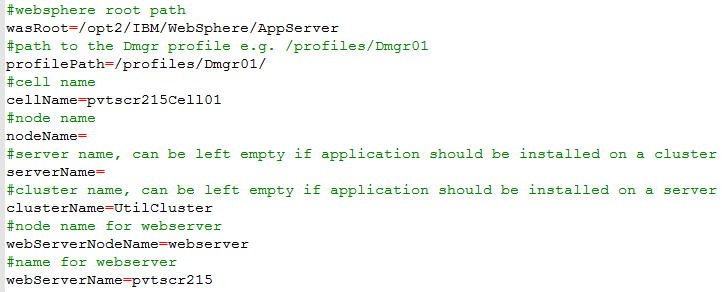 Note that for Windows, the
wasRootandprofilePathuse backslashes. For example:#websphere root path wasRoot=C:\IBM\WebSphere\AppServer #path to the Dmgr profile e.g. /profiles/Dmgr01 profilePath=\profiles\Dmgr01 - Enter the name for the JDBC Provider if you are creating a JDBC Provider that is separate from
the one used for Activities. By default, ICEC uses the Activities JDBC Provider. The following
example shows the same userId and password used by the script to create an Oracle database.
Credentials here must always match those in the database creation script.

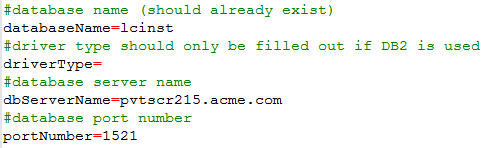
- Enter the database details for your environment. For example:
- Enter the name for the datasource and datastore helper. For example:

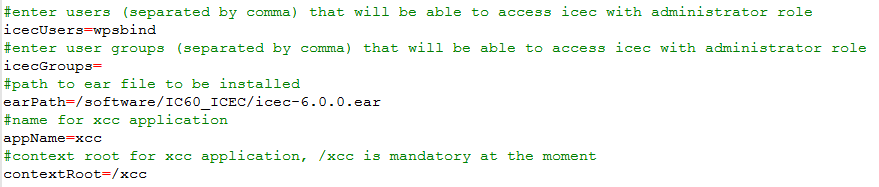
- Enter admin names, group names, path to ear file, app name, and context root. For
example:
 Note: The installer supports the following system encodings: codepage 850, 437, 65001. If the operating system is configured to use a different codepage, 932 for example, follow these instructions:
- Change the earPath in the installation.properties file as follows:
earPath=icec-6.0.1.ear - Move the icec-6.0.1.ear file to the installer directory. In the example above it would be icec-installer.
Note: The path to the ear file on Windows uses forward slashes. For example:#path to ear file to be installed earPath=C:/Downloads/icec/icec-6.0.1.ear - Change the earPath in the installation.properties file as follows:
- Save and close the install.properties file.
- Enter WebSphere Application Server environment names. Note that the