

DPTK Installation - Customization guide
Customize Text (NLS)
Identify DPTK configpath
To customize DPTK texts in the UI, you can create files containing the customized values for the respective NLS keys. NLS keys are identifiers that map the text for different languages to the same field.
First, find the path containing your DPTK configuration. If you have set the path via configuration already (by adjusting the configuration value configpath - see the Configuration documentation), navigate to this path.
If you have not manually set the configpath it will be automatically calculated via the CONNECTIONS_CUSTOMIZATION_PATH WebSphere Variable. To find your path, do the following:
- In the WAS console, navigate to Environment > WebSphere variables
- Search for the set value of the variable CONNECTIONS_CUSTOMIZATION_PATH
Once found, look for the dptk configpath by navigating to the parent folder of the CONNECTIONS_CUSTOMIZATION_PATH folder. There, you should find the folder dptk.
Find the text attribute you want to change
Open the current NLS file used by DPTK via the browser. You can do so by navigating to the URL https://connections_host/dptk/nls/locale_LANG.json, where LANG is the language you want to access (de, en, …). In this file, you will find all available text phrases. Identify the one you want to change.
Alternatively, you can use the URL https://connections_host/dptk?nlsIgnore=true to display the DPTK UI with only the language keys. With this, you can find the name of the text to be changed by looking at the position where the text should appear.
Add a custom NLS file
In the configpath folder, create a folder nls.
[cnx@server dptk]$ mkdir nls
Create a file for the language you want to customize, under the name custom_LANG.json, where LANG is the language you want to access (de, en, …).
[cnx@server nls]$ touch custom_en.json
Add the language key you want to change in the correct object order, and set the value to the text that should be displayed in the UI. E.g. in case we want to customize the Start report button, add the following JSON object to the file content:
{
  "dptk" : {
    "button" : {
      "start" : "Let's Rock"
    }
  }
}
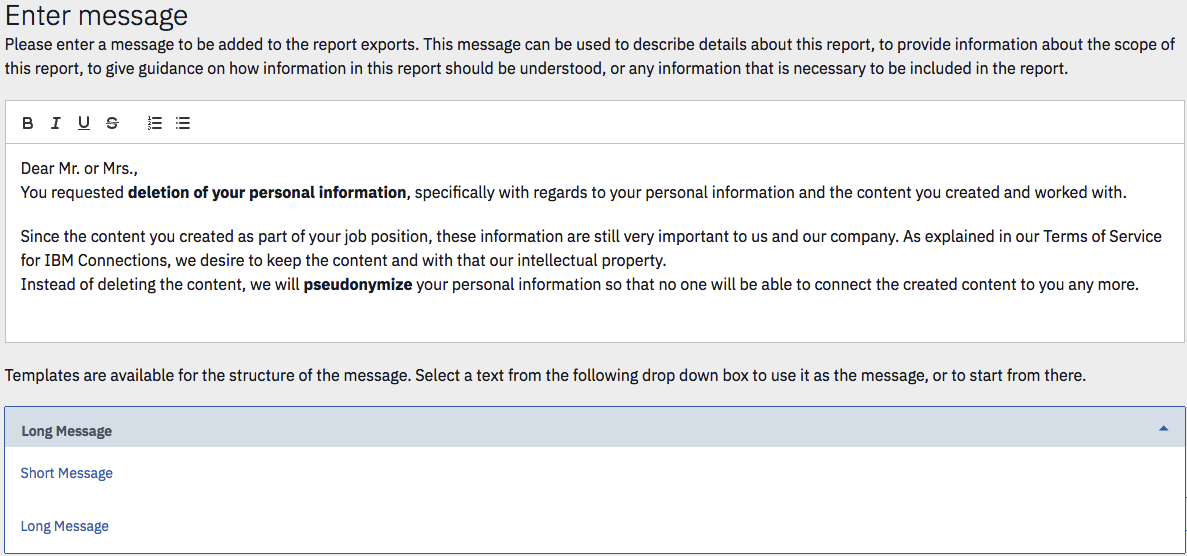
Add custom message templates
In order to use a message from a pre-defined set of templates, following section must be added to each custom language file:
{
  "dptk" : {
    "prepare": {
        "messageTemplates": {
            "messageTemplate1": {
                "key": "Short Message",
                "value": "<p>Dear Mr. or Mrs.,</p><p>You requested a report to obtain your personal information being stored in HCL Connections. This report lists all your personal information as well as where it is used.</p><p><br></p><p>The information was searched in the following data stores</p><ul><li>HCL Connections modules: Activities, Blogs, Communities, Bookmarks, Files, Forums, Profiles, Wikis</li><li>HCL Connections content stores: Binaries (Activities, Files, Wikis), Fulltext content</li></ul><p><br></p><p>All information regarding other users (e.g. authors of content you were mentioned in)</p>"
            },
            "messageTemplate2": {
                "key": "Long Message",
                "value": "<p>Dear Mr. or Mrs.,</p><p>You requested <strong>deletion of your personal information</strong>, specifically with regards to your personal information and the content you created and worked with. </p><p><br></p><p>Since the content you created as part of your job position, these information are still very important to us and our company. As explained in our Terms of Service for HCL Connections, we desire to keep the content and with that our intellectual property. </p><p>Instead of deleting the content, we will <strong>pseudonymize</strong> your personal information so that no one will be able to connect the created content to you any more.</p>"
            }
        }
    }
  }
}
The convention messageTemplate + NUMBER, allows to add as much custom message templates as needed.
Note: The template messages allow to use simple HTML tags such as lists, paragraphs and font styles such as strong or i(talic).
Reset customization cache
To make the customizations become effective, you can either restart the server or requesting the URL https://connections_host/dptk/nls/locale_LANG.json?cache=false in the browser. The URL will reload the language file for the specified language, taking into account any customizations that might have been added.
Refresh the DPTK UI to see the changes.
Add HCL Connections extension attributes to the pseudonymization handling
In order to leverage the Data Privacy Toolkit for profile extension attributes, some additional configuration is necessary. Important to note: not all extension attributes can be handled via the Data Privacy Toolkit. Currently DPTK doesn’t support XML/XSD based attributes (see https://www.ibm.com/support/knowledgecenter/en/SSYGQH_6.0.0/admin/customize/r_admin_profiles_attributes_ext.html ).
Configuring extension attributes
To configure an extension attribute to be handled within DPTK, e.g. the attribute <simpleAttribute extensionId="twitterName" length="256"/>, add the attribute to the profile.anonymize.attributes configuration parameter - in this case add extattr.twitterName (-> extattr. + attributeName). If the profile.anonymize.attributes parameter doesn’t exist yet, please create it first, using the Default value defined in the Configuration.
If the parameter is valid and has a value, it will appear in the list of attributes during manual pseudonymization and will be handled in manual and automated pseudonymization (by default the value will be emptied).
Adjusting the frontend for the extension attribute
By default, the attribute will be displayed in the UI with a generated key like dptk.cmpt.profileTile.attribute.twitterName (-> dptk.cmpt.profileTile.attribute. + attributeName). To use the same name used within your HCL Connections environment, please refer to the Cutomization guide.