Permissions Set in the BigFix Console
In this page, you can fine instructions to manage the WebUI permissions set in the BigFix Console.
Detailed procedures, including a description of how explicit and effective permissions work, appear below. To summarize: use the Console's All Content > WebUI Apps screen to set permissions for operators and roles. Or manage the same settings from the All Content > Operators > WebUI and All Content > Roles > WebUI screens. To control access to the WebUI log-in page, use the All Content > Operators > Details and All Content > Roles > Details screens.
Set Permissions: WebUI Apps Screen
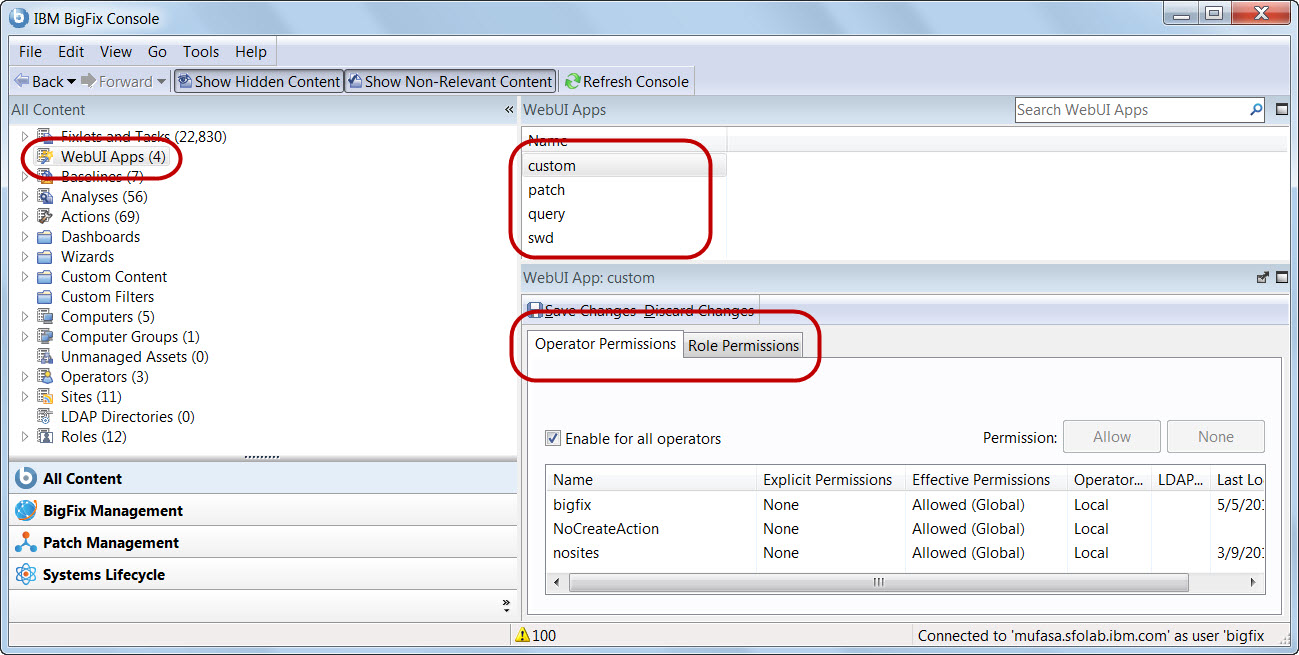
- Select a WebUI application.
- Select the Operator or the Role tab, and then an
operator or role.
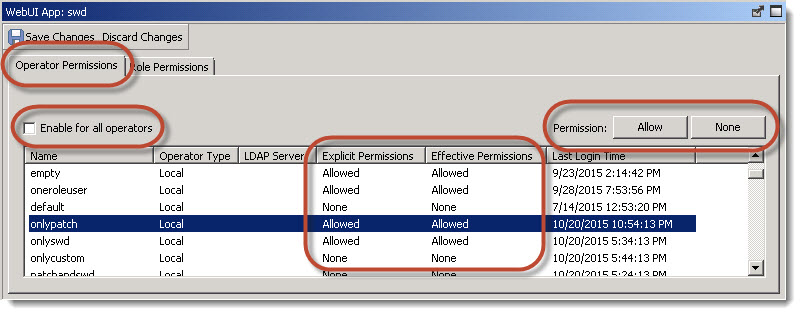
- Click the Allow button to grant access, or the None button to disable access.
- Click Save Changes.
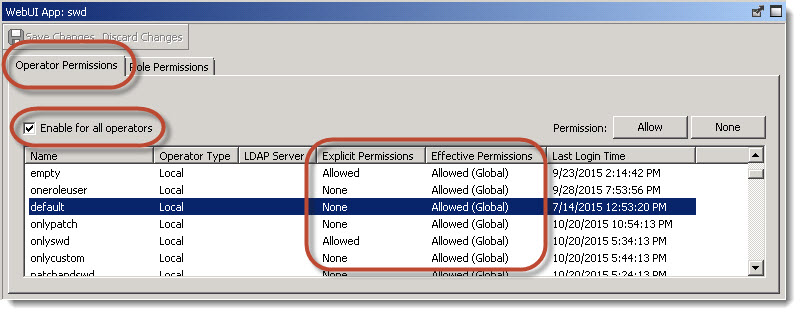
To grant access to all operators with one click check the Enable for All Operators box.
Permissions granted directly to an operator are called explicit
permissions. Permissions
granted indirectly to one or more operators (for example, through a role) are known as
effective
permissions. What happens when there is a conflict between an operator's explicit
and effective permissions? For example, what happens when access to the Patch application is enabled
for Operator A, but disabled for a role to which Operator A is assigned? When this happens BigFix
applies the least restrictive of the two settings, and the result is the effective permission. The
table shows the result for each set of explicit permissions.
| Explicit Permissions | Effective Permission |
|---|---|
|
Yes – Granted to operator. |
Yes |
|
No – Disabled for operator. |
No |
|
Yes – Granted to operator. |
Yes |
|
No – Disabled for operator. |
Yes |
|
No – Disabled for operator. |
Yes |
Allowedto
Allowed (Global).
Set WebUI Permissions: Operators Screen
To grant or remove access to WebUI components for an operator:
- Go to All Content > Operators > WebUI Apps tab.
- Select an operator.
- Select a WebUI application.
- Click the Allow or None to grant or disable access.
- Click Save Changes.
Set WebUI Permissions: Roles Screen
To grant or remove access to WebUI components for a role:
- Go to All Content > Operators > WebUI Apps tab.
- Select a role.
- Select a WebUI application.
- Click the Allow or None to grant or disable access.
- Click Save Changes.
The Create Actions Privilege
An operator whose Can Create Actions permission is set to No cannot deploy content, but can still see deployments made by others.
To set Create Action permissions to No:
- Go to All Content > Operators > Details or All Content > Roles > Details.
- Scroll down to the Permissions pane and set Can Create Actions to
No
. - Click Save Changes.

Disable Log-in Access to the WebUI
To disable WebUI access for an operator or role completely, turn off access to the log-in page. This option rejects a user’s log-in credentials.
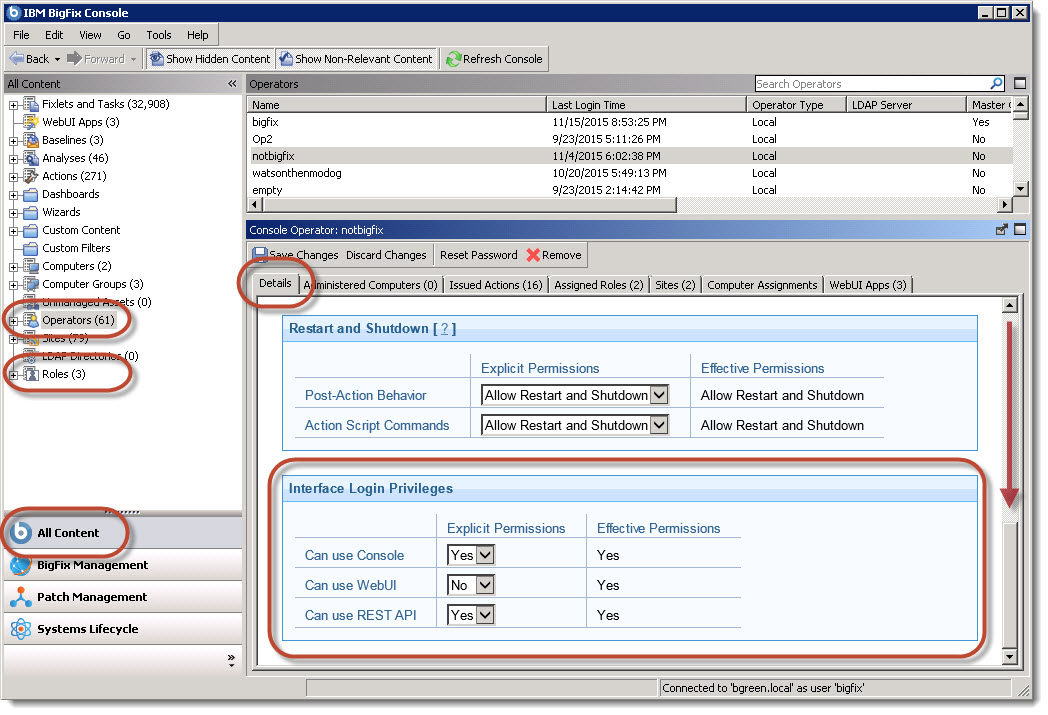
To grant or remove WebUI login access for an operator:
- Go to All Content > Operators > Details tab.
- Scroll down to Interface Login Privileges.
- Set Can Use WebUI to
Yes
orNo
. - Click Save Changes.
To grant or remove WebUI login access for a role:
- Go to All Content > Roles > Details tab.
- Scroll down to Interface Login Privileges.
- Set Can Use WebUI to
Yes
orNo
. - Click Save Changes.