Managing Application Updates
Use the Application Update Manager to:
- Display version information for each WebUI application.
- View and apply available updates.
- Run an ad hoc gather of WebUI sites.
- View AutoUpdate settings.
To display the Update Manager, click the Settings icon on the navigation bar. Only Master Operators see this icon.
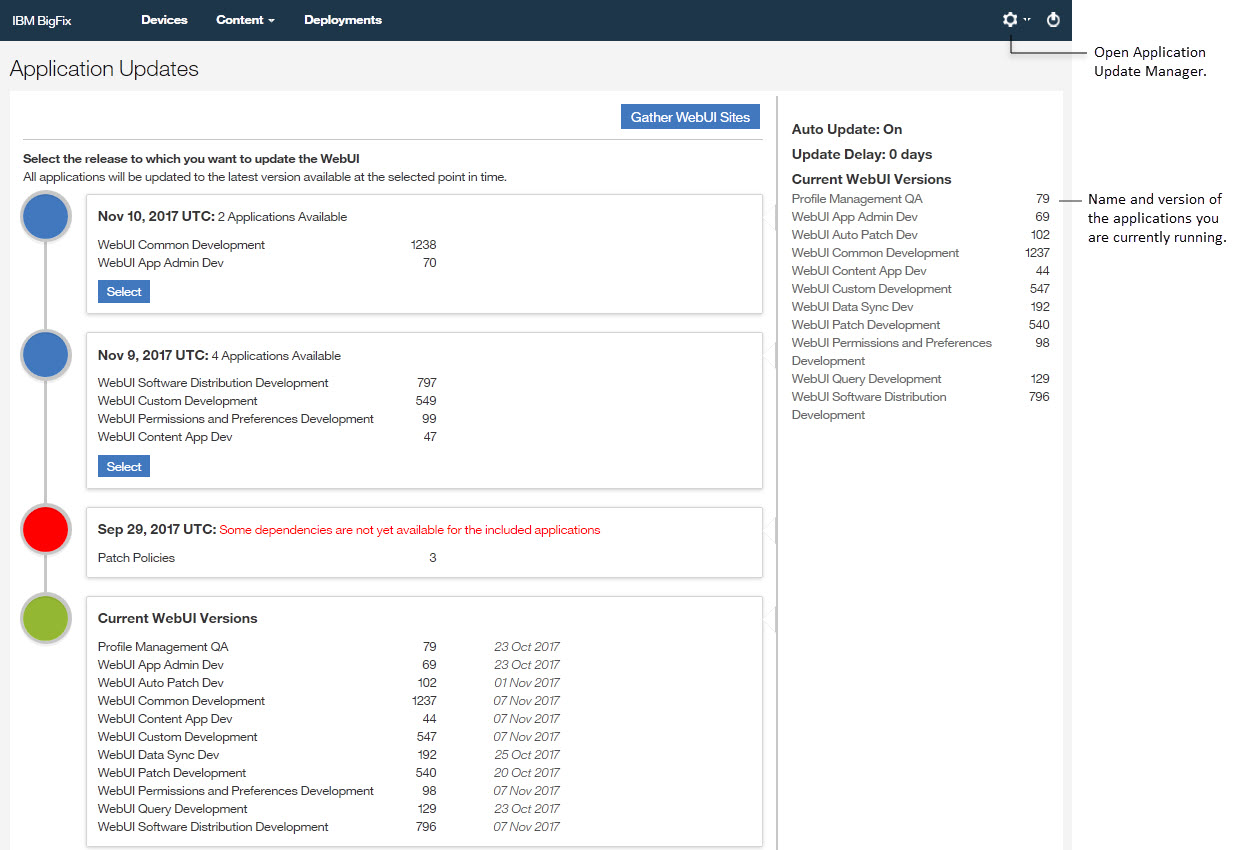
Version numbers reflect an application's site. For example, the Patch application resides in the WebUI Patch site; the WebUI application, which includes the Common application and the Login application, resides in the Common site.
On BigFix platform versions 9.5.7 and above the Gather button appears on the Update Manager. On V9.5.7 the BigFix server checks for new versions of WebUI sites every 6 hours. Use Gather button to retrieve any new versions that have been released since the last gather occurred.
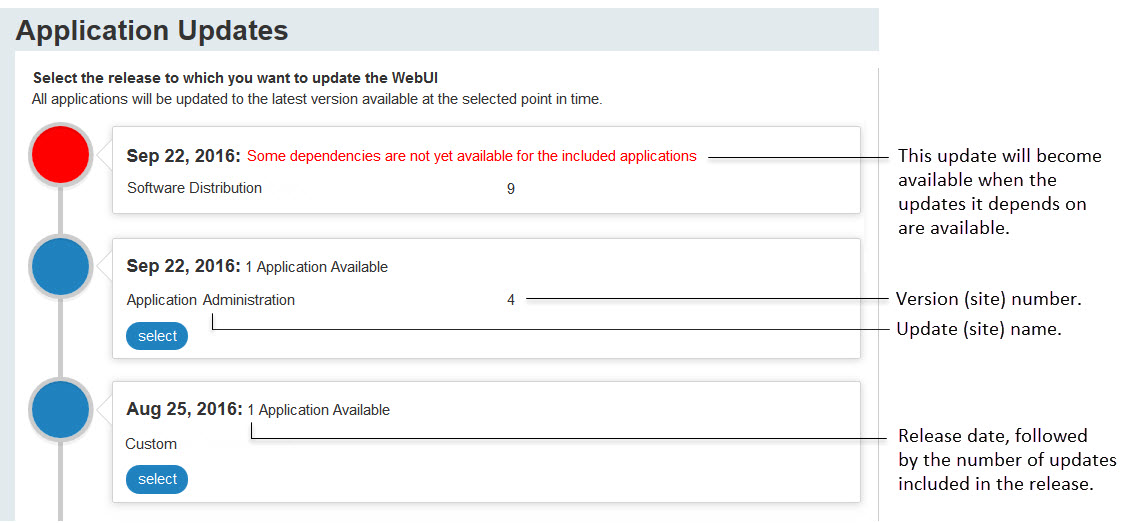
When you update an application, the selected update and all the preceding updates are applied. Internal dependency checks prevent you from updating an application that depends on a version of another application that is not yet available. For example, you cannot install a version of the WebUI Patch application that depends on features in the Common Application that have not yet been released.
WebUI services remain available during updates. To update an application:
- Click Select. A confirmation dialog shows the version you will be running following the update.
- Click Update Now to complete the operation, or
Cancel to return to the Update
Manager.
Take into account that the WebUI service will be automatically restarted if you are updating the WebUI Common application.
- You cannot roll back to an earlier version once an update has been applied.
- When AutoUpdate is on and the delay period is set to 0, the number of available updates in the Update Manager will be 0, because updates are automatically applied. When AutoUpdate is on and the delay period set to 30 days, the number of available updates will extend back 30 days (because updates older than 30 days have been applied).
- When AutoUpdate is off, the number of available updates will extend back in time for an indefinite period.
- The attended restart of the WebUI service after updating the WebUI Common application is available only starting from Patch 17.
AutoUpdate and AutoUpdateDelay
Use the AutoUpdate feature to automatically apply new versions of WebUI applications as they become available. When AutoUpdate is on, WebUI application updates are automatically applied. When AutoUpdate is off, updates to WebUI applications must be applied manually. Use the AutoUpdateDelay setting to control the timing of automatic updates when AutoUpdate is on. Set them to install immediately (Update Delay = 0 days), or delay them for up to 30 days. Reasons to delay automatic updates might include:
- Providing time to update a procedure that will change as a result of new features.
- Trying a new version of an application on a test deployment before installing in on a production system.
- Staying on a specific WebUI version for these or other reasons.
When the WebUI is installed the AutoUpdate function defaults to on, and the AutoUpdateDelay defaults to 0 days. To adjust the AutoUpdate and AutoUpdateDelay settings, use the BigFix console on the computer where the WebUI service is installed.
- On the BigFix Console, select Computers.
- Right-click the WebUI server (either the BigFix server, or a remote machine).
- Select Edit Computer Settings.
- Select the setting that you want to change.
- For AutoUpdate, select
_WebUIAppEnv_APP_UPDATE_ENABLE_AUTO. When set to 1, WebUI applications automatically update to the most recent versions in the Pending Sites cache. When set to 0, AutoUpdate is Off. - For AutoUpdateDelay, select
_WebUIAppEnv_APP_UPDATE_DELAY_DAYS. Enter the number of days to wait between updates. The Delay range is 0 - 30 days; the default is 0 days.
- For AutoUpdate, select
Disaster Recovery
To quickly restore specific versions of your WebUI applications after a system crash, schedule regular backups of the Sites and Pending Sites folders, which are located in the WebUI folder on your WebUI server. The Sites folder stores the versions of the WebUI applications you are currently running. The Pending Sites folder (within the Sites folder) stores the versions that have become available but have not yet been installed.
- To restore your system by using backups, drop the backed-up files into the Sites and Pending Sites folders.
- To use the latest versions of the WebUI applications after a crash, restart the WebUI server.
- To generate a list of the most recent versions of each application you were using before the
crash, check the dashboard variable by using the Relevance
statement:
shared variable (WebUIAppAdmin
,Current_Sites
)
If the backups become unavailable, contact Technical Support; they will be able to provide additional options.