Configuring the NIM client
Use the NIM Installation and Setup Dashboard to define a NIM client to the NIM master. The NIM master cannot take any operation on a NIM client if the NIM client is not defined.
Before you begin
- Ensure that the required NIM client filesets are installed.
- When you define a NIM client to the NIM master, the NIM master must be able to resolve the host name of the NIM client and vice versa. If the host name is not resolved, you get only limited NIM functions.
About this task
- There are two ways to define NIM clients to a NIM master. The NIM master can define NIM clients to itself or, if allowed by the NIM environment, the NIM client can define itself to the NIM master.
- When you define a NIM client through the NIM master, the NIM master does not contact the NIM client. As a result the NIM client must be initialized separately. See Initializing the NIM client.
- A NIM client can be registered to only one NIM master at a time.
- NIM masters cannot be clients to any other NIM master.
Procedure
- From the BigFix console, click .
- Click NIM Client Configuration.
- Select the method that you want to use to define the NIM
client to the NIM master.
Figure 1. Ways to define the NIM client the NIM master 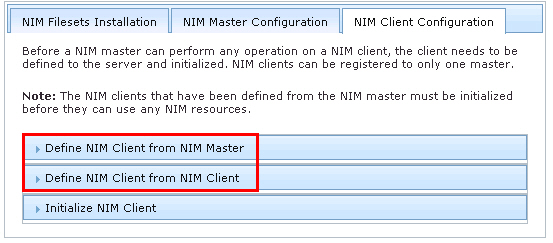
- If you want to define the NIM client from a NIM master, complete
the following steps:
- Click Define NIM Client from NIM Master.
- Enter the machine name. For example, clientname
- Enter the machine type. For example, stand-alone
- Enter the hardware platform type. For example, chrp
- Select the kernel to use to boot the network.
- Select the communication protocol that is used by the NIM client.
- Enter the required information for the primary network installation
interface:
- NIM network name. For example, master_net
- Host name. For example, client_hostname
- Cable type (for Ethernet only)
- Optional: Enter extra network information:
- Network speed setting
- Network duplex setting
- Network adapter hardware address. For example, 0
- Network adapter logical device name
Note: You can also create a NIM network for the NIM client. If you choose to do so, you must provide the Subnet mask, default gateway that is used by the machine and master, network type, and Ethernet type. - Optional: Enter the IPL ROM emulation device.
- Optional: Enter the CPU ID.
- Optional: Enter the machine group.
- Optional: Enter any comments.
- If you want to define a new NIM client to the NIM environment
from another NIM client, complete the following steps:
- Click Define NIM Client from NIM Client.
- Enter the machine name. For example, clientname
- Enter the primary network installation interface. For example, en0
- Enter the host name of the network installation master. For example, master_hostname
- Optional: Enter the hardware platform type. For example, chrp
- Optional: Select the kernel to use to boot the network.
- Optional: Select the communication protocol that is used by the NIM client.
- Optional: Enter any comments.
For more information about the NIM parameters, see the IBM AIX information center.Note: The AIX information centers are version-specific. To see the list of available AIX information centers, see the IBM AIX resources at: http://www-03.ibm.com/systems/power/software/aix/resources.html. - If you want to define the NIM client from a NIM master, complete
the following steps:
- Optional: Select the check box to create a one-time action rather than to create a reusable Fixlet.
- Click Create Action.
- Deploy the action.The created action targets a NIM master and defines clients to that target system.