Rapid7 support
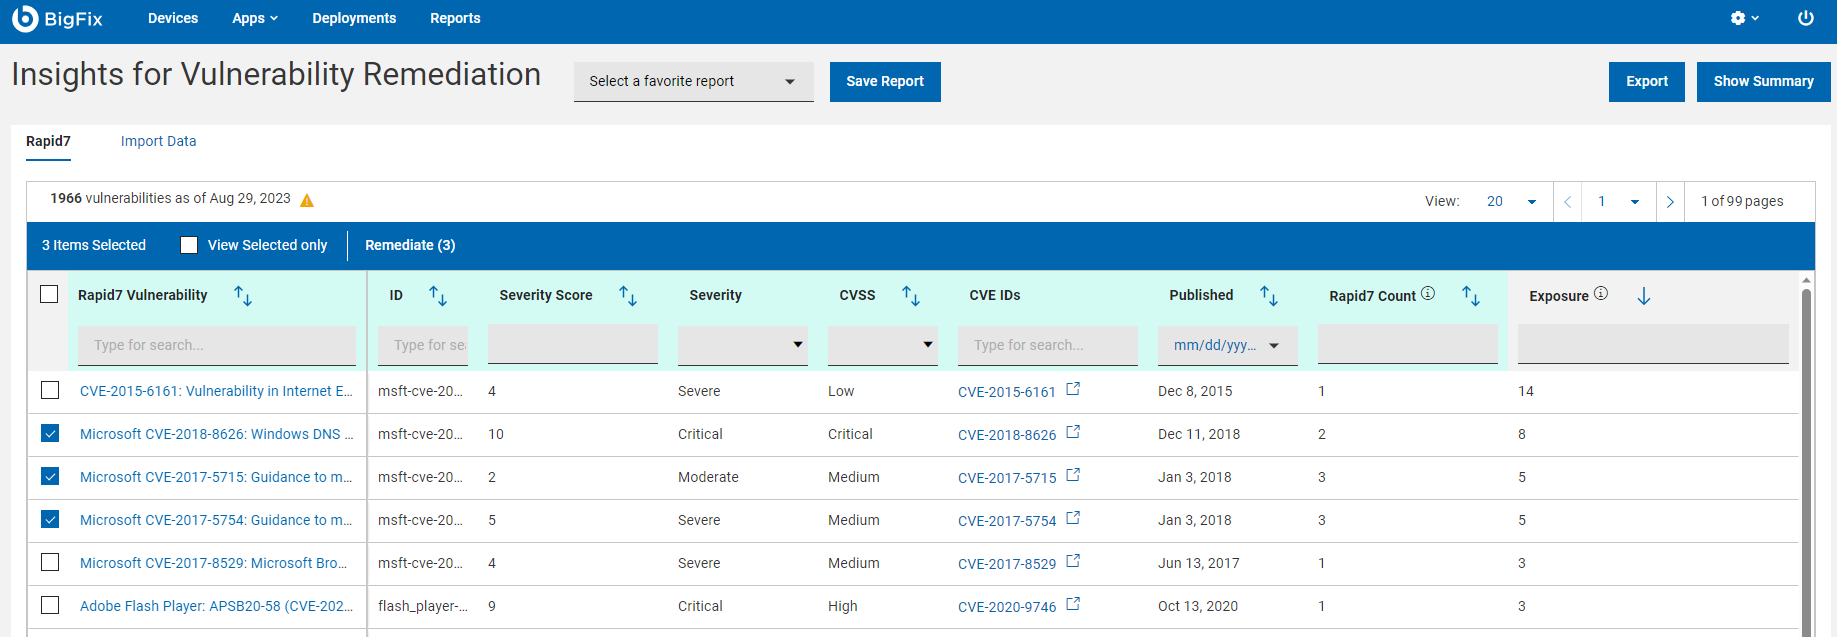
IVR integration with Rapid7 allows BigFix to retrieve vulnerability data, correlate it with devices, and recommend remediation actions based on CVEs. It also provides detailed reports on vulnerability severity and exposure dates, enhancing overall vulnerability management.
Note: Rapid7 support is configured and managed
directly through the WebUI.
To add Rapid7 data source:
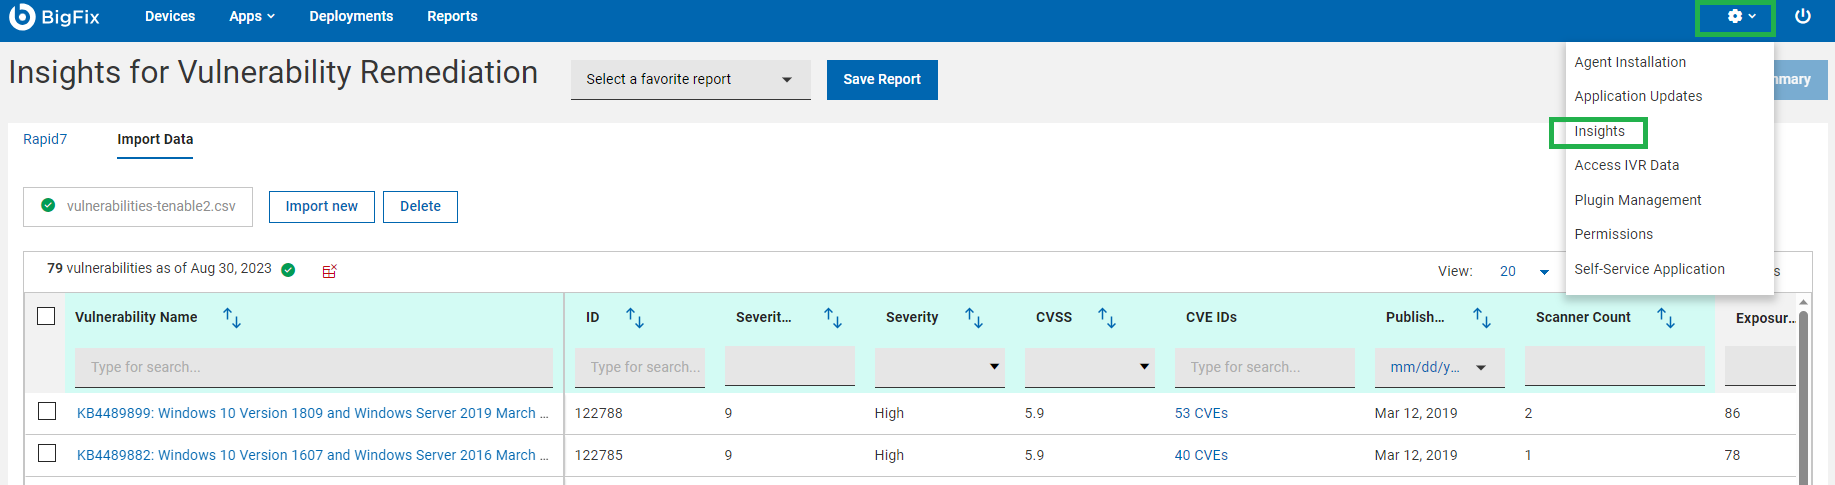
- Click the gear icon located in the navigation bar within the WebUI app and
select Insights. This action will direct you to the Setup BigFix Insights
page.
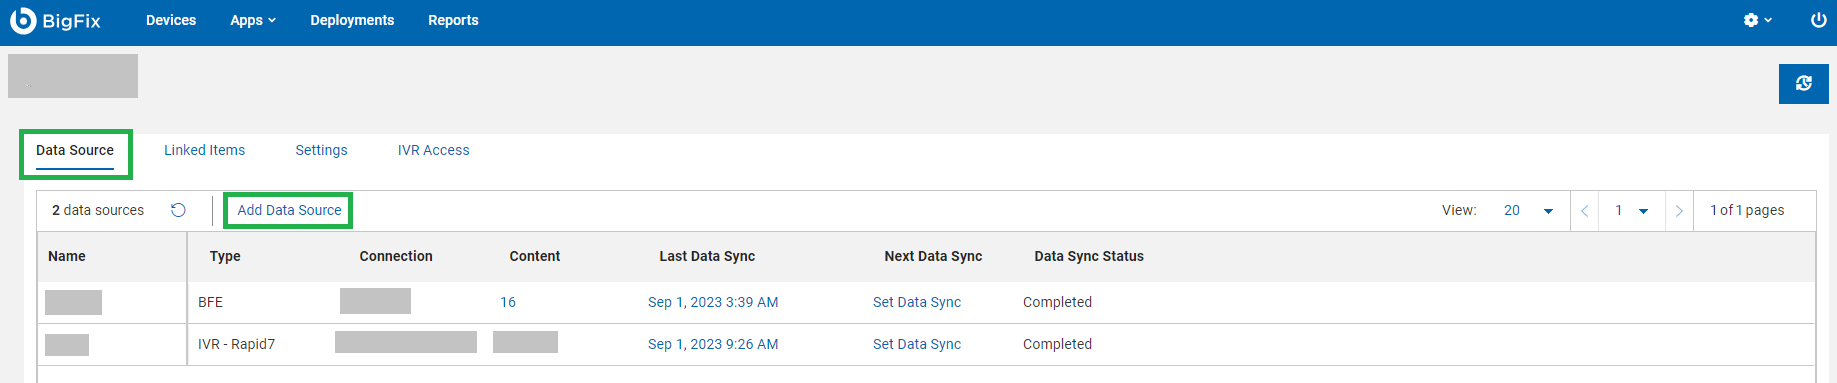
- Navigate to the Data Source tab and click on Add Data
Source.
- Select the Rapid7 data source type and provide the following essential
details:
- Data Source Alias
- API keyNote: The API key must have access to the following Rapid7 API resources:
- https://{region}.api.insight.rapid7.com/vm/v4/integration/vulnerabilities
-
https://{region}.api.insight.rapid7.com/vm/v4/integration/assets
Please refer to https://docs.rapid7.com/insight/managing-platform-api-keys/ and select the correct key type based on the organization's principle of least privilege.
- Region - region code of API endpoint.
As of the publication of this article, the Region Codes are:
For more information on the region code, please refer to the Rapid 7 official documentation.Region Region code United States us United States us2 United States us3 Europe eu Canada ca Australia au Japan ja - Data start date: the date from which you want to start pulling the data for scans
- Associated Datasources: pick the specific datasource from which you intend to extract data
- Filter string: Use this field to apply filters to vulnerabilities as required. For instance: {“vulnerability”:”vulnerability.riskScoreReal>750”} - this filter will exclude vulnerabilities with a risk score exceeding 750. The accepted format for filters is JSON. To view available filters in the Rapid7 query builder, please refer to the Rapid 7 official documentation.
- Proxy Attributes
- A new data source is now ready to pull Rapid 7 data into the Insights database.
To arrange your ETL process, click Set up ETL. For more instructions on
configuring ETL, refer to Scheduling an ETL.Note: It is important to initiate the Rapid7 ETL after the BFE ETL is finished. New devices added to your BigFix environment will be integrated into Insights once you execute another data synchronization.
- Go to IVR Access tab and grant access. For more information on how to grant access see IVR Access.
- Navigate to Apps and select IVR from the dropdown menu. Your Rapid7 data is now
accessible. To activate the action bar, select one or more vulnerabilities from
the data grid.