Editing a test policy
Test Policy view can be used to fine-tune your selected test policy.
About this task
You can fine-tune the current test policy by adding or deleting tests, and also export the changed configuration as a user-defined test policy for future use.
Procedure
-
In Configuration Configuration > Test policy and optimization select or Browse
to the policy.
The policy name appears in the drop-down field.
- Click Manage test policy.
-
Include/exclude tests or variants by selecting/deselecting the check box(es). (To view
individual variants, click the > icon next to a Test Name.)
Note: For each test the following information is listed: Name, Variant ID, CVE ID, CWE ID, Severity assigned to the issue (and whether the severity is CVSS or user-assigned), Type, Invasiveness, WASC threat classification, and XFID (X-Force ID). You can Sort tests by any of these fields, by clicking on the column header.Note: The Search facility lets you search for tests using free text search.
-
New tests are continually being added to AppScan's database of tests. By default, all
new tests except Invasive tests are added to all user-defined test policies. However, you
can define which groups in your policy will be updated: On the vertical three-dot menu
Update Settings, select/deselect check boxes in the Policy update
settings.
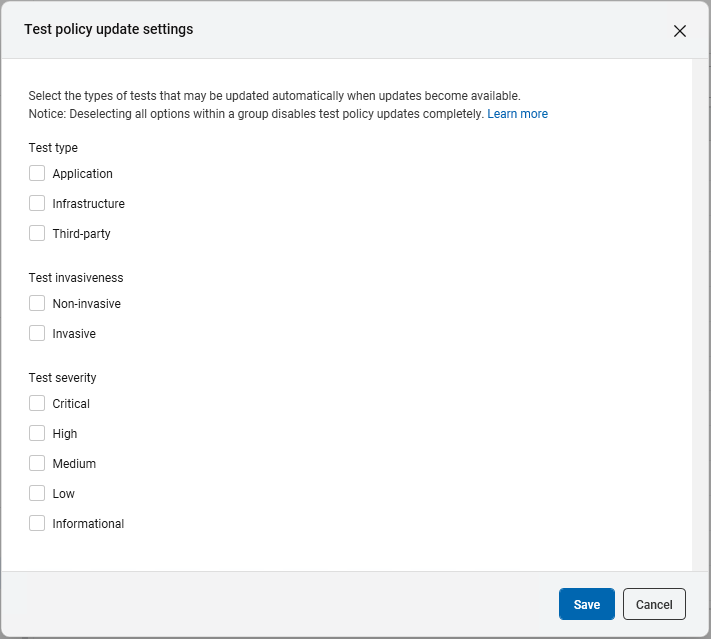
The dialog box contains three groups: Test Type, Test Invasiveness, and Test Severity. Only the tests that belong to a selected category in all three groups will be added to the current policy, when new tests are added to your AppScan® database of tests. For example: If you select High Severity, but deselect Invasive, high severity, invasive tests will not be added to this policy when updates become available.
- Optional: Name the modified test policy and save it for future use (click Export, and save in .policy format).
- Optional: To view all the tests per version of AppScan Standard, you can export the entire list of tests (only tests, not the variants) to a CSV file, regardless of whether the tests are enabled. On the vertical three-dot menu, click Export all tests to CSV.