Configuring HCL Z and I Emulator for Web with HCL License Server
Table of Contents
- I. Introduction
- II. Pre-requisites
- III. Configuration Steps
I. Introduction:
HCL ZIE for Web (ZIEWeb) product is license based, user must configure licensing to use the product.
This document describes the procedure to configure licensing with HCL License Server (HCL Software License & Download Portal).
There are two ways to configure the ZIEWeb client to HCL Licensing. Direct HCL Licensing is introduced in ZIEWeb version 2.0.1.
- Direct HCL Licensing
In this method, the ZIEWeb client directly communicates with “HCL License Server" for licensing.
- HCL Licensing via “License Manager”
In this method, licensing mechanism is managed by HCL License Manager (LM).
II. Pre-requisites:
Direct HCL Licensing:ZIEWeb communicate to “HCL License Server" or “HCL Common Local License Server”(CLLS) for Licensing.
- Registration to HCL Software License & Download Portal ( Click here )
- User ID, HCL License Server device, Licensing Entitlements in HCL Software License & Download Portal ( Click here )
- ZIEWeb package
- The “HCL Common Local License Server”(CLLS) package, only in case of ZIEWeb configuration with the“HCL Common Local License Server”(CLLS)- ZIEWeb supports the “HCL Common Local License Server”(CLLS) 2.0 onwards.
HCL Licensing via “License Manager":
The License Manager administers the license acquisition and release for all its clients. ZIEWeb as a client sends the license acquisition and release requests to the License Manager server, which in turn forwards the requests to “HCL License Server". The HCL License Server can be “ HCL License Server” or “HCL Common Local License Server”(CLLS).
- Registration to HCL Software License & Download Portal ( Click here )
- User ID, HCL License Server device, Licensing Entitlements in HCL Software License & Download Portal ( Click here )
- ZIEWeb package
- CLLS package, only in case of “License Manager” configuration with “HCL Common Local License Server”(CLLS)
- Public and Private SSH Key Pair
License Manager Enhancement (Web Client):
When the user launches an HTTPS secure connection with client authentication enabled in the browser, the unique user will be a combination of IP address instead of the system username and the common name (which reads from the certificate the client is presented with while accessing the HTTPS secure connection).
User use Cloud deployed HCL License Server from HCL Software License & Download Portal ( Click here ) or the CLLS installed in Windows or Linux Server.
- For Windows Operating System, Click here.
- For Linux Operating System, Click here.
III. Configuration Steps:
- Direct HCL Licensing
- HCL Licensing via License Manager
A. Configuration Steps for “Direct HCL Licensing"
Step-1 : Download the Product and License Server (CLLS) from HCL Software License & Download Portal
-
Copy and paste the following link in a browser address bar to access the HCL Software License & Download Portal login page. https://hclsoftware.flexnetoperations.com/flexnet/operationsportal/logon.do
Enter the authorized login credentials and click Login, it redirects to Home Page.
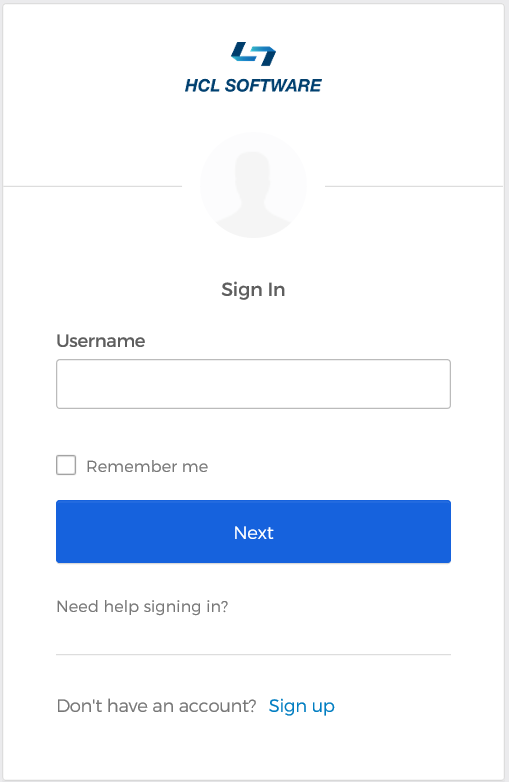
Figure 1: Home Page
- From the Downloads, click List Downloads. It redirects to
Downloads page.
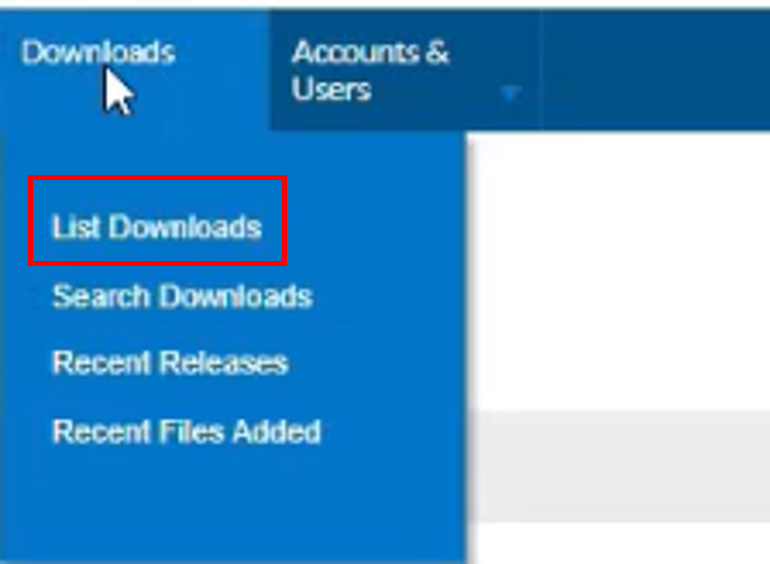
Figure 2: Products List
Download Product
-
Select the HCL Z & I Emulator (ZIE) from the list of products. It redirects to the Download Packages page. The below image displays a keyword entered in the search field, to find the “HCL ZIE Family products”.
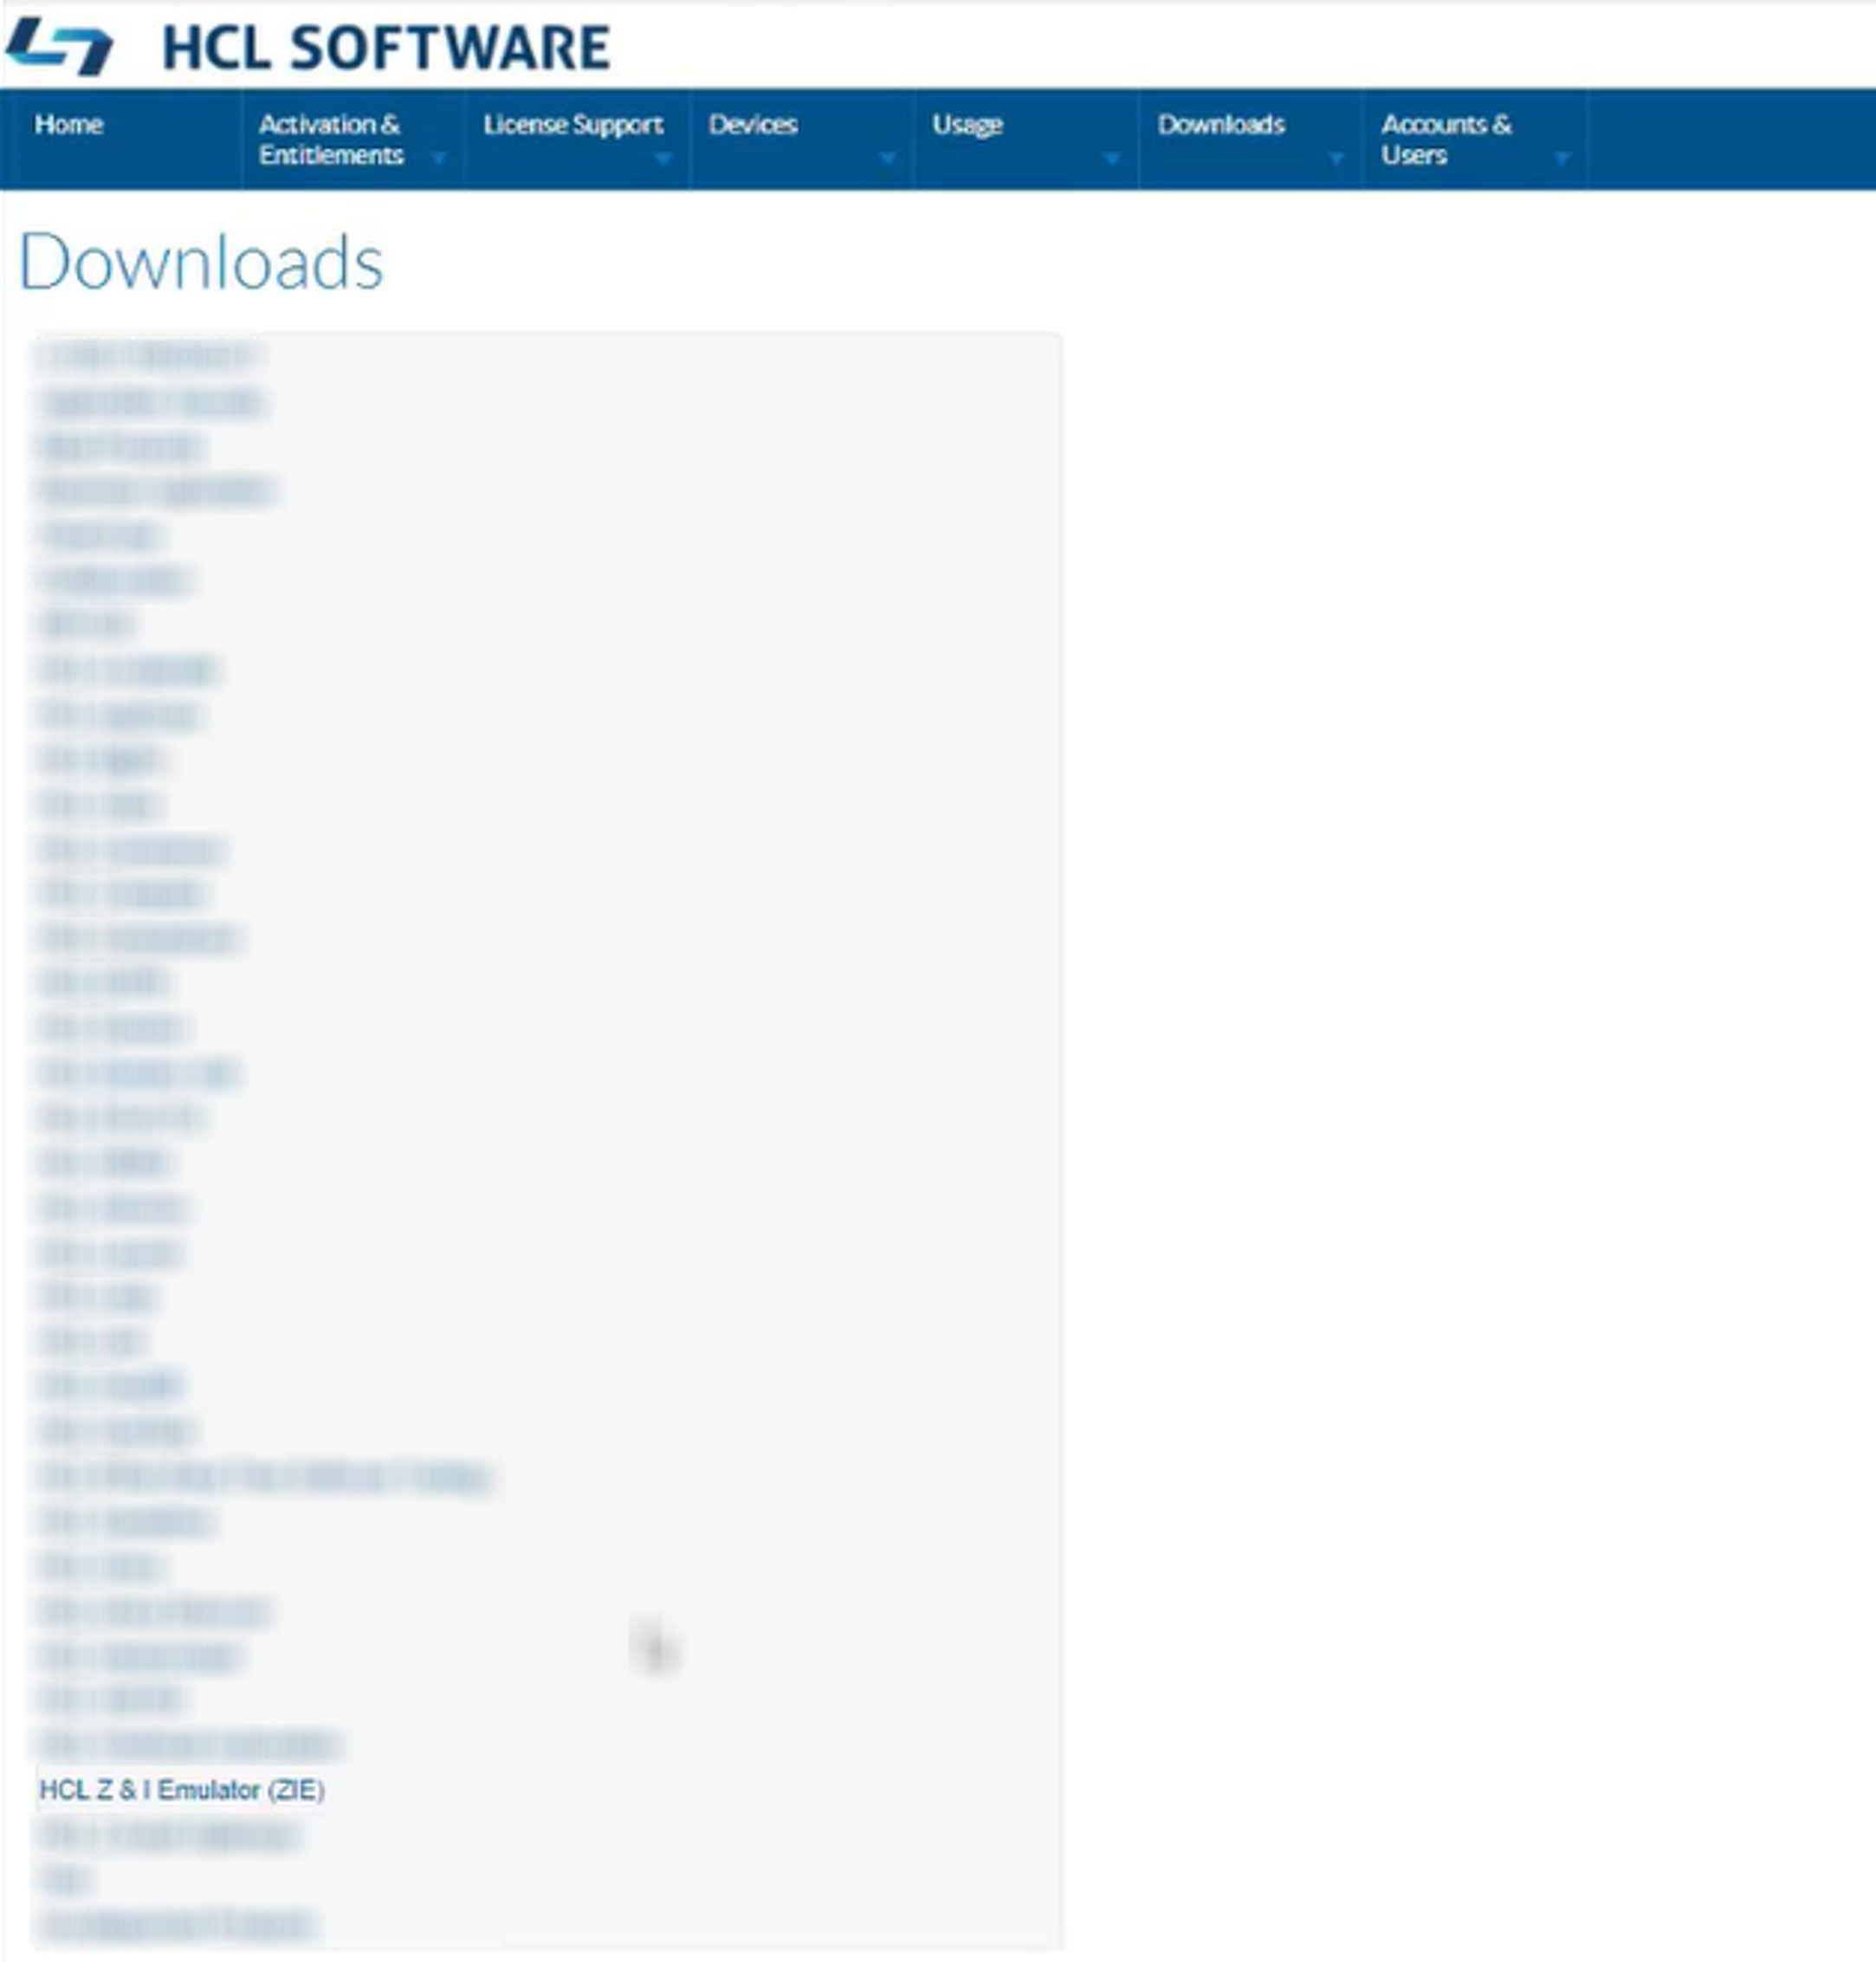
Figure 3: Products List
-
Select the required Product package from the list (HCL Z and I Emulator for Web x.x).
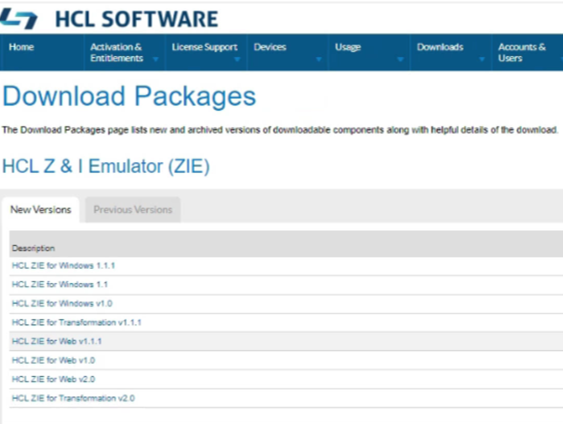
Figure 4: Download Packages
- Click on File Name (hyperlink) to download the product files to a user
defined location.
Example: HCL ZIE For Web v2.0
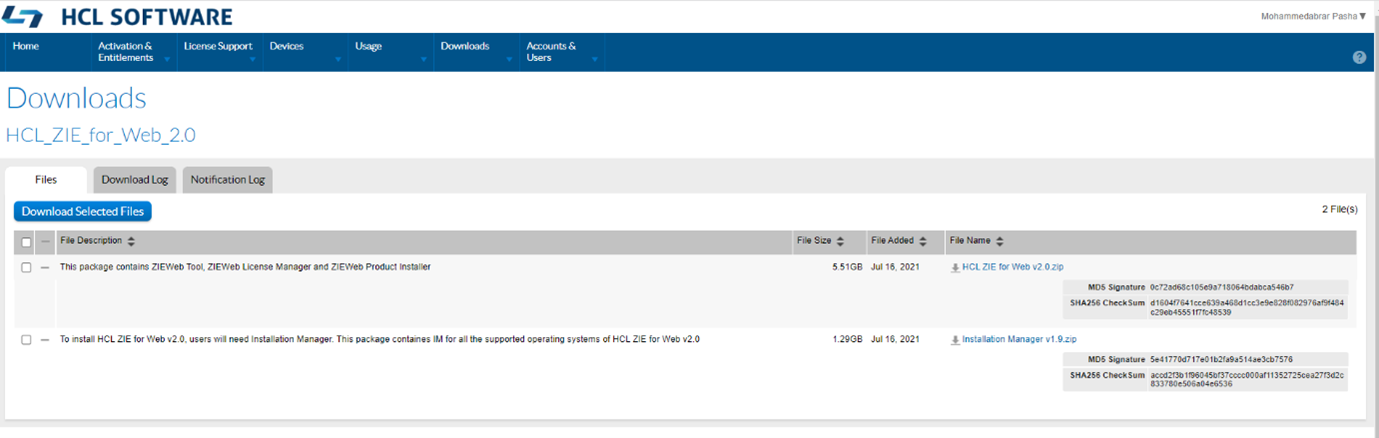
Figure 5 : HCL ZIE For Web
Download HCL Common Local License Server(CLLS)Note: ZIEWeb v2.0.1 supports “HCL Common Local License Server” (CLLS) 2.0. - Select Uncategorized Products from the list of products. It
redirects to the Download Packages Page.
Figure 6 : Products List
-
Select the HCL Common Local License Server (CLLS) 2.0 from the list.
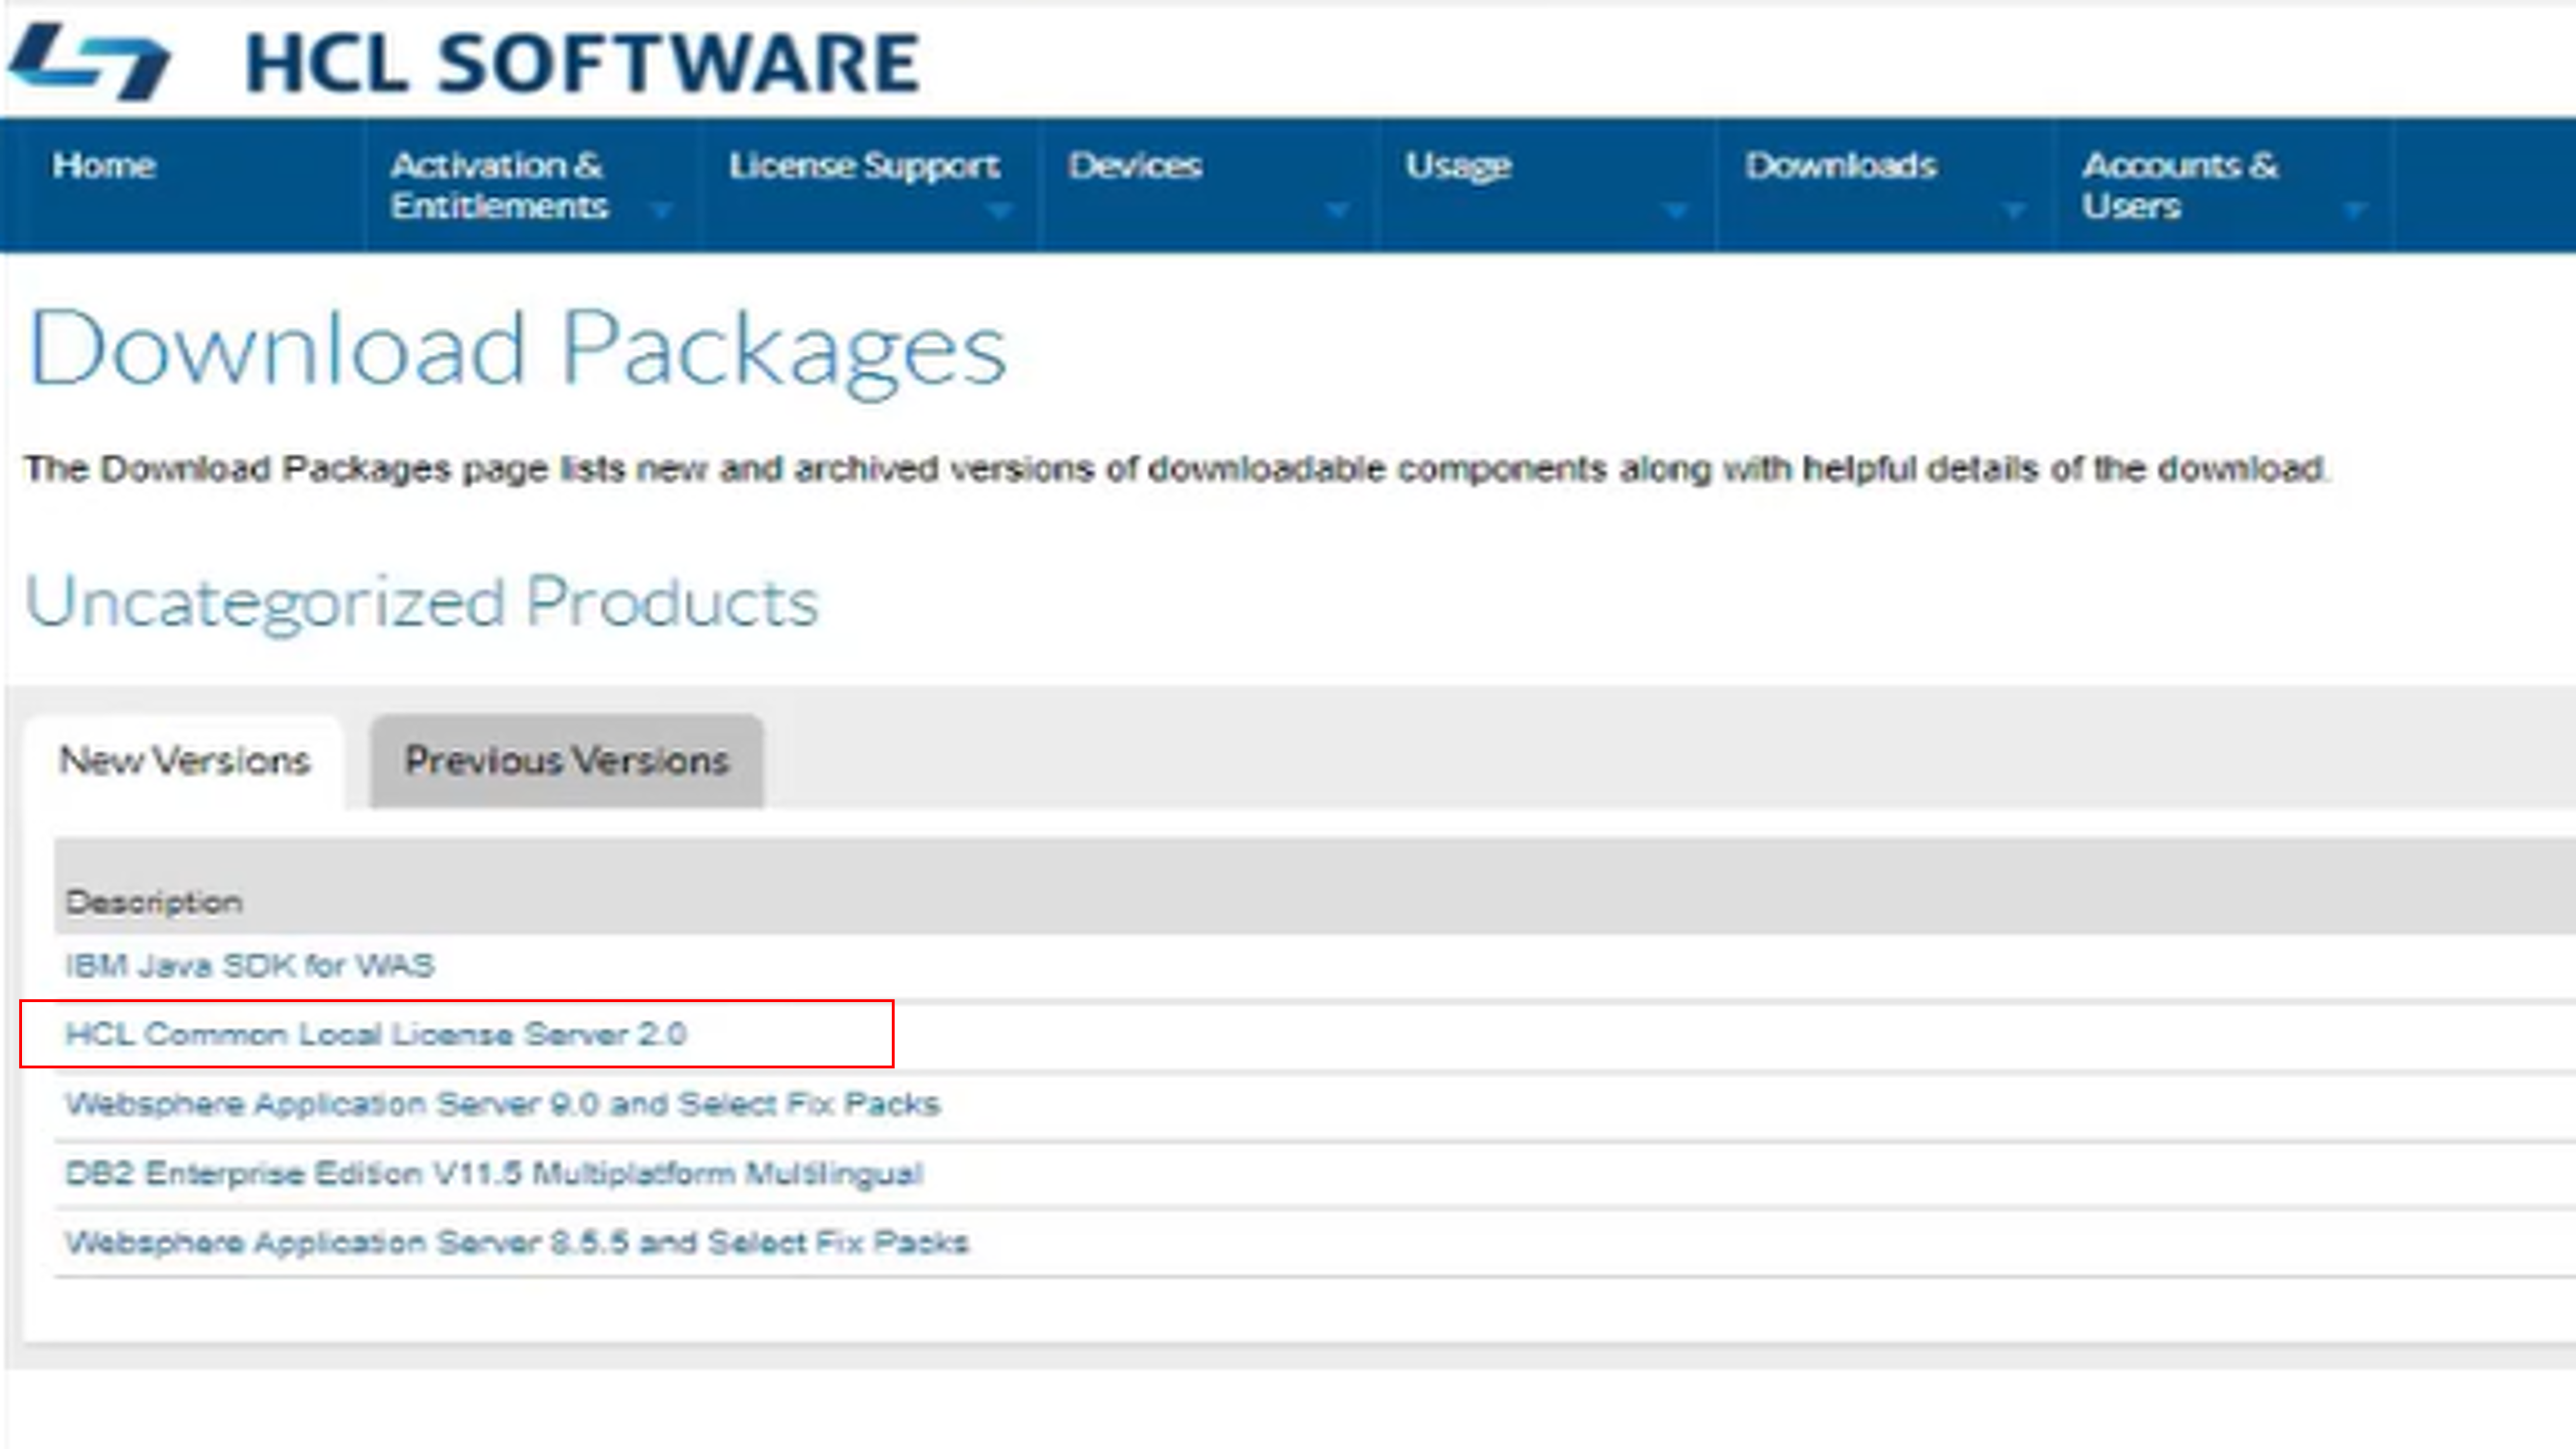
Figure 7 : Download Packages
-
Select the appropriate and required file from the list and click on File Name (hyperlink) to download the files to a user defined location .
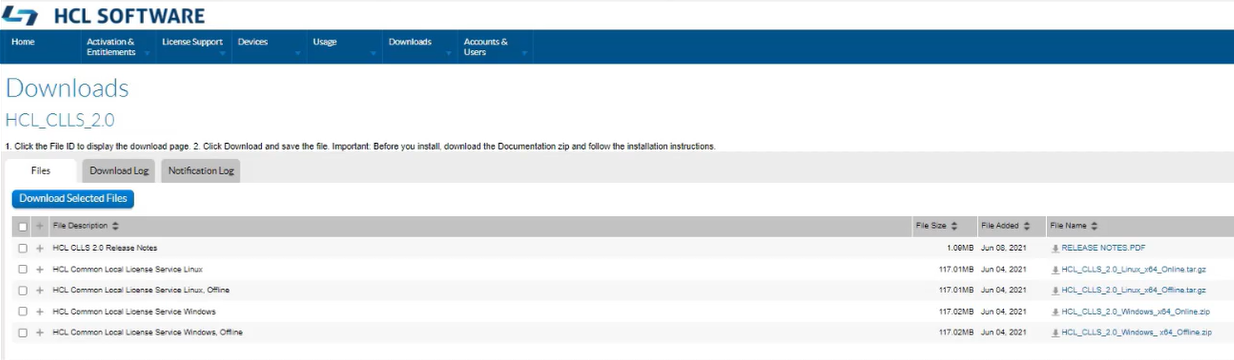
Figure 8 : Downloads
Step-2: Configure the Product (HCL ZIE for Web) with Direct HCL Licensing Server
Pre-requisite:
The product (HCL ZIE For Web) must be installed in the machine.
Configuration:
- Navigate to the product installation directory: C:\Program Files\HCL\ZIEForWeb\ZIEWeb.
- Open the
config.propertiesfile from the installed path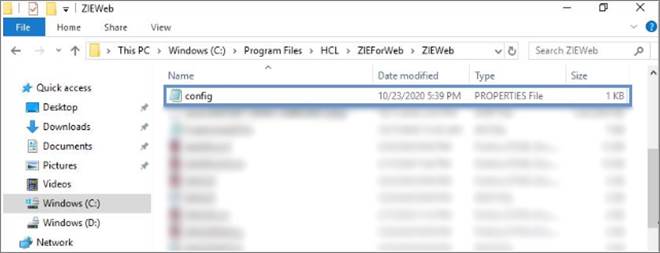
Figure 9: config.properties file in product installation directory
- Update the
config.propertieswith the parameters mentioned in below steps for Direct HCL Licensing Server.- Update or add
directFlxLicenseparameter value as true for Direct HCL Licensing Server. - Remove the # symbol before the
licenseserverurlparameter, to un-comment the statement and modify the given path with custom Direct HCL License Server URL(“HCL License Server" Cloud-based (HCL Software License & Download Portal) or “HCL Common Local License Server” (CLLS)).For Example: https://[license server host]/api/1.0/instances/[license server ID]
- Modify and provide the
timeoutparameter value ranging between 288 to 1440, which is used for Borrow Interval feature for direct HCL Server License when server goes down. - Modify the parameter
lmRequestTimeoutto minimum value of 30 secondsif exist or add the parameterlmRequestTimeout=30for Direct HCL Server Licensing feature.
- Update or add
- Restart the HCL ZIE for Web service manager from Services.
- Open the Deployment Wizard and Create a session.
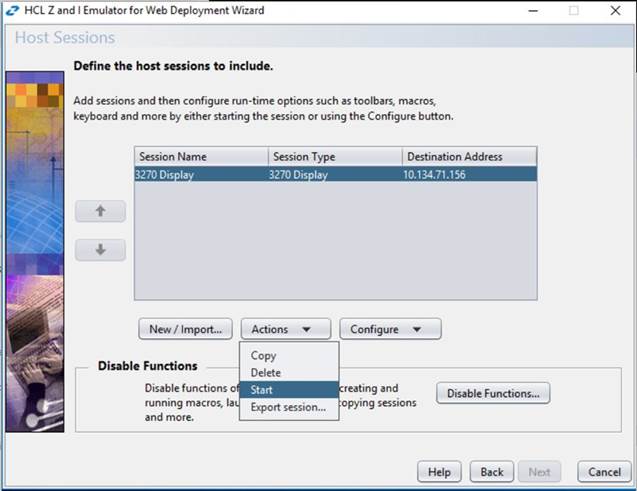
Figure 10: Create session using Deployment Wizard
- Launch the session and use the Use HCL License Server command to check the acquired licenses/ license count.
- Provide the below HCL License command (same as the command entered
previously to upload the public key to HCL server) and check the
acquired licenses as per the session launched from different machines.
C:\Users\Admin\Desktop\HCL License Server\Others\[Extracted CLLS package]\enterprise\flexnetlsadmin.bat -
server <https://[license server host]/api/1.0/instances/[license server ID] / -authorize <username> <password> -licenses -verbose>
For Example:C:\Users\Admin\Desktop\HCL License Server\Others\[Extracted CLLS package]\enterprise\flexnetlsadmin.bat - server https:// hclsoftware.compliance.flexnetoperations.com/api/1.0/instances/FED321CBA -authorize admin xxxx -licenses -verboseThe HCL License Server window will also show the Client device information from where the sessions are launched, and licenses are acquired.
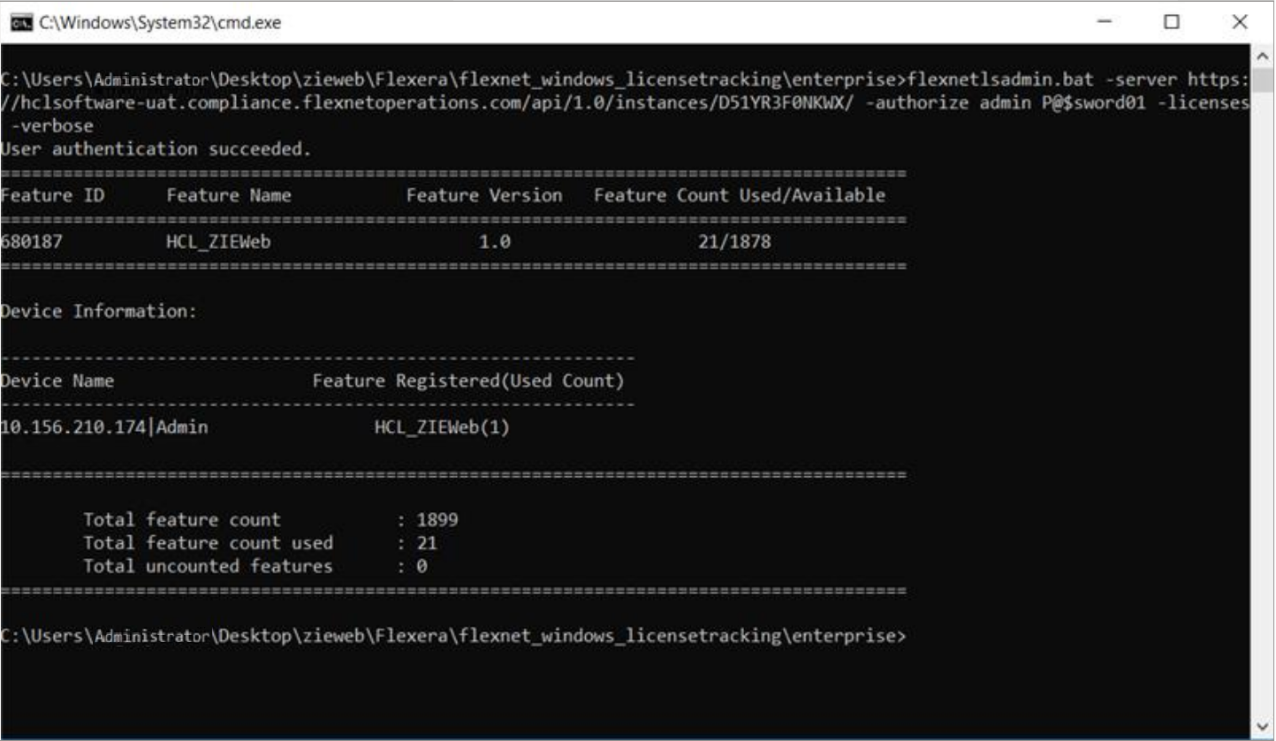
Figure 11 : HCL License server command to check acquired licenses
Limitations:
- For HCL ZIE clients, Direct HCL server license feature not supported in RHEL ppc64le and z/OS platform.
B. HCL Licensing via License Manager”
Step-1 : Download the Product and License Server (CLLS) from HCL Software License & Download Portal
-
Copy and paste the following link in a browser address bar to access the HCL Software License & Download Portal login page. https://hclsoftware.flexnetoperations.com/flexnet/operationsportal/logon.do
-
Enter the authorized login credentials and click Login, it redirects to Home Page .
Figure 12: Home Page
-
From the Downloads, click List Downloads. It redirects to Downloads page.
Figure 13: Products List
Download Product
-
Select HCL Z & I Emulator (ZIE) from the list of products. It redirects to the Download Packages page.
The below image displays a keyword entered in the search field, to find the “HCL ZIE Family products”.
Figure 14 : Products List
-
Select the required Product package from the list (HCL Z and I Emulator for Web x.x).
Figure 15 : Download Packages
-
Click on File Name (hyperlink) to download the product files to a user defined location.
Example: HCL ZIE For Web v2.0
Figure 16 : HCL ZIE For Web
Download HCL Common Local License Server(CLLS)Note: ZIEWeb v2.0.1 supports “HCL Common Local License Server”(CLLS) 2.0. -
Select Uncategorized Products from the list of products. It redirects to the Download Packages Page.
Figure 17 : Products List
-
Select the HCL Common Local License Server 2.0 from the list.
Figure 18 : Download Packages
-
Select the appropriate and required file from the list and click on File Name (hyperlink) to download the files to a user defined location .
Figure 19 : Downloads
Step-2 : Extract the Installers (for the Product and License Manager)
-
Open the downloaded package.
For the product HCL Z and I Emulator for Web (ZIEWeb), the downloaded package ‘HCL_ZIE_for_Web_x.x.x.x’ have the following folder structure.
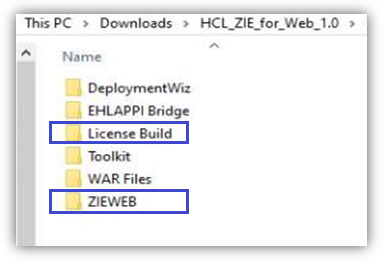
Figure 20 : HCL ZIE for Web product package
-
Extract the following components:
- The ZIEWeb Product Installer from the
ZIEWEBfolder. - The License Manager Installer
(
.warand.ear) files from theLicense Buildfolder.
- The ZIEWeb Product Installer from the
Step-3 : Configure the License Manager and the Product for usage
3.a Setup the HCL Licensing
Once the download is complete follow the below procedures.
-
Extract the appropriate OS Specification package, which contains the required jars and .bat files.
-
The flexnetlsadmin.bat file which is used to connect to the HCL Licensing is present in : [Extracted CLLS package]\enterprise.
-
Once the installers are available, follow the below given steps and article URL to configure the HCL Licensing.

Figure 21 : Server deployment mode
-
After completing the License server deployment, the user gets a custom HCL License URL.
-
Use custom URL to replace the following link given in the upcoming procedures.
<https://[license server host]/api/1.0/instances/[license server ID]>- "Set Password”, click “Action” for the newly created device, select “Set Password” option from the drop down and setup a password. This password is used to upload the “public” key for License Manager auto SSH login.
For Example:
[license server host] is to be replaced with License Server http address and [license server ID] is replaced with License Server’s ID.
For further queries related to HCL License Server setup, contact the HCL Customer support team using the following link : https://support.hcltechsw.com/csm
3.b Configure the Product (HCL ZIEWeb) with the HCL Licensing
To configure HCL ZIE for Web with the License Server, follow the below steps.
-
Install any open source key tool (like Open SSL or Java key tool) in the machine for key-pair generation.
Steps to Configure the product with the HCL Licensing:
-
Configure the Key Tool
-
Generate the Key-pairs
-
Upload the public key to HCL License Server
Below are the detailed procedure to Configure ZIEWeb with HCL License Server using Open SSL:
a.Key Tool Configuration (for Open SSL):-
After installing Open SSL, copy the open SSL folder under C:\ drive.
-
Configure the Open SSL path in the system environment variables as shown:
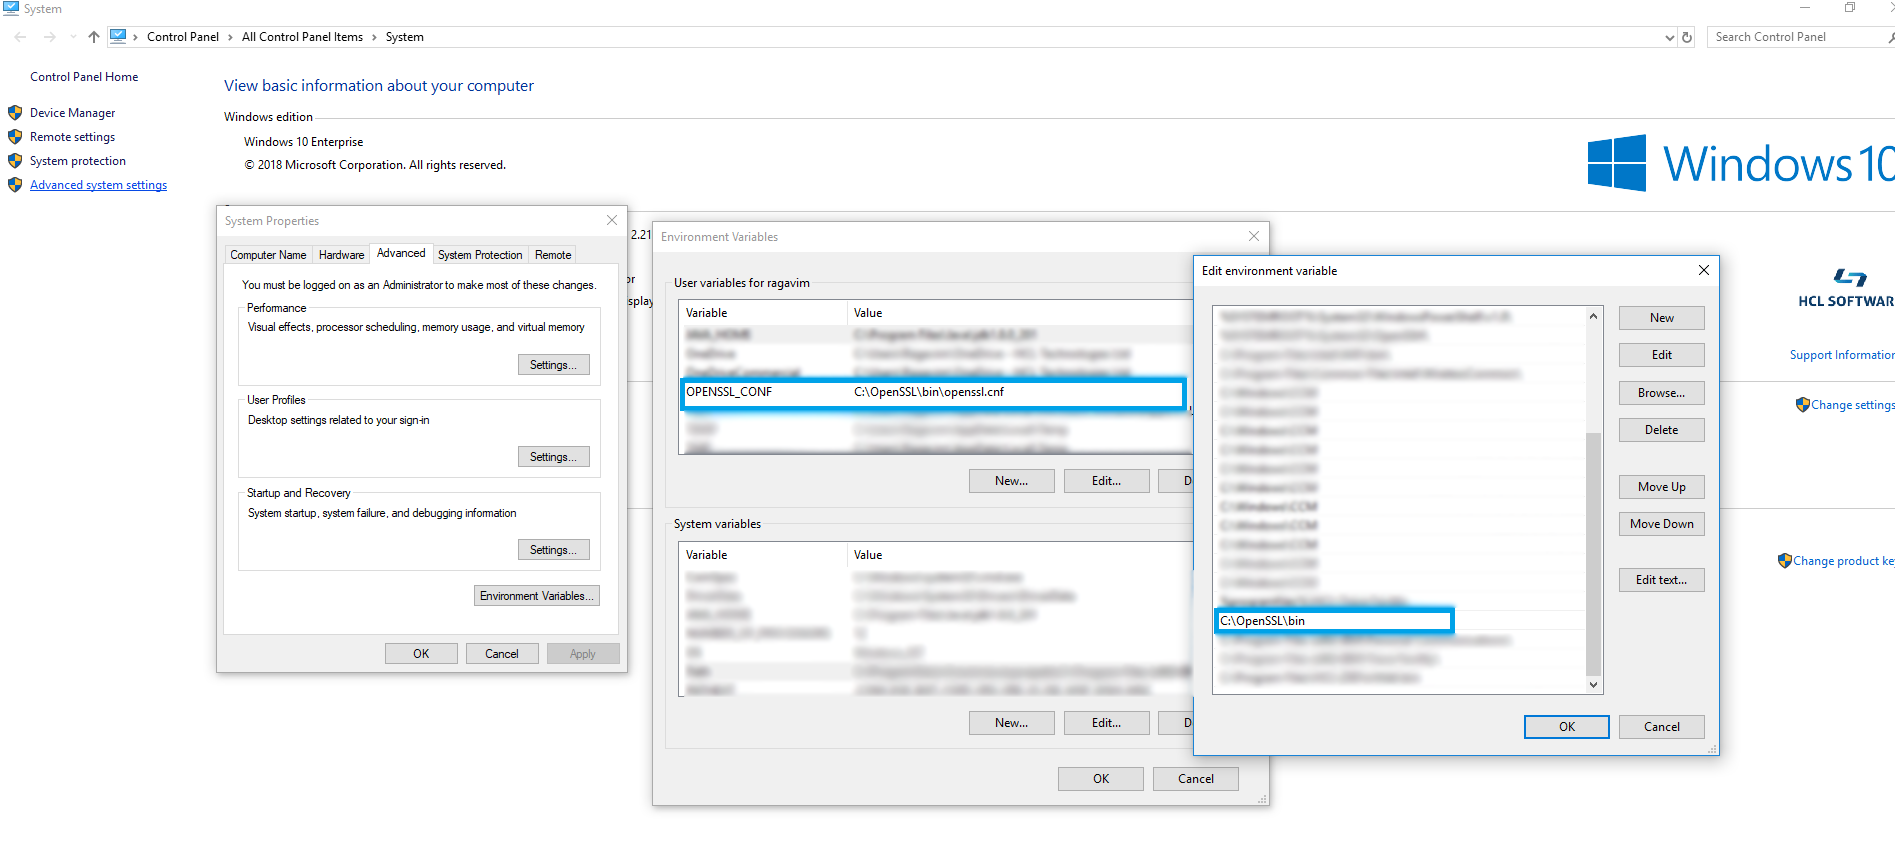
Figure 22 : Configuring the Open SSL under system environment variables
b.Generation of Key-pairs (using Open SSL tool)The Public/Private key pair generated is used for secure communication. The key pair must be in "RSA 2048-bit" format. The private key format must be "pksc8", and that of the public key must be "DER" format.
-
Generate Private Key.
Open Command Prompt as an Administrator and enter the Open SSL path to change the path from the root directory (
C:\OpenSSL\bin). Enter the below command, to generate the private key underC:\OpenSSL\bin,openssl genrsa -out private_key.pem 2048 -
Get the Public Key.
After the private key is generated, enter the below command to generate the public key also in the same path.
openssl rsa -in private_key.pem -pubout -outform DER -out public_key.der -
Convert Private Key to pkcs8 Format to use it.
The
private_key.pemfile must be converted into pcks8 format for strong encryption. To do this conversion, enter the below command,openssl pkcs8 -topk8 -inform PEM -outform PEM -in private_key.pem -out private_key_pkcs8.pem -nocrypt
Figure 23 : Generated keys under C:\OpenSSL\bin
-
To connect to the HCL License Server, the Extracted CLLS package must be available in the local machine. Navigate to the HCL License Server folder in the local machine. (D:\ [Extracted CLLS package]\enterprise)
-
Open the Command Prompt and enter the below command. Set the password while creating the device in HCL Software License & Download Portal using the “Set Password” option or the default password for HCL CLLS is “HCLDefault1@”.
flexnetlsadmin.bat -server https://[license server
                                    host]/api/1.0/instances/[license server ID]
                                -authorize admin [license sever admin password]
                                -uploadPublicKey [local path to public key (in DER
                                format)]
For Example:
flexnetlsadmin.bat -server https:// hclsoftware.compliance.flexnetoperations.com/api/1.0/instances/FED321CBA -authorize admin xxxx - uploadPublicKey C:\temp\public_key.der -
If the public key is successfully uploaded to the HCL License Server using the above command, the user receives an acknowledgment as “Client public key has been uploaded successfully” from the HCL License Server.
(For any queries related to the HCL License Server setup, contact the HCL Customer support team using the following link : https://support.hcltechsw.com/csm)
-
Enter the below HCL License Server command to check the feature description and the total no. of licenses configured for that feature.
C:\Users\Admin\Desktop\HCL License Server\Others\[Extracted CLLS
package]\enterprise\flexnetlsadmin.bat -server <https://[license server
host]/api/1.0/instances/[license server ID] / -authorize <username> <password> -licenses -
verbose>
For Example:
C:\Users\Admin\Desktop\HCL License Server\Others\[Extracted CLLS
package]\enterprise\flexnetlsadmin.bat -server https://
hclsoftware.compliance.flexnetoperations.com/api/1.0/instances/FED321CBA -authorize admin xxxx -
licenses -verbose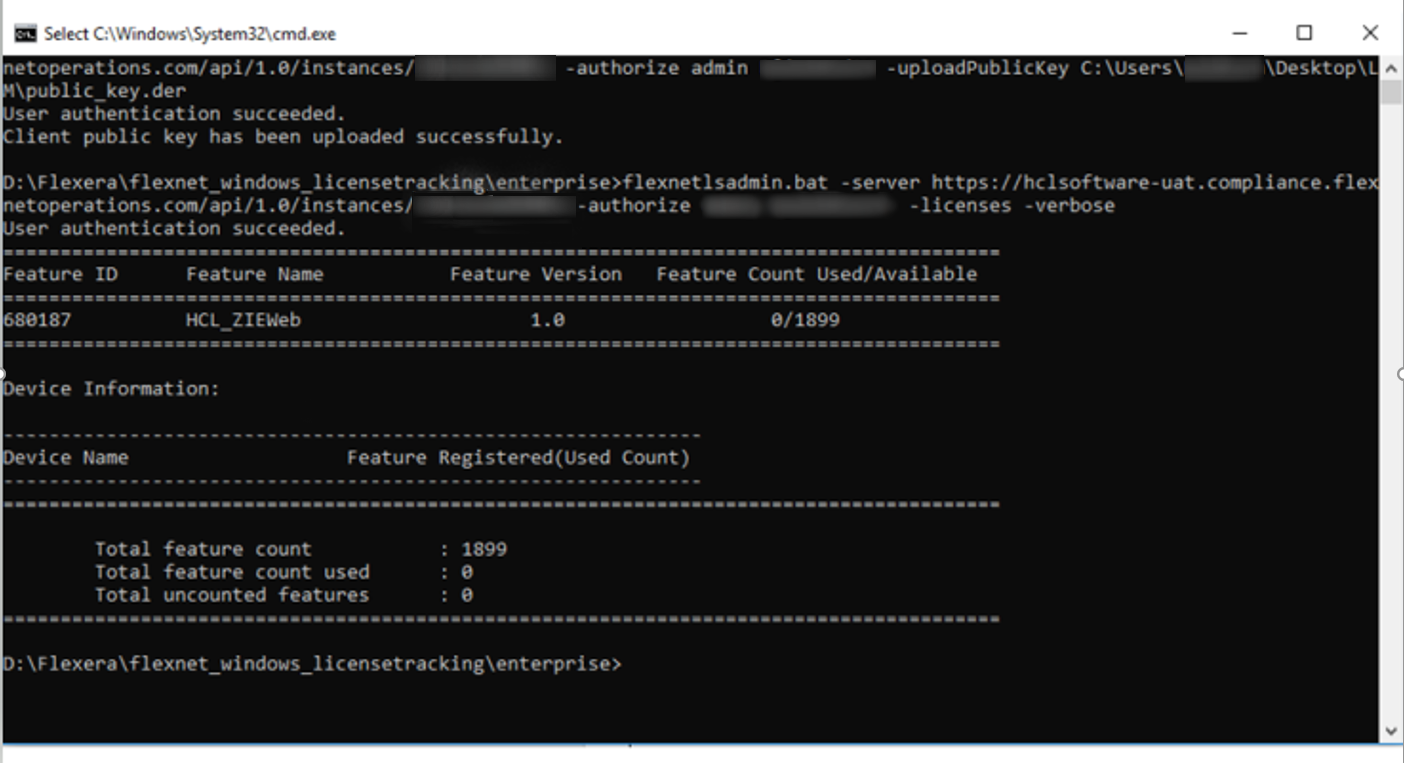
Figure 24 : HCL License Server command to check Feature description & count of configured licenses
3.c Configure the HCL Licensing details in License Manager application
- A supported Application server (like WAS or Tomcat) must be installed in the machine.
- Deploy the License Manager .ear or .war file in the Application
server. The below image shows the deployment of License Manager using
WebSphere Application sever’.
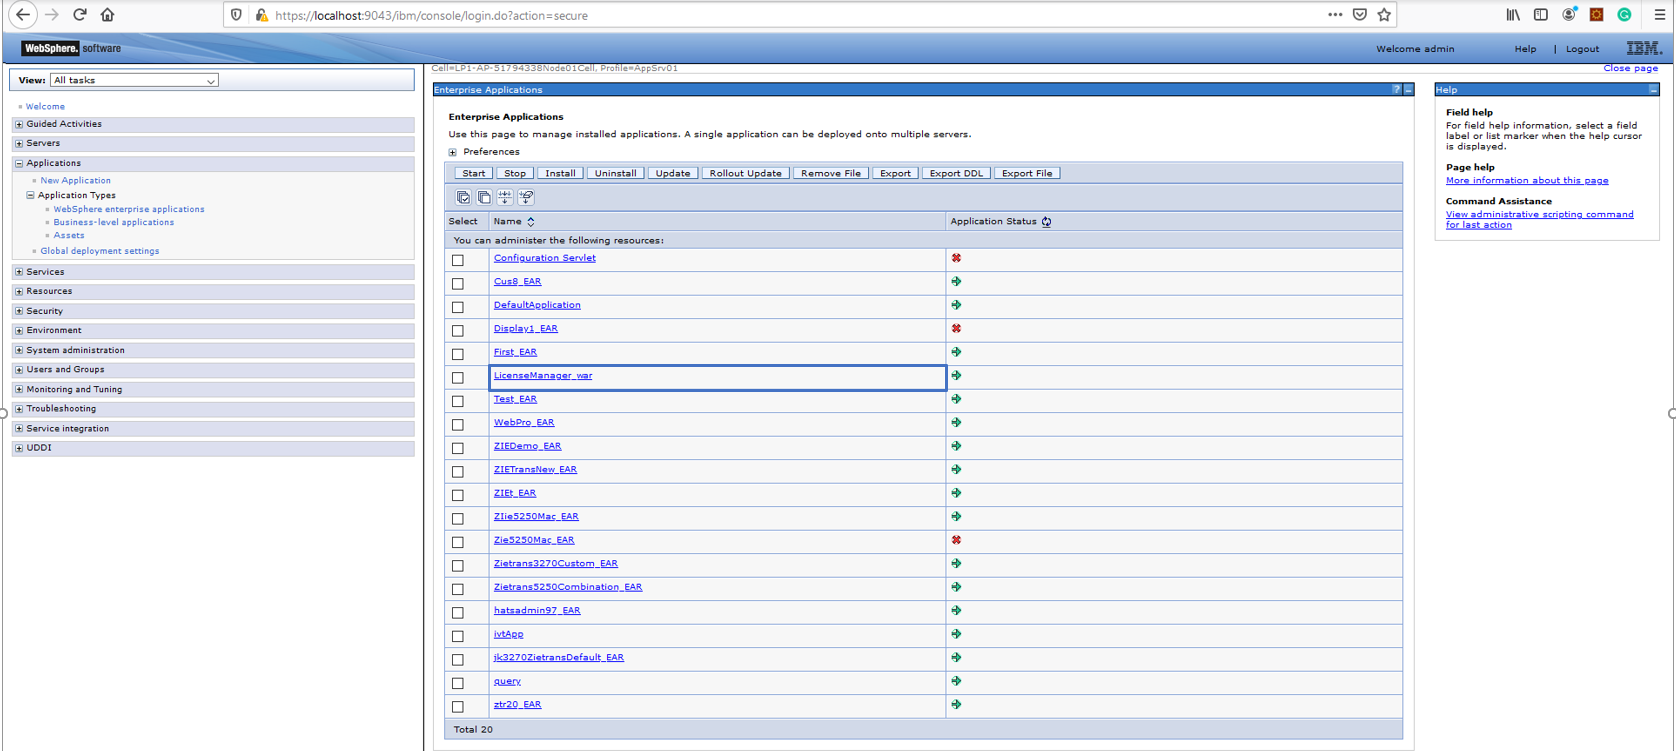
Figure 25 : Deploying License manager file (.ear/.war) in Application server
Configuration:
- Click and Open the deployed License Manager application.
- Configure the context root for the License Manager under: Web Module
Properties à Context Root for Web Modules.
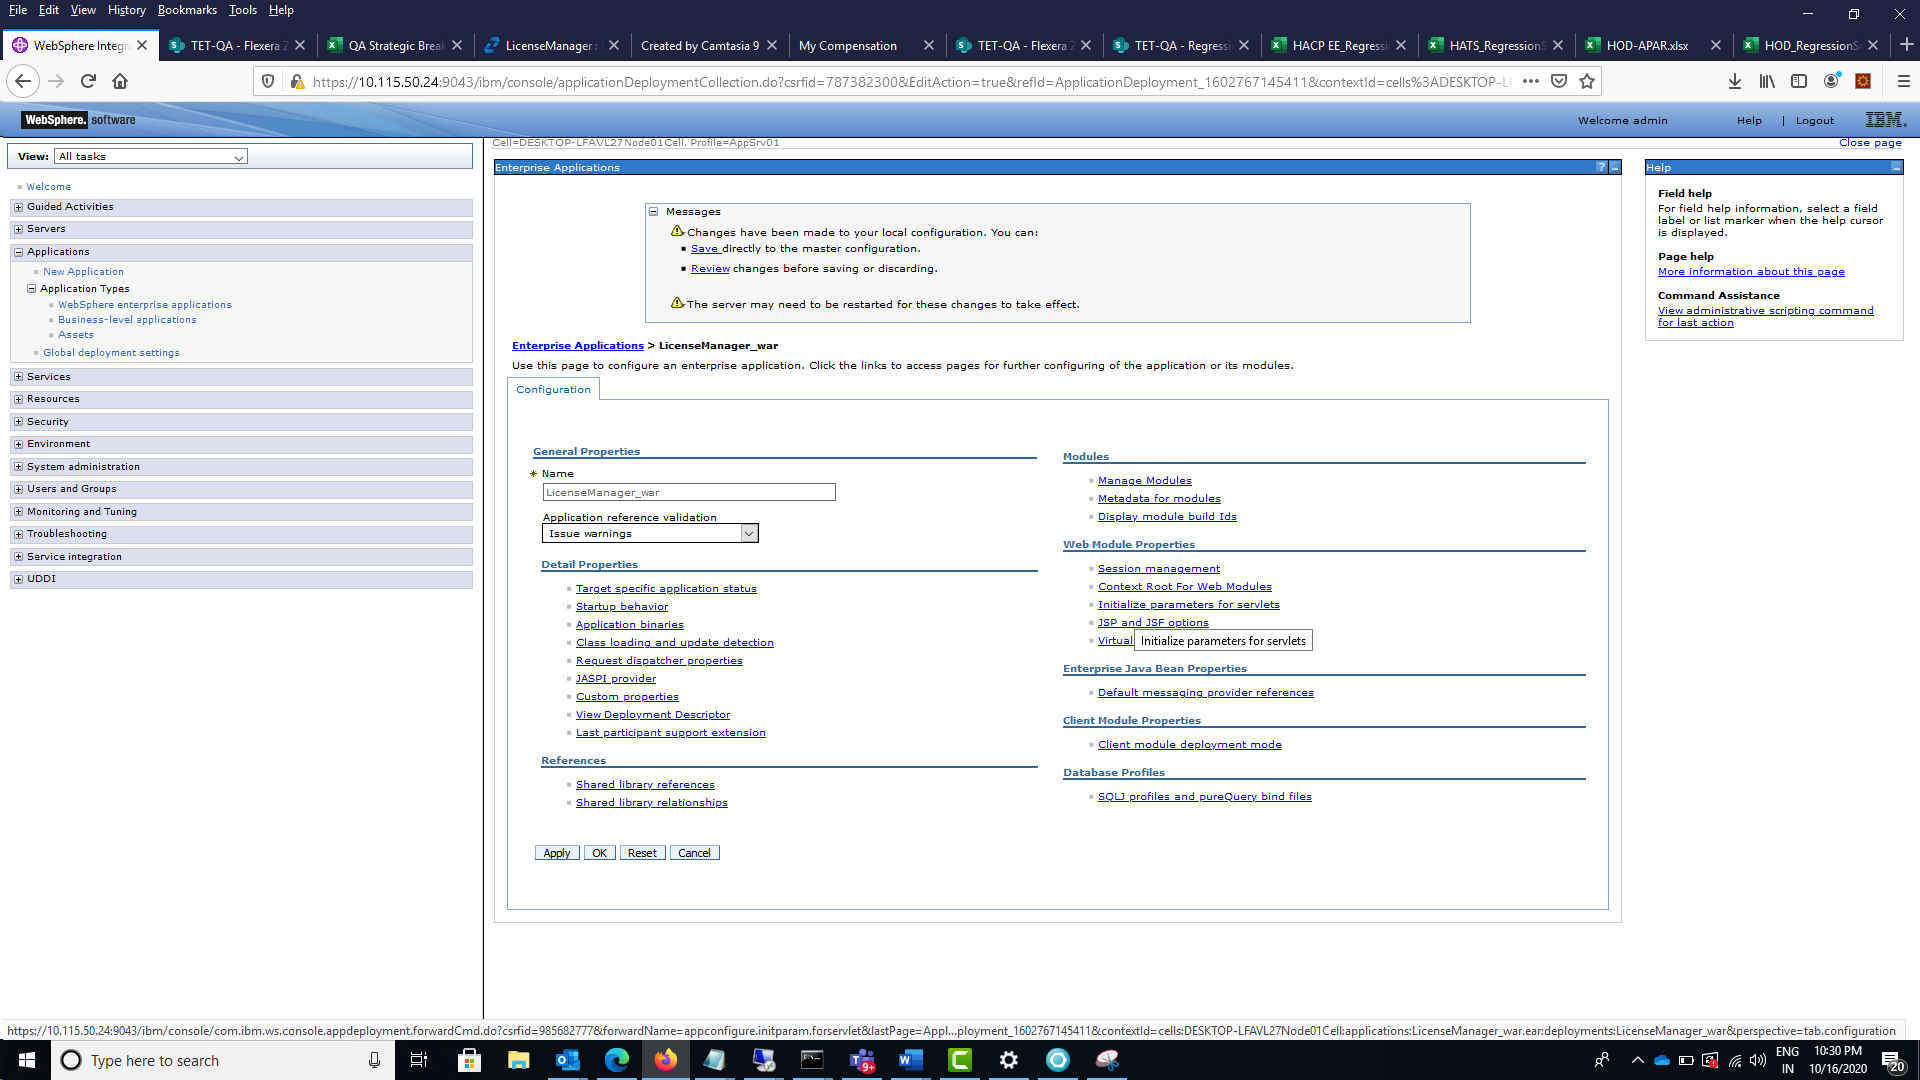
Figure 26 : Configuring context root for License Manager (in Web Module Properties)
- Configure the HCL License Server parameter details (in the below panel) , under theWeb Module Properties Initialize Parameters for servlets.Figure 26 : Configuring context root for License Manager (in Web Module Properties)
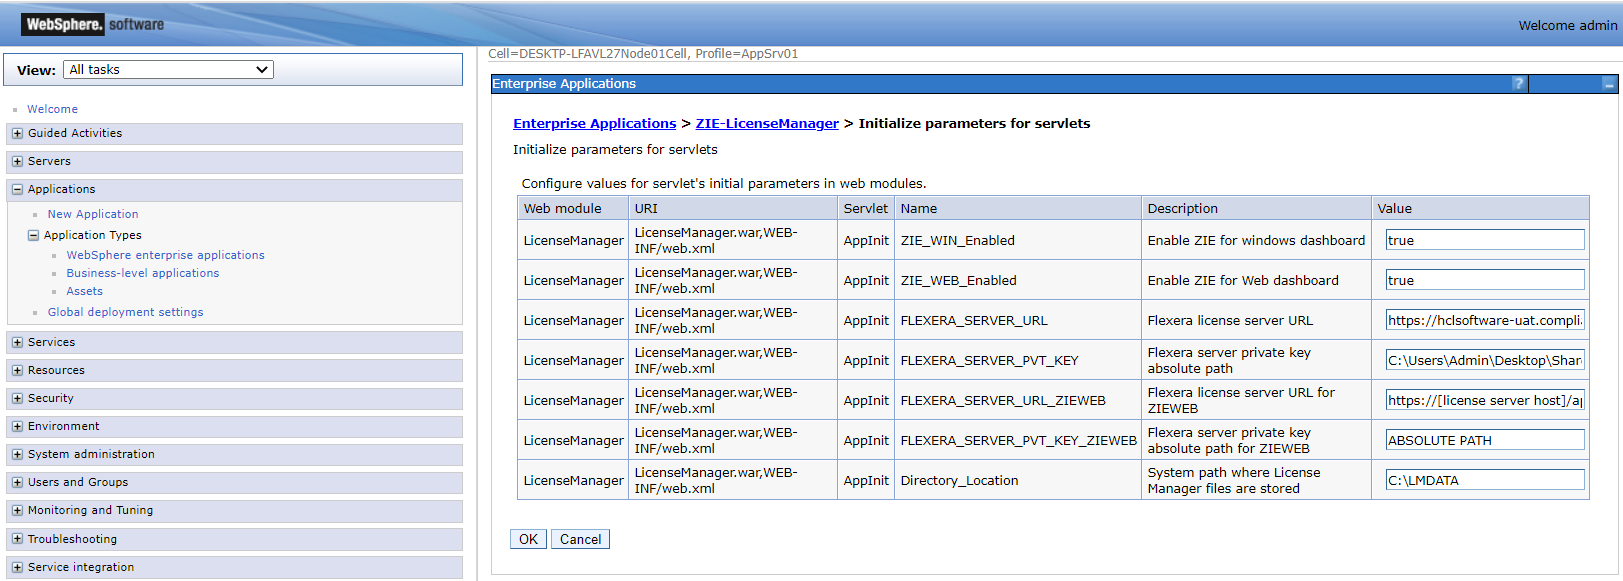
Figure 27 : Configuring HCL License Server details (in Web Module Properties)
- HCL License Server URL:
Provide user custom HCL License Server URL that is generated in the step detailed in section 3.a.
For Example:
https://[license server
                                host]/api/1.0/instances/[license server
                        ID]
- HCL License Server server Private key path:
The path where the converted private key in pkcs8 format is stored.
For Example:
D:\HCL
                            License Server\private_key_pkcs8.pem
- User Directory:
Path for creating the User Directory, automatically after configuration. This directory contains all the License Manager related files and Database file.
For Example:
C:\LMDATA
- HCL License Server URL:
-
After the configuration is completed, launch the HCL ZIE License Manager from a browser.
http://<server ip>:<server port no>/<context-root>/LicenseLoggerFor Example:
http://10.115.50.68:9080/LicenseManager/Login.jsp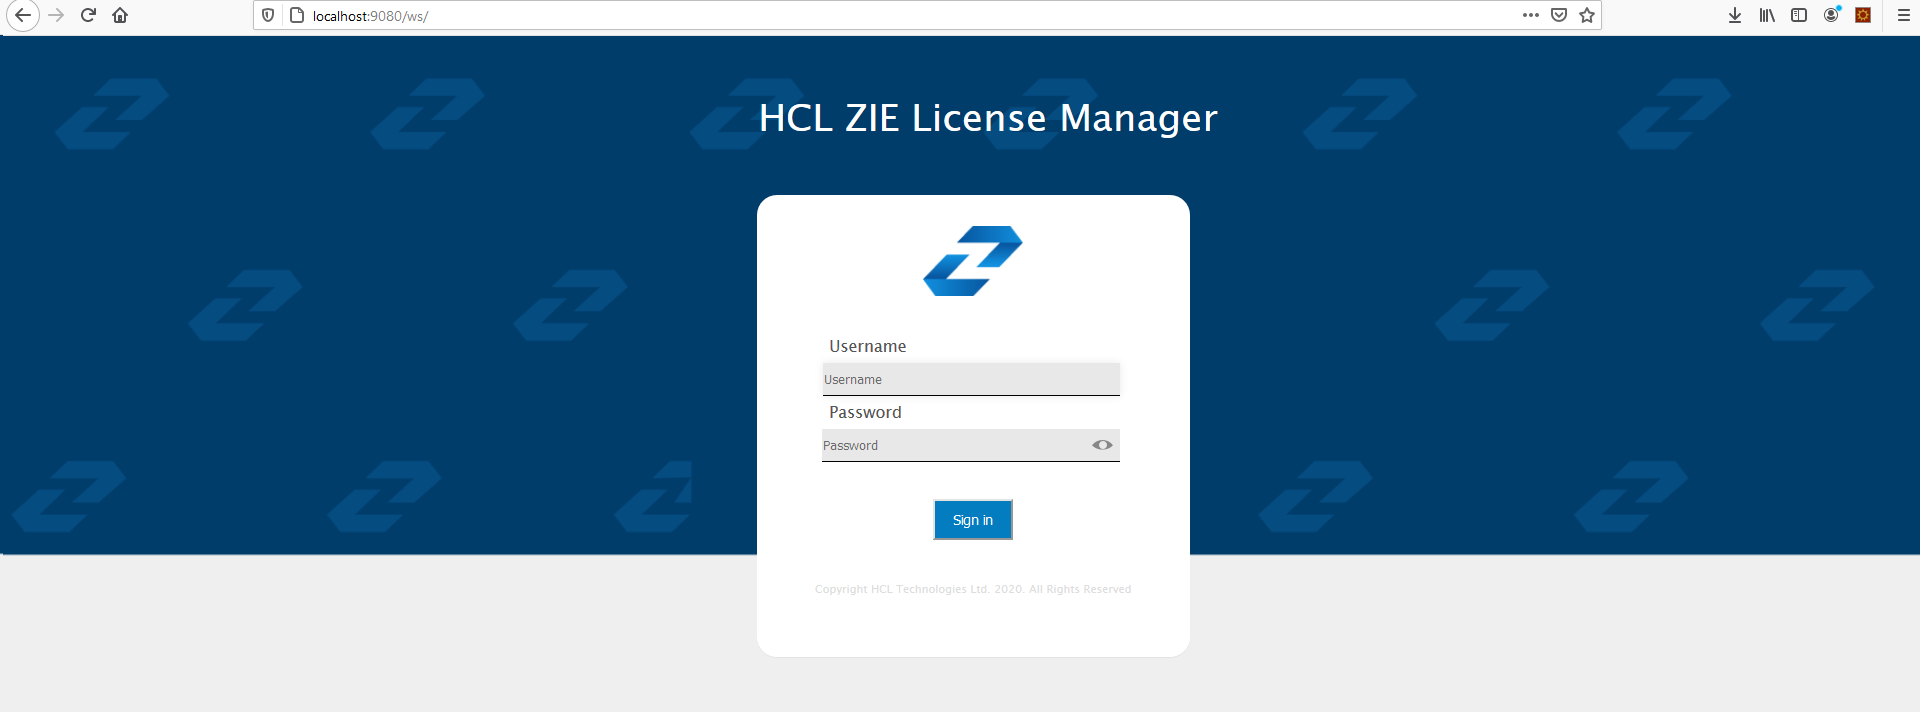
Figure 28 : HCL ZIE License Manager Login
Note: If you cannot see the HCL ZIE License Manager login page, restart the License Manager application on the Application server where it is deployed - Login to the License Manager with the default credentials (username:
“admin”, password: “password”), and check the Total Active license count. The
count is shown as 0 initially since the downloaded product (ZIEWeb) is not
configured with the license manager.

Figure 29 : Active License count in License Manager (without configuring License Manager)
3.d Configure the License Manager application with the Product (HCL ZIEWeb)
Pre-requisite:
The product (HCL ZIE For Web) must be installed in the machine.
Configuration:
- Navigate to the product installation directory: C:\Program Files\HCL\ZIEForWeb\ZIEWeb.
- Open the config.properties file from the installed path
Figure 30: config.properties file in product installation directory
- Remove the # symbol before the
licenseserverurlparameter, to un-comment the statement and modify the given path with the <application serverurl:port/contextpath/LicenseLogger>as highlighted below,to configure the License Server URL.Figure 31 : Enabling and configuring licenseserverurl in config.properties
- Restart the HCL ZIE for Web service manager from Services.
- Open the Deployment Wizard and Create a session.
Figure 32: Create session using Deployment Wizard
- Launch the session and check the License count in the License Manager.
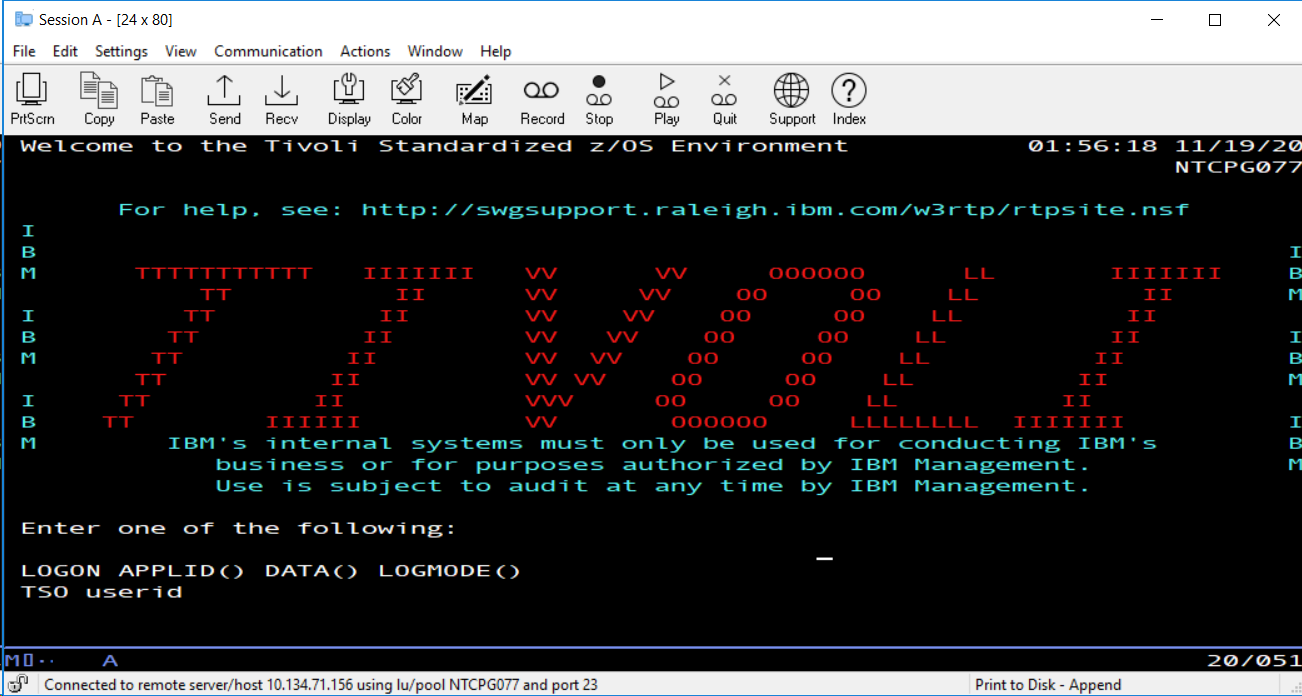
Figure 33: Launch the session from Deployment Wizard
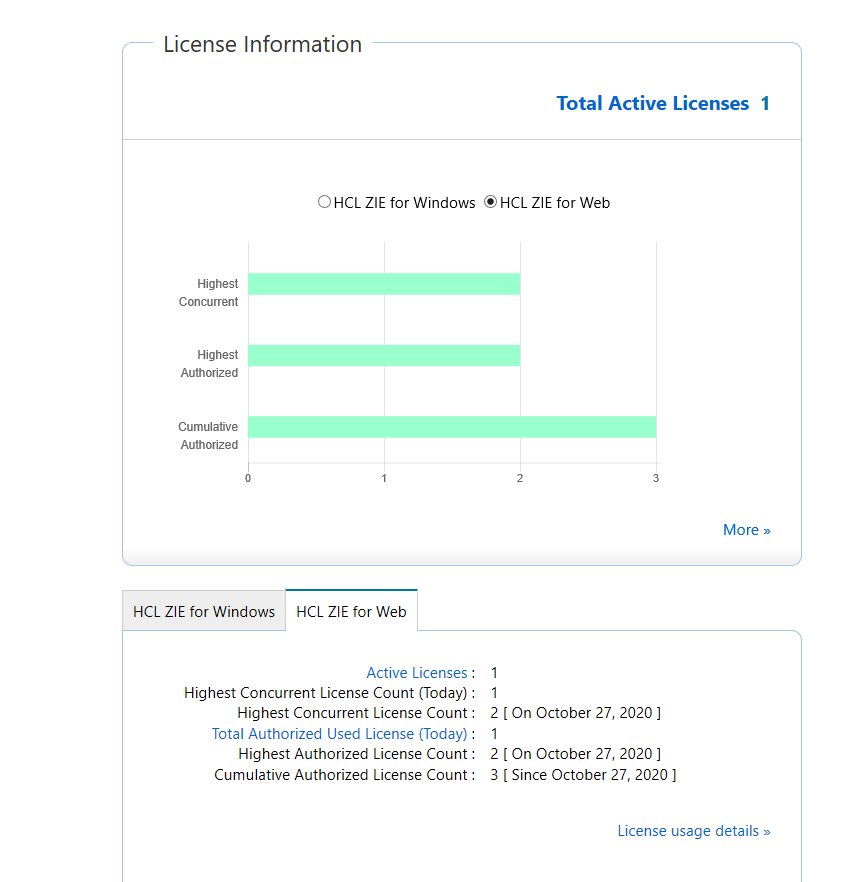
Figure 34 : Updated Active License count in License Manager (after configuring License Manager)
- Provide the below HCL License Server command (same as the command entered
previously to upload the public key to HCL License Server) and check the
acquired licenses as per the session launched from different machines.
C:\Users\Admin\Desktop\HCL License Server\Others\[Extracted CLLS package]\enterprise\flexnetlsadmin.bat -
server <https://[license server host]/api/1.0/instances/[license server ID] / -authorize <username> <password> -licenses -verbose>
For Example:The HCL License Server window also show the Client device information from where the sessions are launched, and licenses are acquired.C:\Users\Admin\Desktop\HCL License Server\Others\[Extracted CLLS package]\enterprise\flexnetlsadmin.bat - server https:// hclsoftware.compliance.flexnetoperations.com/api/1.0/instances/FED321CBA -authorize admin xxxx -licenses -verbose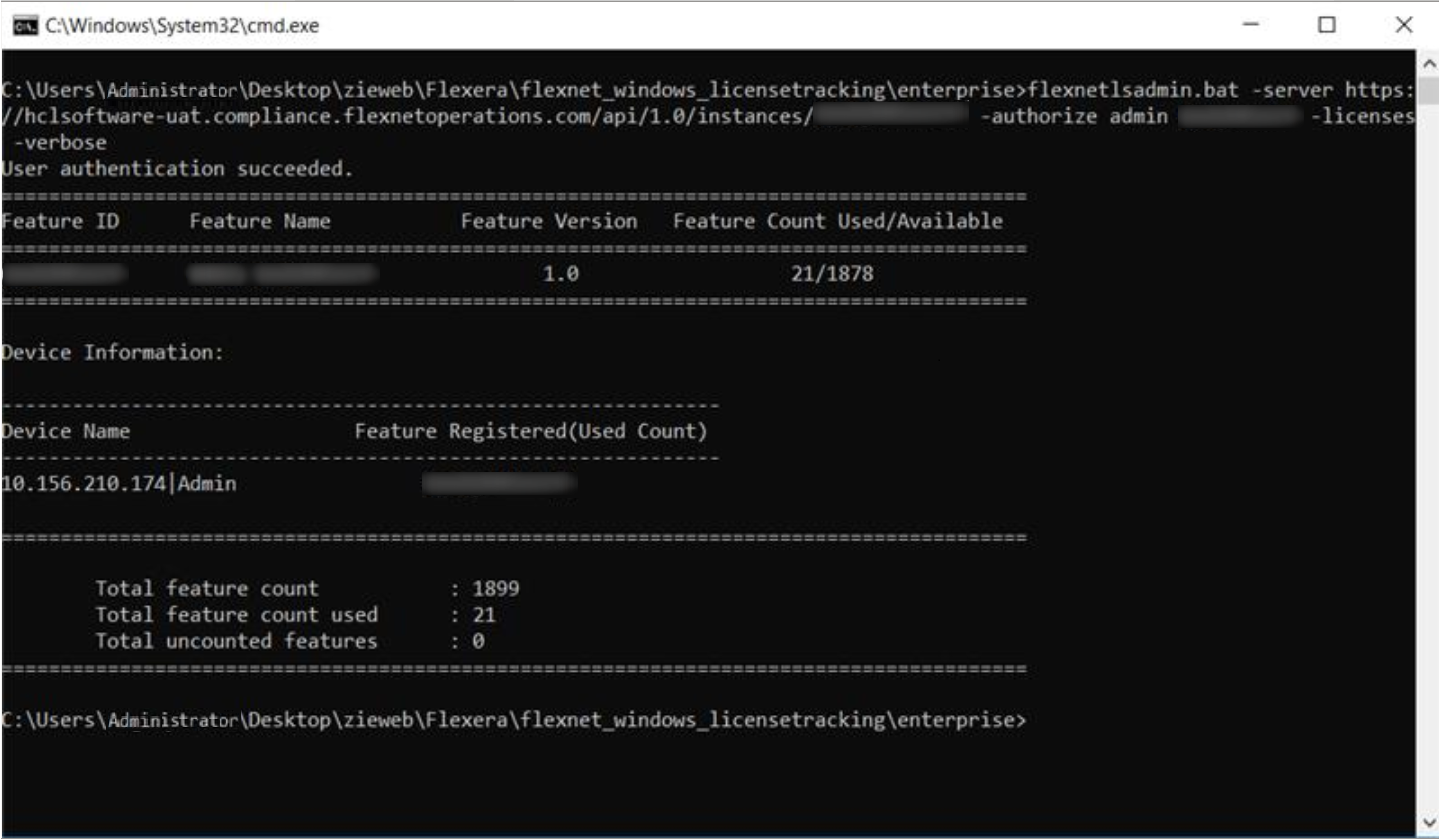
Figure 35 : HCL License server command to check acquired licenses.