Configuring HCL Z and I Emulator for Transformation with Flexera
This document describes the procedure to acquire a license for using the product ‘HCL Z and I Emulator for Transformation’ and to configure the product for connecting to a host.
- Step 1: Download the Product and License Server (CLLS) from FlexNet Operations.
- Step 2: Extract the installers (for the Product and License Manager).
- Step 3: Configure the License Manager and the Product for usage:
- Set up the License Server (Flexera).
- Configure the Product (HCL ZIETrans) with the License Server (Flexera).
- Configure the Flexera details in License Manager application.
- Configure the License Manager application with the Product (HCL ZIETrans).
Step-1 : Download the Product and License Server (CLLS) from FlexNet Operations
- Copy the following link and paste it in a browser address bar to access the
FlexNet login page:https://hclsoftware-fno.flexnetoperations.com/flexnet/operations/logon.do?logoff=true
Flexera Login dialog box
- Enter the authorized login credentials to access the Producer Portal Home page.
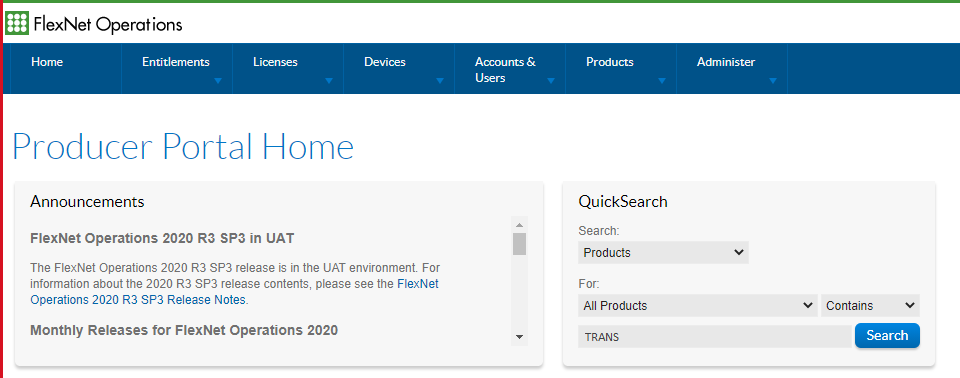
- Search for the required product by specifying the relevant keywords in the
QuickSearch section. The following image shows a keyword entered in the
search field, to find “HCL Z and I Emulator for Transformation.”
Producer Portal Home (QuickSearch for Products)
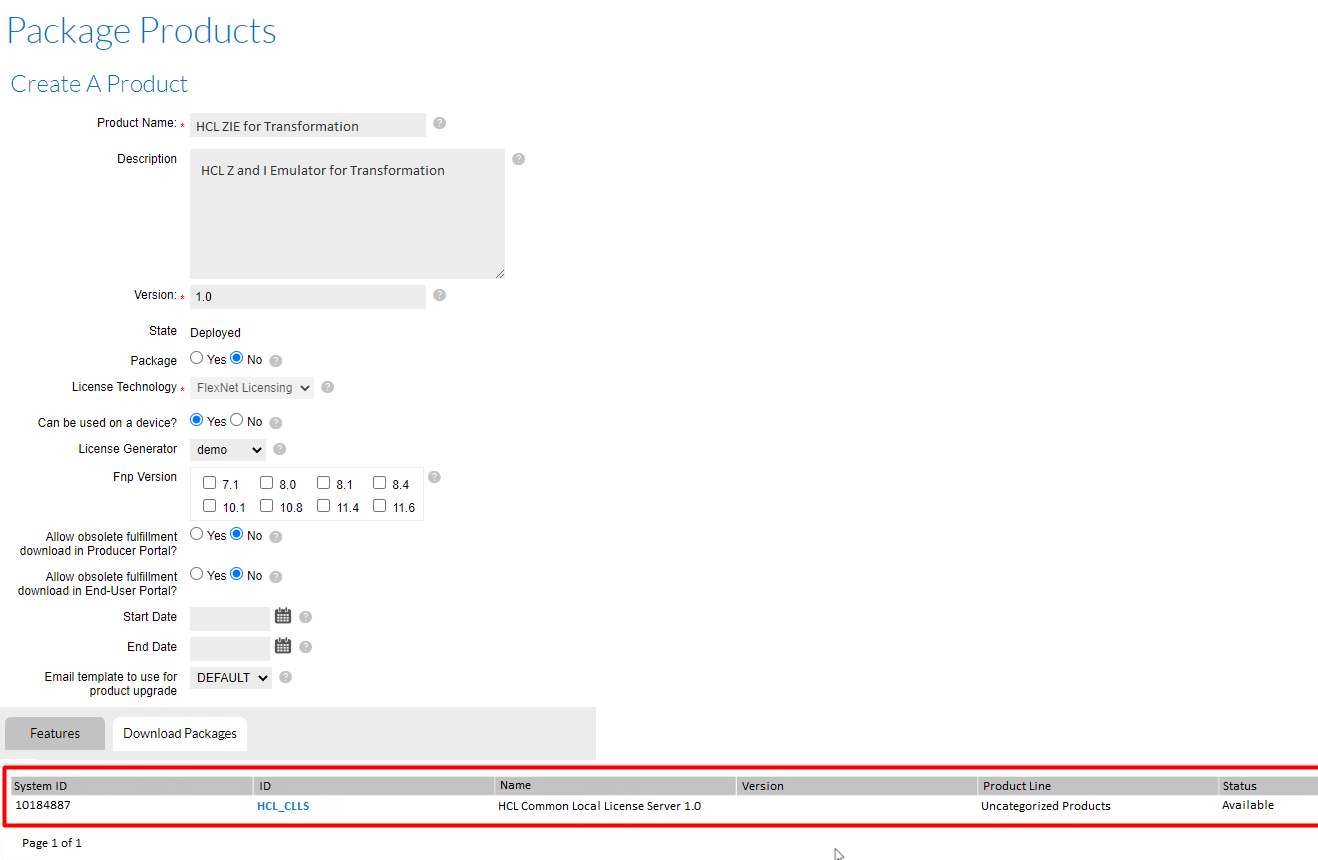
- If the Search is successful, all the product packages relevant to the
entered keyword will be displayed in the Search results.
Package Products (Search Results)

- In the “Create A product” panel that follows, click the Download
Packages tab to view and download the required packages. The
below image shows the options selected for downloading ‘HCL_CLLS.’
Package Products (Download Packages)
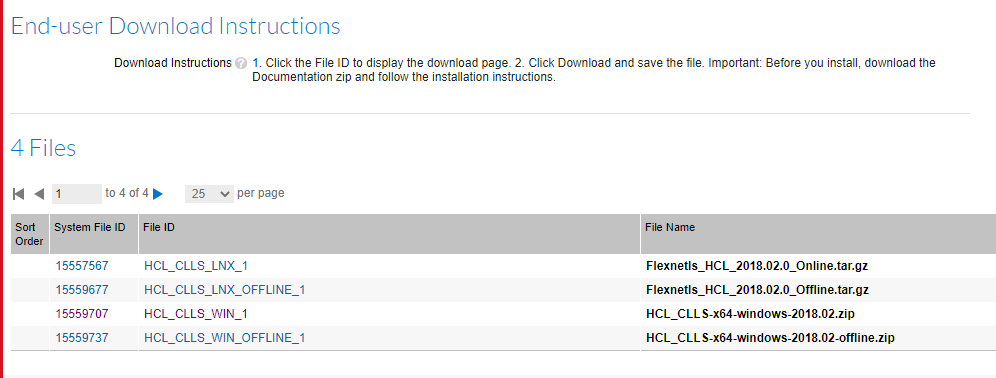
- Click HCL_CLLS to download the ‘HCL Common Local License Sever 1.0’ package to a user defined location.
- Click the Features tab and download HCL_ZIETrans to download all the packages related to ZIETrans.
Step-2 : Extract the Installers (for the Product and License Manager)
- Open the downloaded package.
For the product HCL Z and I Emulator for Transformation (ZIETrans), the downloaded package will be ‘HCL_ZIETrans.’ Extract the package you will get the Zietrans folder.

- Extract the ZIETrans Product Installer from the ZIETrans folder.
Step-3 : Configure the License Manager and the Product for usage
3.1 Set up the License Server (Flexera)
- In the HCL_CLLS package that is selected, the zipped packages shown in the
below image are present. Download the relevant installer, based on your OS
specification to connect to the Flexera License server.
Installer Packages in HCL CLLS
- For Windows users, download the HCL_CLLS_WIN_1 package.
- For Linux users, download the HCL_CLLS_LNX_1 package.
- The flexnetlsadmin.bat file that is used to connect to the Flexera License server is present in the [Extracted CLLS package]\enterprise folder.
- Once the installers are available, follow the steps given in the
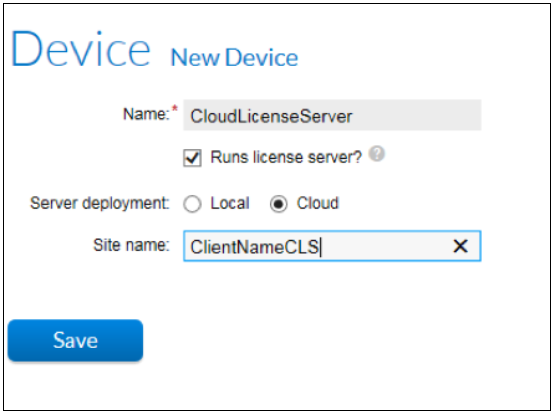
below link to configure the Flexera License Server. https://support.hcltechsw.com/csm?id=kb_article&sysparm_article=KB0073344&sys_kb_id=c75b269c1b79dc54f37655352a4bcb47 Note : You can choose the
Server deployment mode as Local or Cloud while setting up the
license server.
Server deployment mode
- After completing the License server deployment, you will get a custom Flexera URL.
- Use your custom URL to replace the following link given in the upcoming procedures: <https://[license server host]/api/1.0/instances/[license server ID]>
- For further queries related to Flexera setup, contact the HCL Customer support team using the following link: https://hclpnpsupport.hcltech.com/csm.
3.2 Configure the Product (HCL ZIETrans) with the License server (Flexera)
- Make sure that you meet the following prerequisite for key-pair generation: install any open source key tool (such as Open SSL or Java key tool) in the computer for key-pair generation.
- Complete these steps to configure the product with the license server
(Flexera):
- Configure the key tool
- Generate the key-pairs
- Upload the public key to the Flexera License server
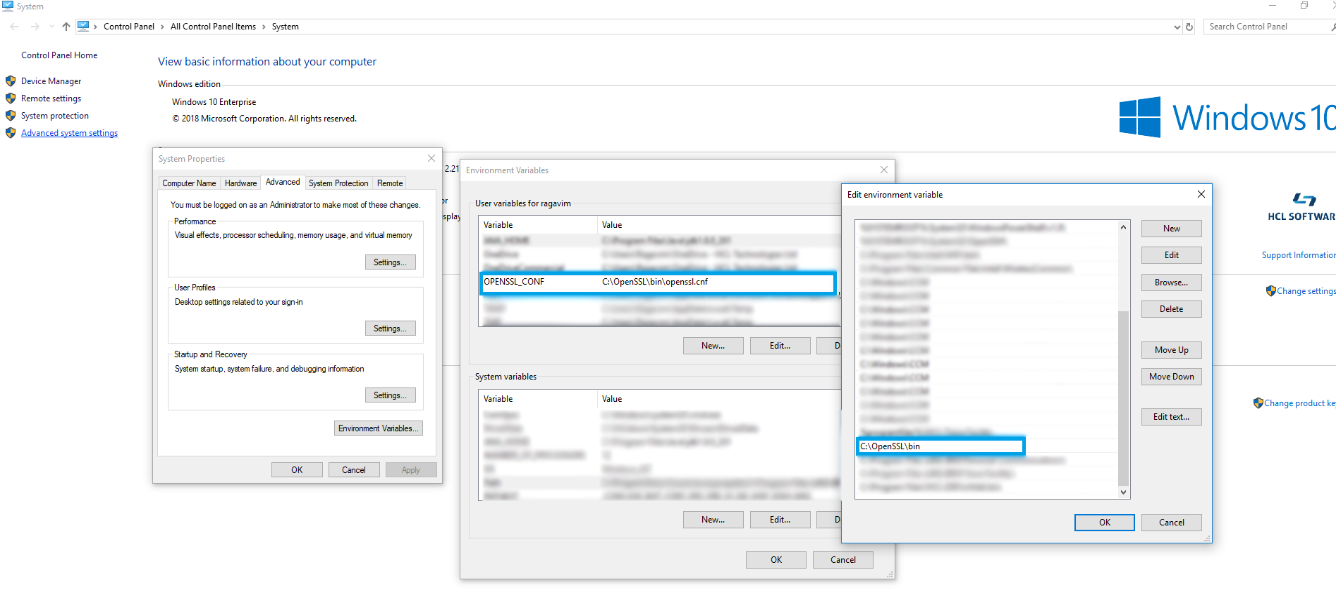
- After installing Open SSL, copy the open SSL folder under C:\ drive.
- Configure the Open SSL path in the system environment variables as
shown:
Configuring the Open SSL under system environment variables
The Public/Private key pair generated is used for secure communication. The key pair should be in "RSA 2048-bit" format. The private key format should be "pksc8", and that of the public key should be "DER" format.
The following is the procedure to generate key-pairs using OpenSSL:
- Generate private key. Open Command Prompt as an Administrator and enter the
Open SSL path to change the path from the root directory
(C:\OpenSSL\bin). Enter the following command, to
generate the private key in the C:\OpenSSL\bin
folder:
openssl genrsa -out private_key.pem 2048 - Get the public key. After the private key is generated, enter the following
command to generate the public key in the same
path.
openssl rsa -in private_key.pem -pubout -outform DER -out public_key.der - Convert private key to pkcs8 format to use it. Convert the
private_key.pem file into pcks8 format for strong
encryption. To do this conversion, enter the following command:
openssl pkcs8 -topk8 -inform PEM -outform PEM -in private_key.pem -out private_key_pkcs8.pem -nocryptGenerated keys under C:\OpenSSL\bin

- To connect to the Flexera server, the Extracted CLLS package should be
available in the local machine. Navigate to the Flexera folder in the local
machine (
D:\ [Extracted CLLS package]\enterprise). - Open the Command Prompt and enter the below
command:
For example:flexnetlsadmin.bat -server <https://[license server host]/api/1.0/instances/[license server ID] -authorize admin [license sever admin password] -uploadPublicKey [local path to public key (in DER format)]>flexnetlsadmin.bat -server https://hclsoftware.compliance.flexnetoperations.com/api/1.0/instances/FED321CBA -authorize admin adminpwd -uploadPublicKey C:\temp\public_key.der - If the public key is successfully uploaded to the Flexera server using the above command, you will receive an acknowledgement as Client public key has been uploaded successfully from the Flexera server.(For any queries related to the Flexera setup, contact the HCL Customer support team using the following link : https://hclpnpsupport.hcltech.com/csm).
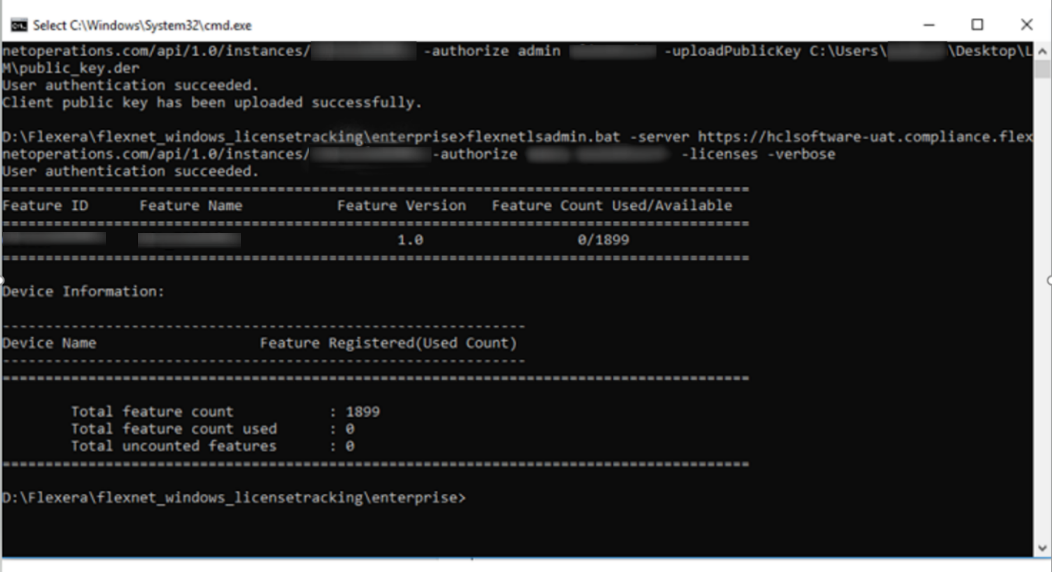
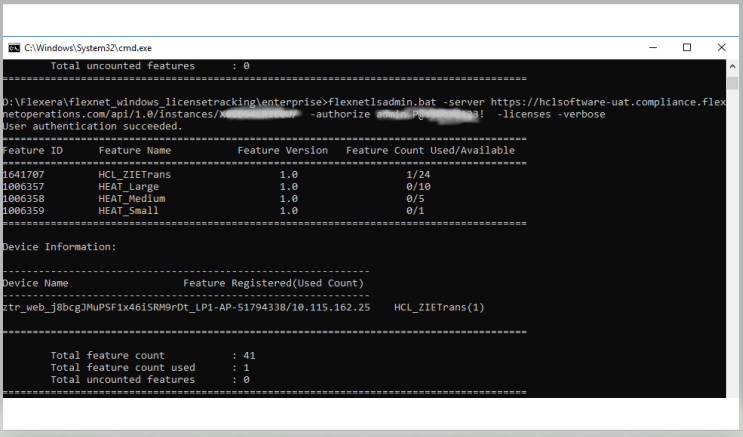
- Enter the below Flexera server command to check the feature description and
the total no. of licenses configured for that
feature.
For example:C:\Users\Admin\Desktop\Flexera\Others\[Extracted CLLS package]\enterprise\flexnetlsadmin.bat -server <https://[license server host]/api/1.0/instances/[license server ID] /-authorize <username> <password> -licenses -verbose>C:\Users\Admin\Desktop\Flexera\Others\[Extracted CLLS package]\enterprise\flexnetlsadmin.bat -server https://hclsoftware.compliance.flexnetoperations.com/api/1.0/instances/FED321CBA -authorize admin adminpwd -licenses -verboseFlexera server command to check Feature description & count of configured licenses
3.3 Configure the License Manager with the product (HCL ZIE For Transformation)
Prerequisites
- The User must install HCL ZIETrans and Create a ZIETrans project in the Toolkit .
- Configure the supported Application server like WAS, WebSphere Liberty Profile or JBOSS in the toolkit.
- Configure the “Flexera Server URL” , “Private key path” and “BorrowInterval”
time in the runtime .properties file of the project .ear. If the user wants
to run his application in debug mode he need to configure the same in
runtime-debug .properties file.
Configured Flexera in runtime.property file
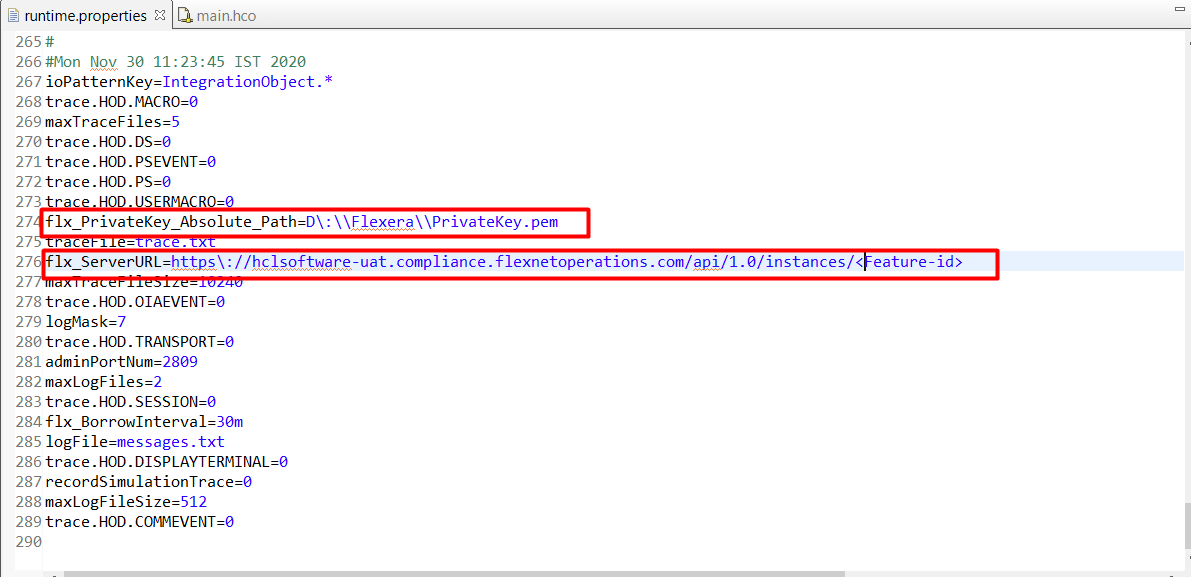
flx_PrivateKey_Absolute_Path= Drive\:
                            \\Path\\PrivateKey.pem
For example:
flx_PrivateKey_Absolute_Path =D\:\\Flexera\\private_key_pkcs8.pemflx_ServerURL= https://[license server host]/api/1.0/instances/[license server ID] /api/1.0/instances/Feature IDFor example:
https\://hclsoftware-uat.compliance.flexnetoperations.com/api/1.0/instances/X9C0S4LR1E0E
                                    flx_BorrowInterval=30m(default)
This parameter contains a numeric value followed by a unit-suffix letter, for example, flx_BorrowInterval value of 10h denotes 10 hours. The valid values for the unit-suffix letter for this parameter are : s, m, h, d and w (that indicates seconds, minutes, hours, days and weeks respectively).
- If the user does not set a value for this parameter, the default value is set to 30 minutes.
- This parameter is set in the license request to return license automatically after the borrow-interval is reached and will be useful in ensuring that any abnormal termination of ZIETrans will result in automatically returning the license.
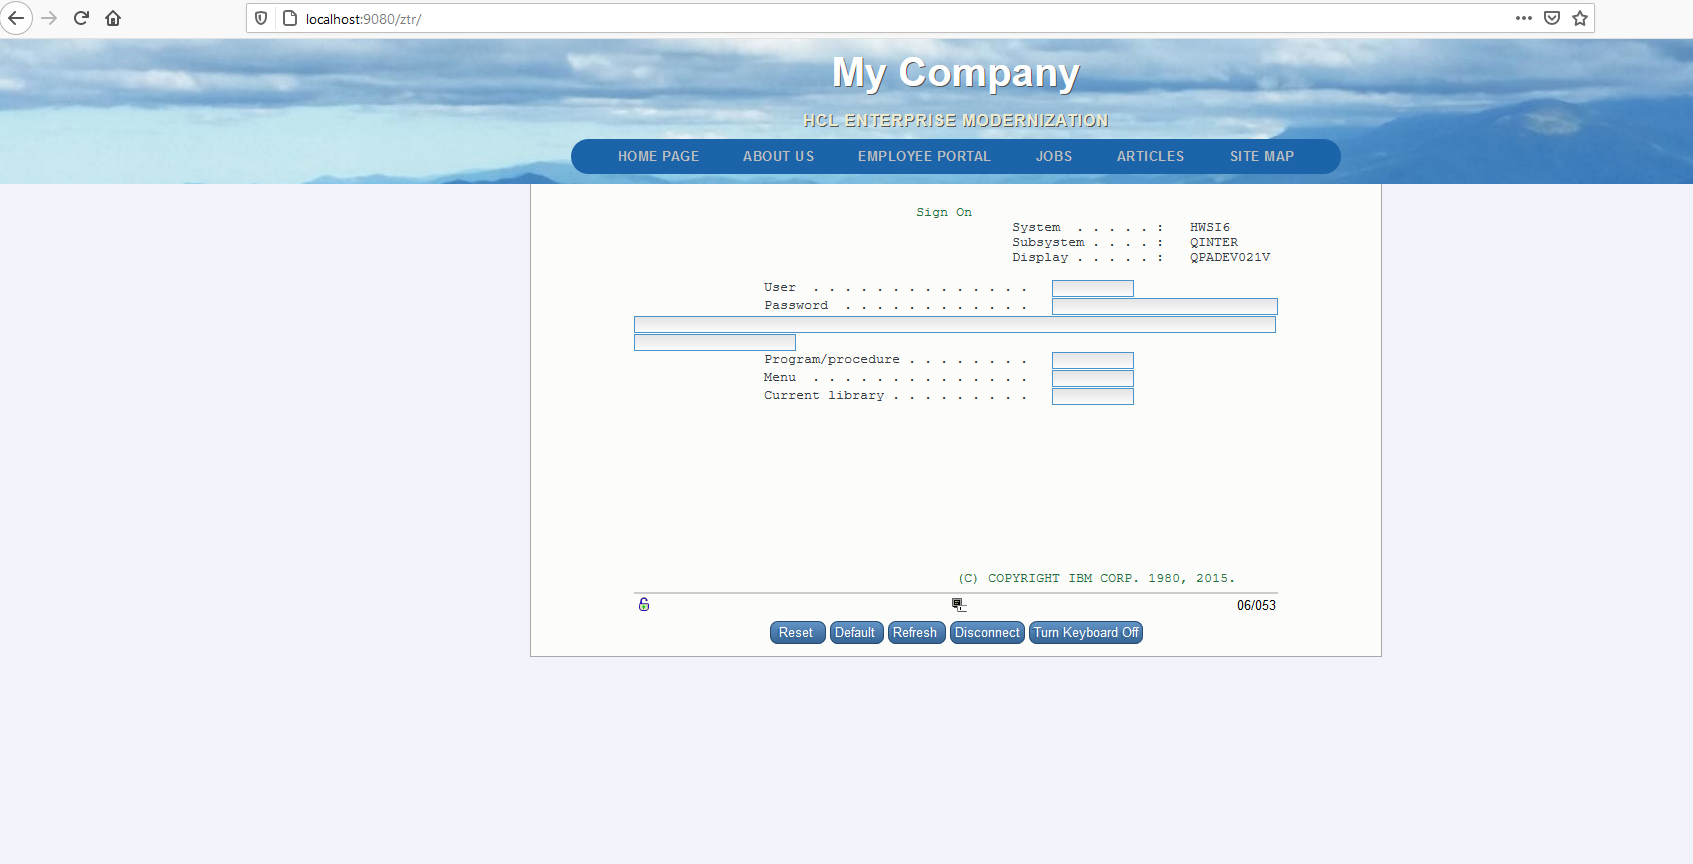
- Run the project on the configured server and user can use preferred
browser.
- Run the Flexera command and check the consumed licenses.
- Follow the preceding steps to open the application and connect to the configured host.