Create strategies
To create a strategy, complete the following steps. Use the Strategy tab under the Interactive Channel screen.
- Under All Interactive Channels, select an Interactive Channel that you want to work on. This takes you to detail page of the Interactive channel with multi-tabs. Click the Strategy tab.
- Click Add Strategy.

- In the Add Strategy box, complete the following substeps.
- Under Name, provide a Strategy name.
- Optional. Under Description, provide an appropriate description.
- Select the associated campaign. Associating a campaign with a strategy can
be made as optional or required, depending on the following setting in
Configuration. This setting applies to the entire Interact application. The
screen for creating smart rules displays.Note: If a campaign is required, you can configure through the setting
Affinium|Campaign|partitions|partition1|Interact|offerArbitration.isCampaignRequiredForStrategy


Once strategy object is created, you can directly add rules in the strategy. The screen for creating Smart Rules displays.
Rules in Strategy tab have View mode and Edit mode. See the View smart strategies section for details on View mode. In Edit mode, you can add, delete, and edit rules. All changes are cached at client side, until you click Save or Save and Exit. This results in saving the changes to the database level.
In Edit mode, the Rule table has two panes, New rules pane on top, where you can add numbers of new rules and Existing rules pane below where you can edit or and copy from existing rules.
- Click Select or drag segment or Select or drag zone or Select or drag offer of existing top row to select segment, zone or offer from its drop-down list. Click Add Row to add more rows.
- Select one or multiple Segments, Zones, Offer items from its tree at left panel
and drag and drop to New rules pane area..

- Click Add Zone button.

If you require multiple new rules for different zones, while keeping everything else the same, click Copy to Zones and select the target zones. The following screen circled in green is the source, while the screens circled in red are the generated copies.

The same functionality is also supported for segments and offers.
You can edit offer scores, eligibilities, learning setting, and their corresponding groups using “Advanced Options”, which is available for individual rule by hovering the cursor to the right end of that row. For multiple rules, select the boxes to the left of all the applicable rules.

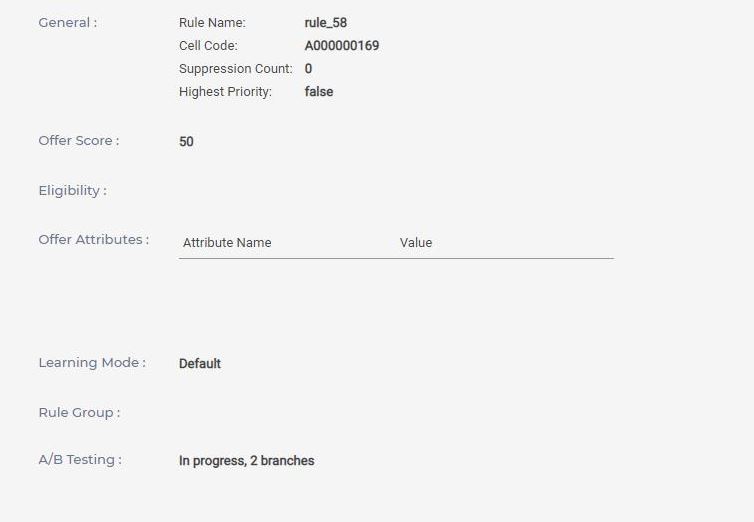
The following Advanced Options screen displays. It includes the fields categorized in multiple tabs. After completing all required changes, click Apply Changes to save the changes on all tabs, if any, to rule data cached on client side.

The following sections provide details on the different tabs available on Advanced Options.
General
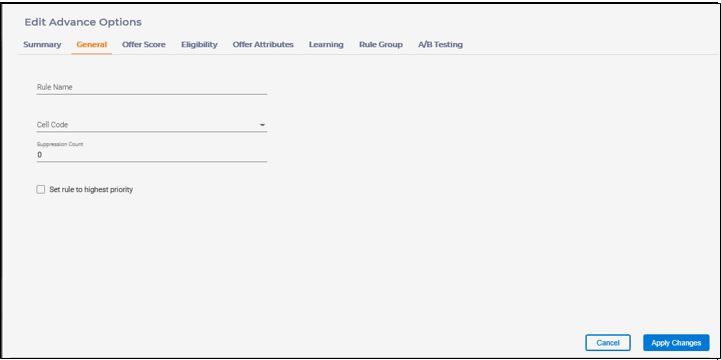
Under General tab, the following fields are available.
- Rule Name: The name of the rule. It is optional. The default is
rule_<ruleId>generated by server. Its length cannot be more than 64 characters. - Cell Code: The code of the target cell this rule is associated to. An existing cell can be selected or a new cell can be created.
- Suppression Count: The maximum number of offers, which are returned to the client when getOffers request is invoked. The offer in this rule has the highest score in all eligible offers.
- Set rule to highest priority: A flag to indicate the offer in this rule is returned first to the client, when getOffers request is invoked, regardless of its score. However, when two or more eligible offers have this flag set, they are prioritized based on their scores.
Offer score

Under Offer Score tab, the following fields are available.
- Set Score: The marketer score in the range of 1 to 100.
- Use Expression: The score of this offer is calculated at run time using
the given expression, which generates a numeric value. The expression
can be constructed using any of the macros, operators, profile
attributes, offer attributes, real-time attributes, and/or event
patterns listed in the left panel.
Click Validate syntax to check the expression’s syntactic validity.
Eligibility

Under the Eligibility tab, the following fields are available.
- Eligibility in time: The range of time this rule is effective. When left blank for “Effective Date”, this rule is effective immediately. When left blank for “Expiration Date”, this rule is effective as long as this rule is in place. A past date cannot be set as the expiration date.
- Eligible if following conditions are met: The eligibility of this offer
is calculated at run time using the given expression, which has to
generate a boolean value. The expression can be constructed using any of
the macros, operators, profile attributes, offer attributes, real-time
attributes, and/or event patterns listed in the left panel.
Click Validate syntax to check the expression’s syntactic validity.
Offer attributes

Under Offer Attributes tab, all the parameterizable attributes of the offer in this rule are listed. By clicking an individual value, it can be parameterized in next window.

The parameterized value can be either a constant or an expression. If it is an expression, it has to generate a value that has the same type as defined in the offer. The expression can be constructed using any of the macros and/or operators listed on the left panel on top of profile attributes, offer attributes, and real-time attributes, which are also listed in the left panel. Click Validate syntax to check the expression’s syntactic validity. After the value is edited, click Apply to save changes. Click Reset to default to reset the value to the one defined in the offer.
Learning

Under Learning Mode tab, the following fields are available. On this tab, the learning mode is set.
- Inherit from zone: The learning setting in the applicable zone, corresponding to the interaction point in the getOffers request, is used.
- No learning: market score is used.
- Custom Learning Model: If built-in learning is enabled globally, self-learning with the specified learning model is used. A learning model defined in this interactive channel can be selected from the drop-down list.
Rule group

On this tab, this rule can be added into zero, one, or more rule groups. You can select a rule group by checking the box to the left of its name. Click Add New Group to create a new rule group. Rule groups are used solely for organizing rules, with no extra functionality.

A/B Testing
A/B testing, also known aperformans 'split testing', is the process of comparing two versions of same scenario with just one varying parameter. It brings scientific methodology to marketing and removes the guesswork.
In Interact, A/B testing is the test done for a treatment rule with all its properties fixed, but only one parameter varies. In 12.1, this parameter is combination of offer and offer attributes. In an A/B testing of a rule, each variation of offer and/or offer attributes represents one branch with specified audience distribution.
The testing period is defined with effective date and expiration date. Both dates are optional. If effective date is not defined, then A/B testing is in affect immediately after deployment. If expiration date is not defined, then it is in affect forever.

By default, A/B testing is disabled for a
rule. To enable it, select the Enabled checkbox, click  , and then click
A/B.
, and then click
A/B.
- Select the Enabled checkbox.
- Under Test Period, provide the Effective and Expiration dates.
- In the Selection mode list, select one of the following options.
- Use Default: Select this option if you want the offer to be served from the default branch out of A/B test branches, regardless of the higher acceptance rate of any offer.
- Use base: Select this option if you want the offer to be served from the treatment rule, regardless of the higher acceptance rate of any offer.
- Auto Selection: Select this option if you want the offer to be
served from one of the A/B test branches having highest
acceptance rate. Acceptance rate is calculated as ratio of
response count to contact count.
Once "Auto Selection" or "Use Base" option is selected, then Default Branch column will be hidden. If there is performance data in Acceptance Rate column, then branch information can be read only.
- Click Apply changes.
This adds base rule as first branch in Branch table. The additional branches can be added by clicking Add Branch. Branch Name is an unique identifier for a branch. It is a required field and must be unique within A/B testing. A branch can be enabled and disabled. Only enabled branches participate in A/B Testing at runtime. An A/B testing can be enabled or disabled. Only enabled A/B Testing is actually executed at runtime.
To save A/B testing data, click Apply Changes on Advanced Option dialog to close it.
A/B Testing data is applied to database only when you click the “Save” or “Save and Exit” button on the upper right corner on Strategy rule list.

In the Strategy Rule list page, select the Show A/B testing rules only checkbox to display the rules with A/B testing and acceptance rate column with ABT status and acceptance rate of each branch.
There can be four statuses for Acceptance Rate column for base rule including disabled, yet to start, in progress, and finished. In case, you select the "Use Default" or "Auto Selection" selection mode, a "check-mark" near the selected branch is displayed.


For any rule that has A/B testing data defined, there is "A/B Testing" icon located on the right. The orange color means it is active and grey color means it is disabled.
ABT Summary page displays the “ABT status” and “number of branches” for the A/B test.
To analyze A/B Testing results in case of "Auto Selection" mode, a column "ABTestBranchID" is added into audience specific detail contact history table (Example: UA_DTLContactHist table) in Campaign database to record the ID of the selected branch when A/B testing is engaged in arbitrating the relevant smart rules. The information in this column, together with other treatment fields, enables users to create reports on the performance on A/B testing branches for individual smart rules. The "ABTestBranchID" column is used in rule based performance query for retrieving the branch details and calculate the accept rate of branches.
One of the offers from A/B testing branches is served based on the random selection approach if A/B testing is define but not completed. Once A/B testing is completed, i.e. after its expiration date, then an offer from A/B testing branches is served as per the option selected under the Selection Mode list.
If Mode is "Auto Selection", then UACI_ABTestPerformance table of runtime database will be used for serving the offer.
During offer arbitration, when a rule has A/B testing enabled but expired, the UACI_ABTestPerformance table calculates the accept rate of all the branches belonging to the rule and the best performance branch is calculated based on their highest accept to contact ratio.
The UACI_ABTestPerformance table is queried during offer arbitration and data of
this table is stored in the read cache. An offer is severed based on the data
that exists in the read cache. The data of the read cache is updated after 60
minutes as default value of the JVM parameter
com.unica.interact.abtPerformanceDataLoadFrequencyInMin is
60 minutes. You can change the data update time of the read cache by using the
com.unica.interact.abtPerformanceDataLoadFrequencyInMin JVM
configuration parameter.
If you have same accept rate for multiple branches, then the offer of that branch is selected during offer arbitration, which includes the current updateTime value.