Installing Sametime Community on Windows
This topic guides you through the steps for installing HCL Sametime 11.5 Community Server for Windows.
About this task
For Windows based installs:
Procedure
- Extract the Sametime_11.5_CommunityServer_Win64 or latest version archive to your local drive and execute the ‘install.exe’ located in the Server subdirectory.
- If you plan to use TLS for your LDAP connections, you must also install the GSKit, located in the GSKit subdirectory. Refer to Installing GSKit on Windows.
Note: Windows installations require the latest Microsoft Visual C++ install. Windows
Virtual Machine installs may not have this installed, which will result in a
failure loading JWT dll. Ensure Microsoft Visual C++ is installed before continuing.
Installation Steps
This topic guides you through the steps for installing the HCL Sametime Community Server.
To install HCL Sametime Community Server:
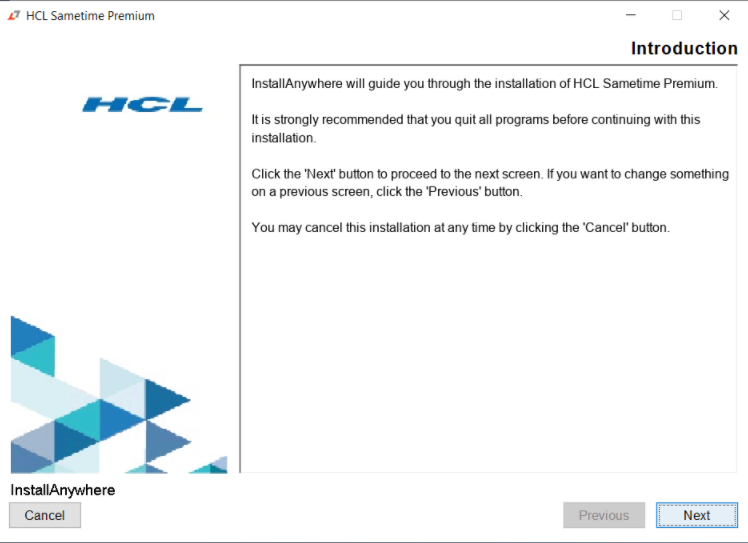
- On the computer where you will install the HCL Sametime Community Server, the InstallAnywhere
install shield will guide you through the installation process. Click
Next.
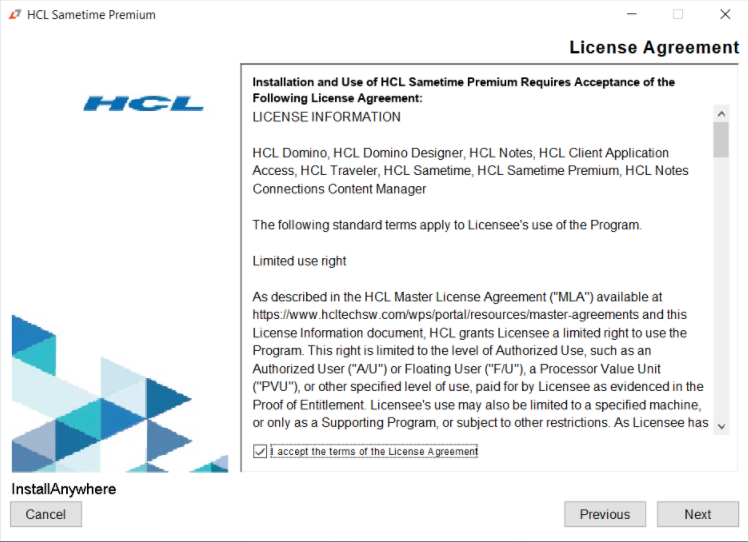
- The license agreement screen displays. Click Next.
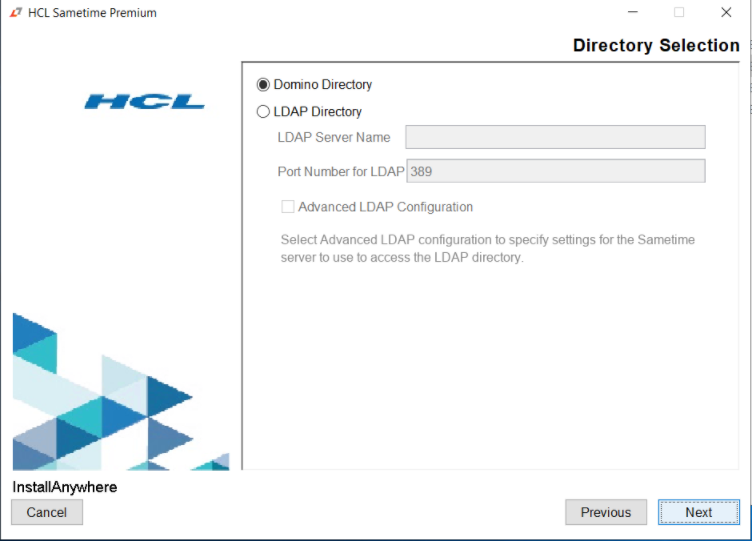
- Select the Directory type you wish to use,
- If using the local Domino directory, click Next.
- If you select the LDAP Directory radio button.
- In the LDAP Server Name text box, enter the hostname of your LDAP server.
- In the Port Number for LDAP text box, enter the appropriate port for your LDAP server
- Click Next.
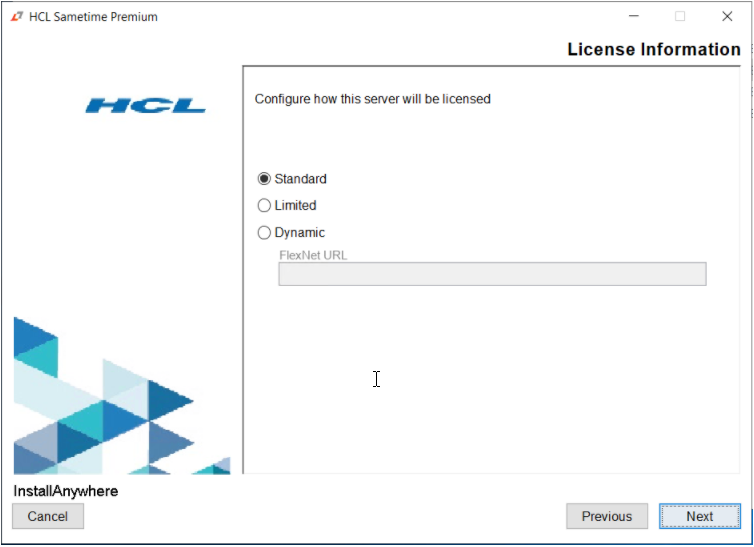
- Select the radio button option in the License Information screen
to configure the license. Click Next. Note: You can choose either Standard or Limited depending on your license. Currently the Dynamic model option, where you can enter the flex net url is not supported for this release.
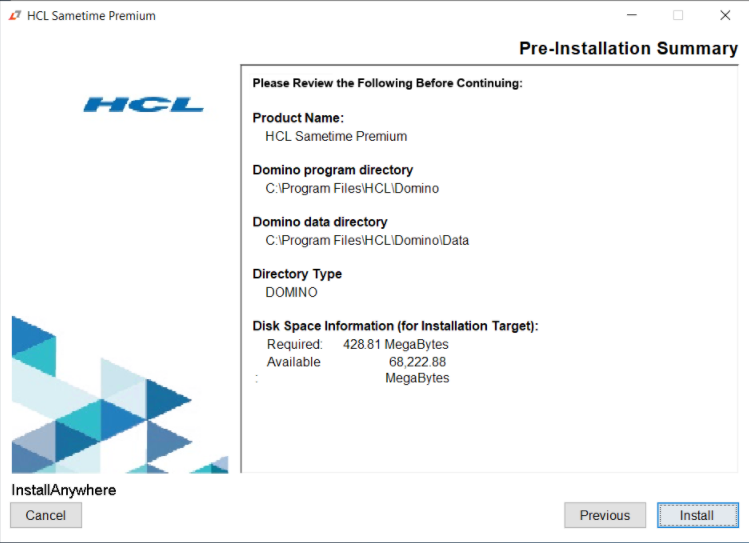
- The Pre-Installation Summary displays. Click Install.
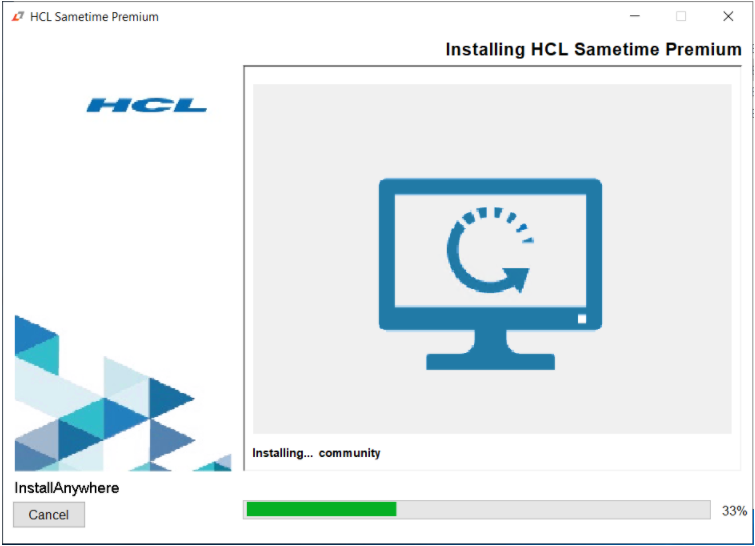
- The installation begins.
- Confirm the installation is performed without error. Note: You must restart the system to complete the installation. Select the radio button Yes, restart my system and then click Done.
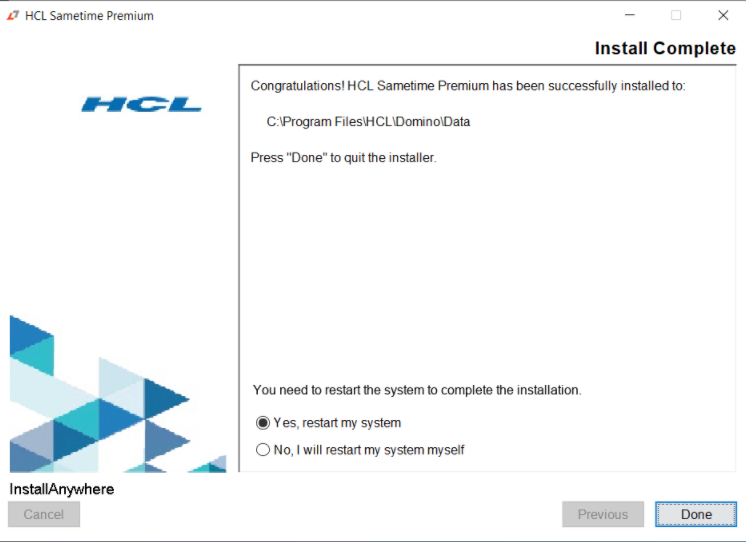
- After the restart, the installation is complete.
Results
In the Domino data directory, stsetup_exit_status.txt file will contain a zero (0) if the installation is successful. If the installation was not successful, look at the installation logs for more information. Fix the problem, then try installing again. The installation logs are stored in the following locations.
C:\Program Files\HCL\Domino\Data\stsetup.log
C:\Users\<user>\AppData\Local\Temp\SametimeIniParser.log