Configuring the SafeLinx server for Nomad
Configure the SafeLinx server for Nomad.
Before you begin
About this task
- Configure a SafeLinx login profile and then log in.
- Configure the SafeLinx Access Manager.
- Add a SafeLinx server.
- Configure a Nomad proxy for the SafeLinx server.
- Confirm the configuration.
Procedure
-
Configure a SafeLinx login profile and then log in:
-
Complete the fields in the Add Login Profile
window and then click OK.
Replace the following example information with information for your environment:
Login Profile Name: SLDomino
Host Name: SLDomino.mycompany.com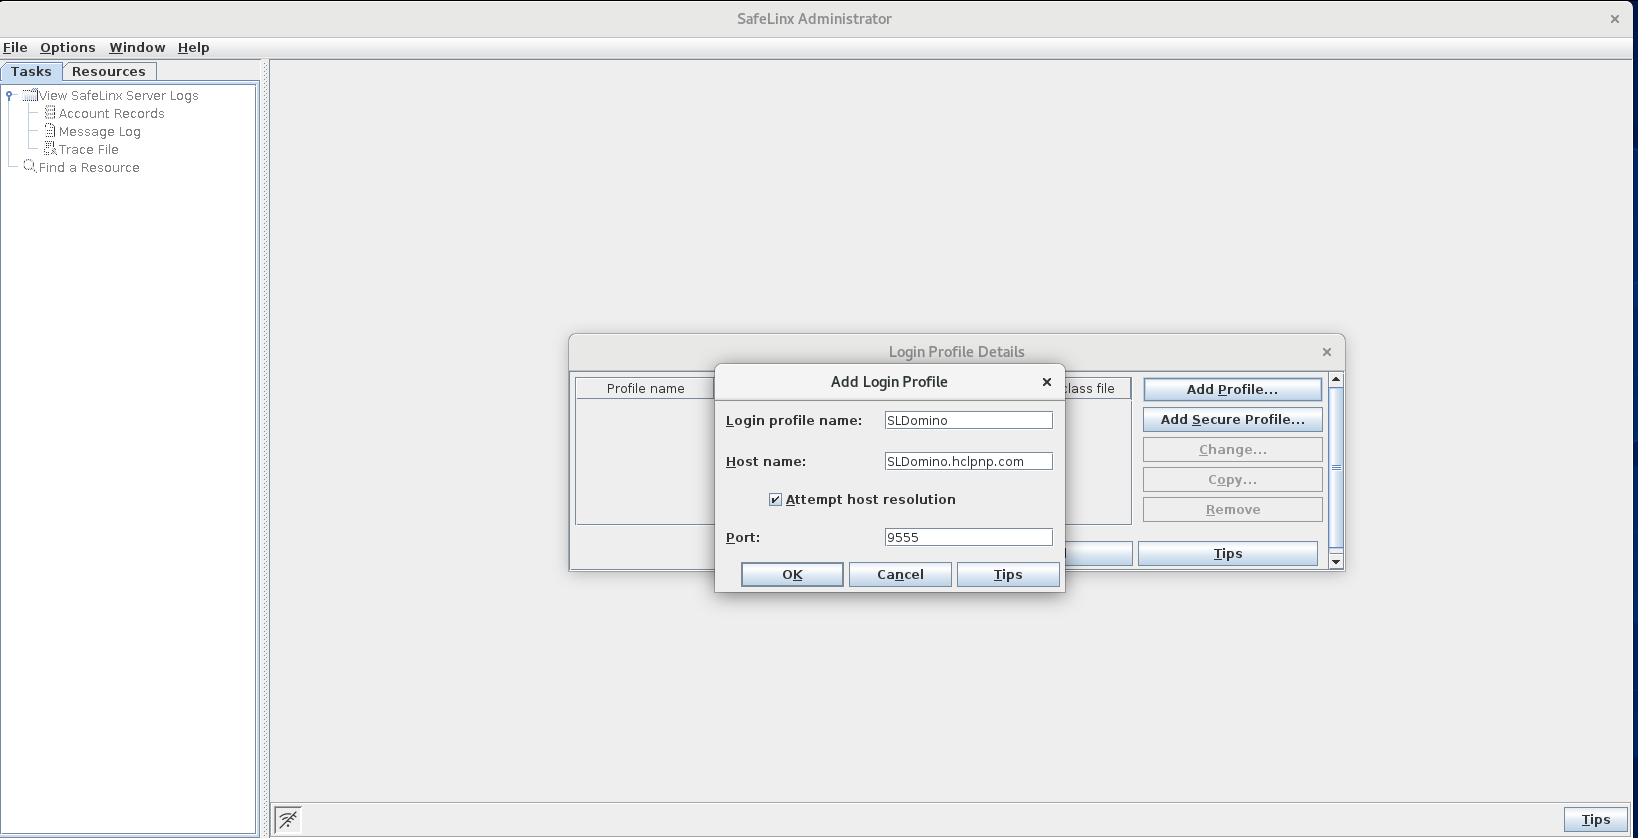
-
Select the profile you created and click OK to
log in.

-
Complete the fields in the Add Login Profile
window and then click OK.
-
Configure the SafeLinx Access Manager:
-
In the Configure the SafeLinx Access Manager
window, keep the default selection An ODBC compliant
relational database and click
Next.

-
In the next window, update the database ID and password fields to the
values required for your configuration and then click
Next. The other fields are filled in for you.
Database name: wgdata
Database administrative ID: wgdb
Enter the password: Safelinx@55
Confirm the password: Safelinx@55
-
In the next window, for Base distinguished name
(DN):, keep the default value,
“o=local”. Optionally, change to your company
or organization name. Click Next.

-
In the next window, select All to enable all
logging and click Next.

-
In the next window, click Finish to connect to
the server and create the new required database. Processing may take a
few moments to complete.

-
At the following prompt, click Yes to change the
password for the SafeLinx super user “admin” account used to log in to
the SafeLinx Administratror. This step is required because you logged in
with the default SafeLinx admin password.

-
In the Configure the SafeLinx Access Manager
window, keep the default selection An ODBC compliant
relational database and click
Next.
-
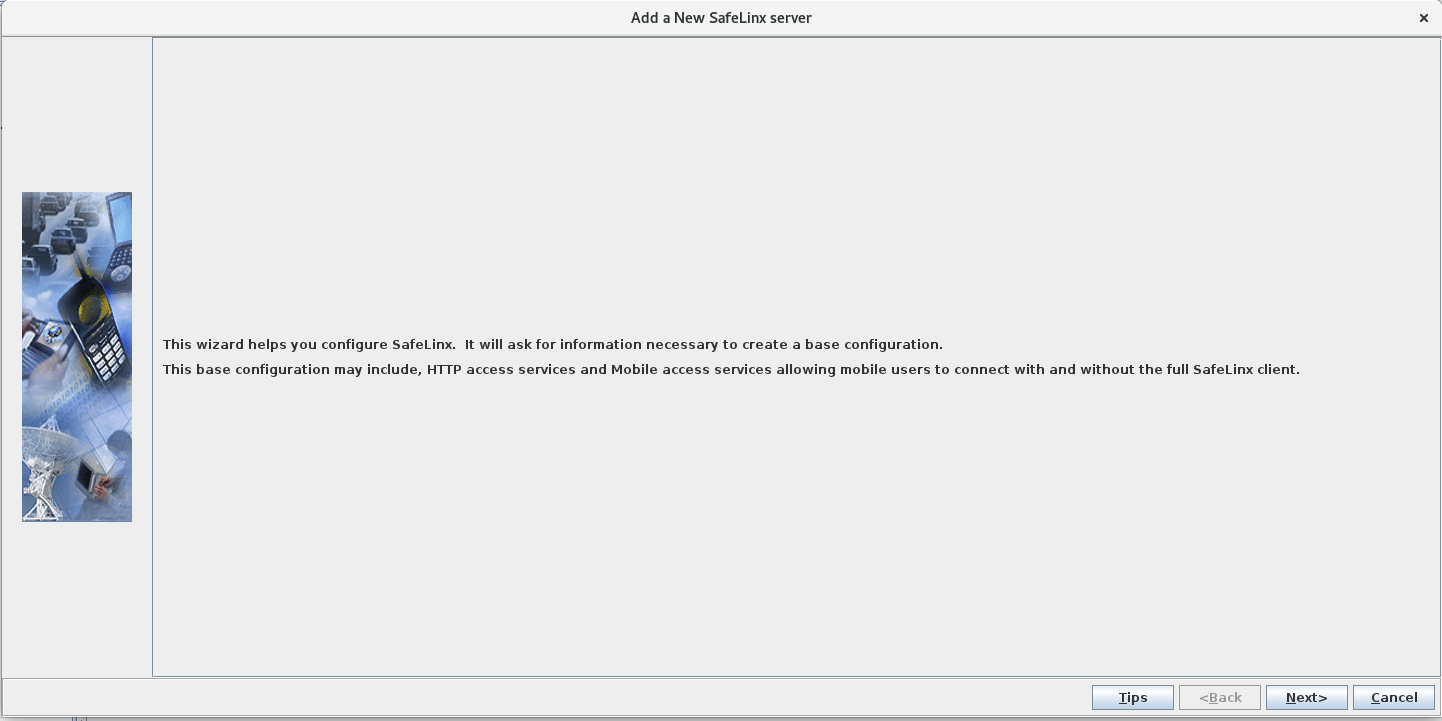
Add a new SafeLinx server:
-
At the Add a New SafeLinx server window, click
Next.
-
In the next window, the Linux machine host name is automatically
selected as the SafeLinx server. Provide a SafeLinx server identifier
name for it. This is a free-form name for recognizing this server that
only the SafeLinx Administrator client uses. Accept the default values
in the other fields and then click Next.
Current host name: SLDomino.mycompany.com
SafeLinx server identifier: SLDomino.mycompany.com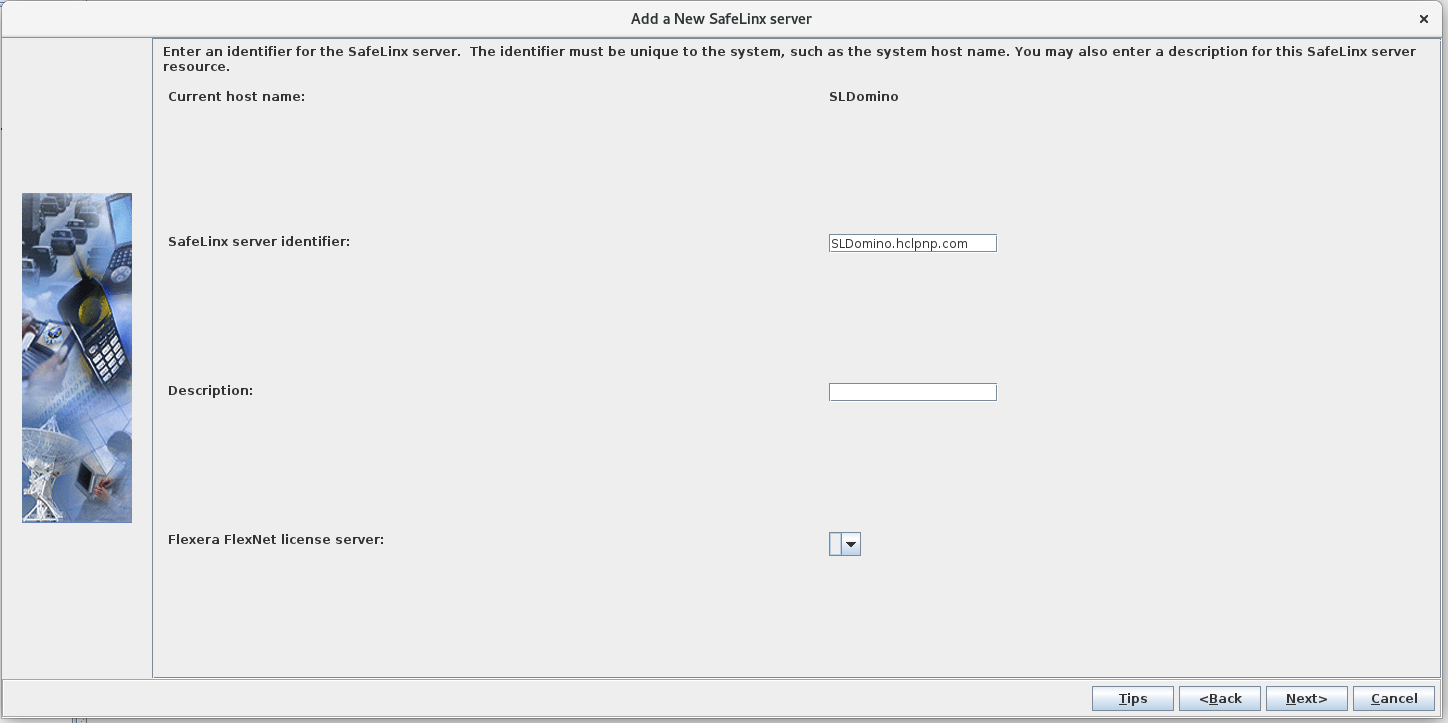
-
In the next window, keep O=local selected as the
primary organizational unit and click Next.

-
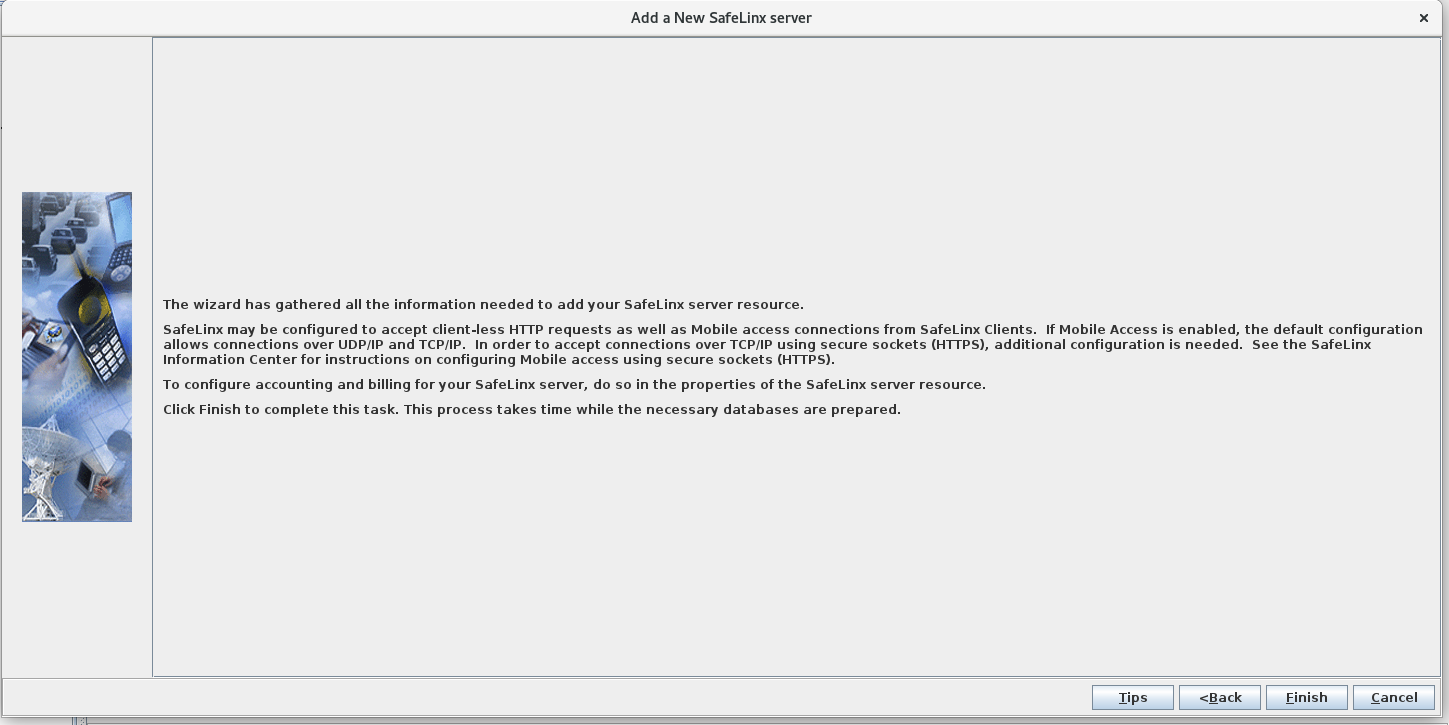
In the next window, click Finish to complete the
SafeLinx server configuration.
-
At the Add a New SafeLinx server window, click
Next.
-
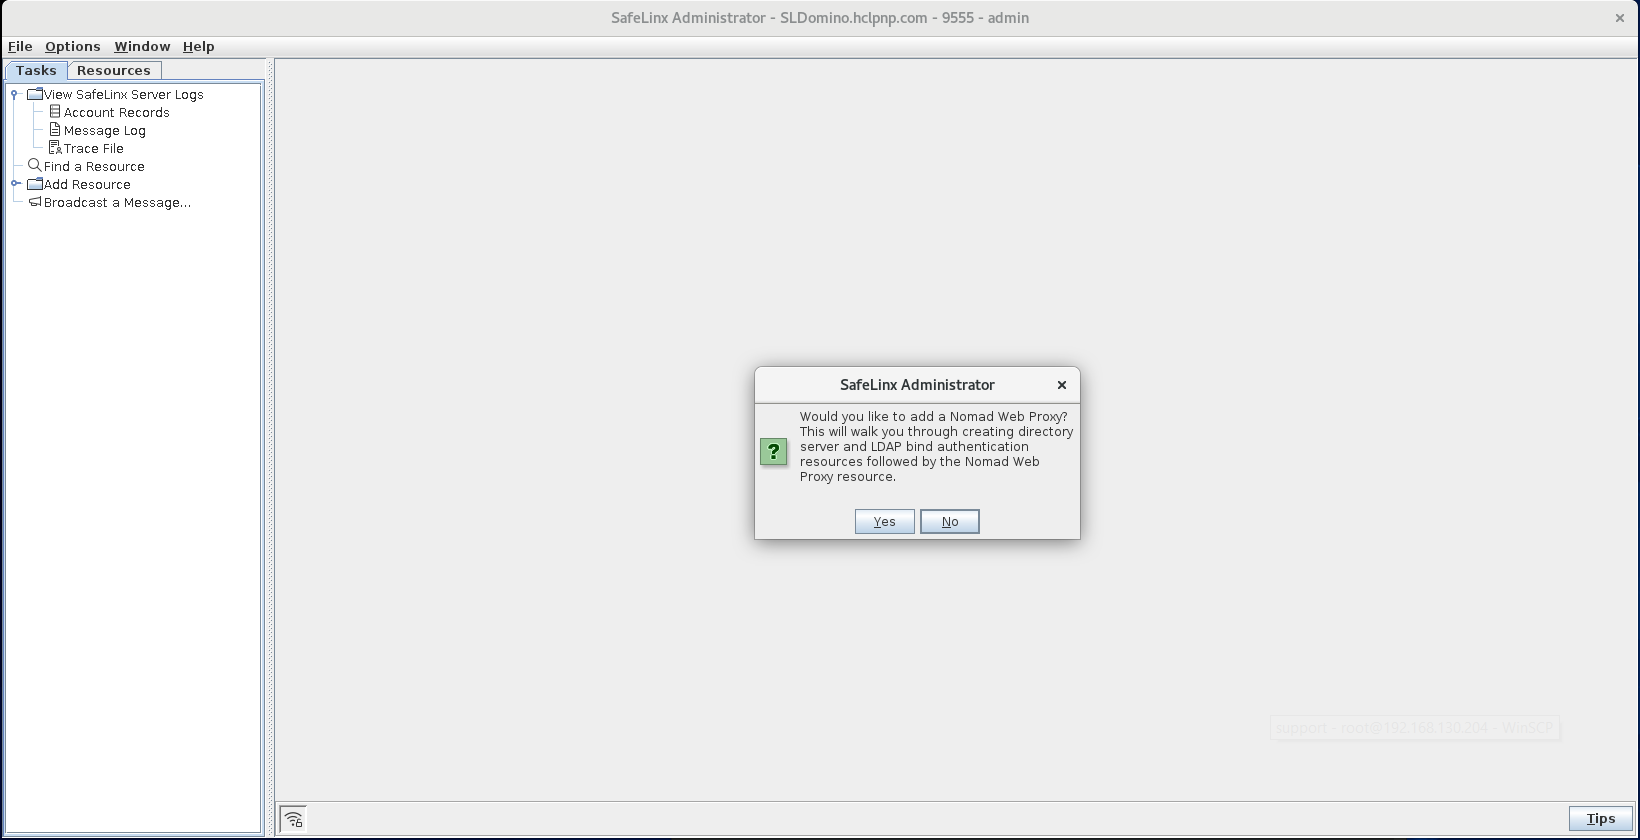
Configure the Nomad proxy:
-
At the prompt asking whether to add a Nomad proxy, click
Yes.
-
At the prompt asking whether to add an LDAP Directory server, click
Yes.

-
In the Add a Directory Server window, complete
the following fields.
Note: Using port 636 for connections between the SafeLinx server and Domino LDAP server is recommended.
Field Description Common Name: The Domino LDAP server host name, for example, Myserver.mycompany.com. Host name or IP address of Service: Host name or IP address of the Domino LDAP server, for example, 192.168.0.110. Base distinguish name (DN): The Domino Org name, for example, O=JAM. If your LDAP server uses multiple suffixes, adding the DN can reduce the number of SafeLinx LDAP search paths. 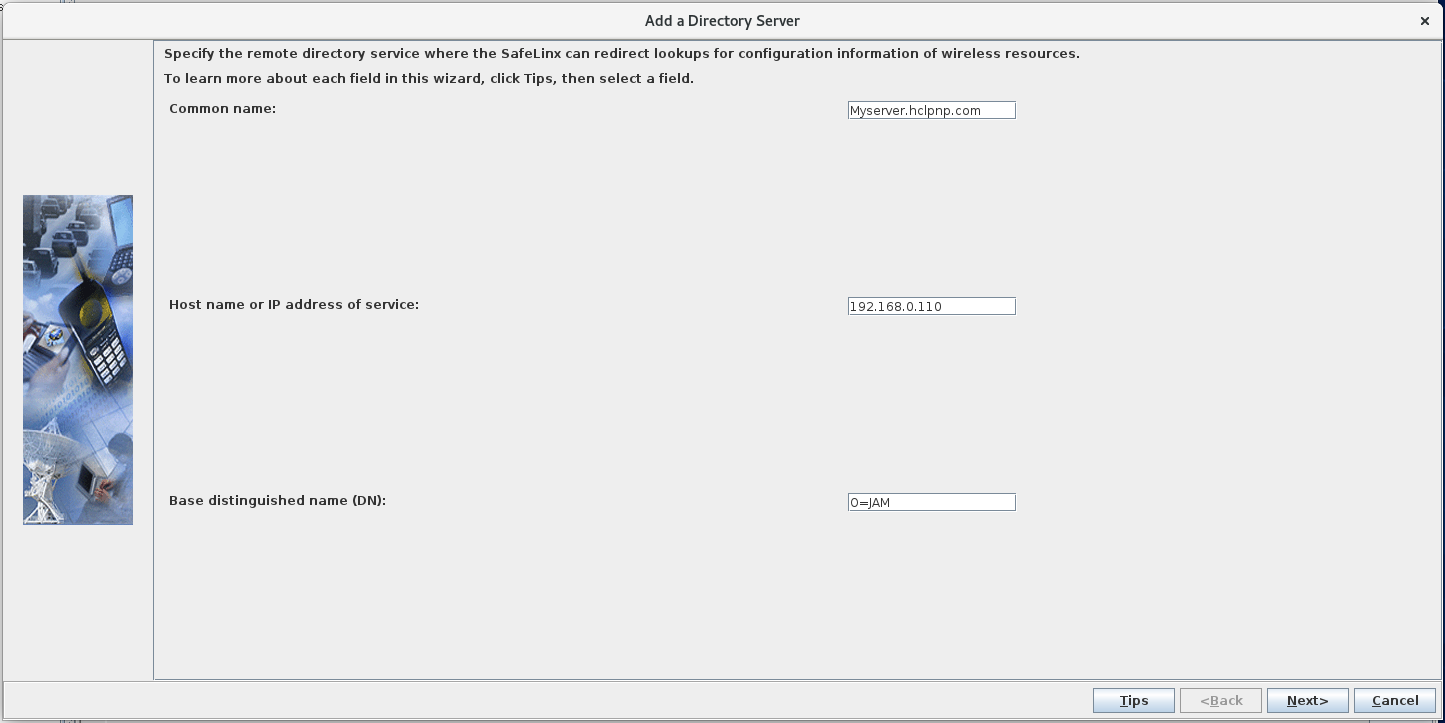
-
In the following window, complete the these fields and then click
Next:
Field Description Port number of Service: Port 389 is picked by default. Port 636 is recommended to avoid user passwords being presented in clear text when users authenticate. Administrator's distinguish name (DN): Distinguished name of the Domino administrator user to use to connect to the Domino LDAP service, for example, CN=Domino Admin/O=JAM. Enter the password: The internet password for the Domino administrator account. Confirm the password: Enter password again. 
-
In the following window, click Finish.

-
At the prompt asking whether to add an LDAP bind authentication method,
click Yes.

-
In the Add a New Authentication Profile window,
complete the following fields and then click
Next:
Field Description Common name: The common name of the Domino LDAP server, for example, MyServerDomino. Description: The descriptive name of the Domino LDAP server, for example, DominoLDAP. Password policy: Accept the default, None. 
-
In the following window, complete these fields and accept the default
values for other fields. Then click Next.
Directory Server: Select the Domino LDAP server that is shown.
User key field: Specify the LDAP attributes to query to identify a user for authentication. For example, if users are identified by their email addresses, specify mail.
-
In the following window, accept the default values and click
Next.

-
In the following window, accept the default values and click
Finish.

-
In the Add a Nomad Web Proxy window, complete
the following fields and click Next. The field
values shown are examples.
Service URL (https://): https://sldomino.mycompany.com
TCP port to listen on: 443
PKCS12 keystore file: slselfsign.p12
Keystore password: trusted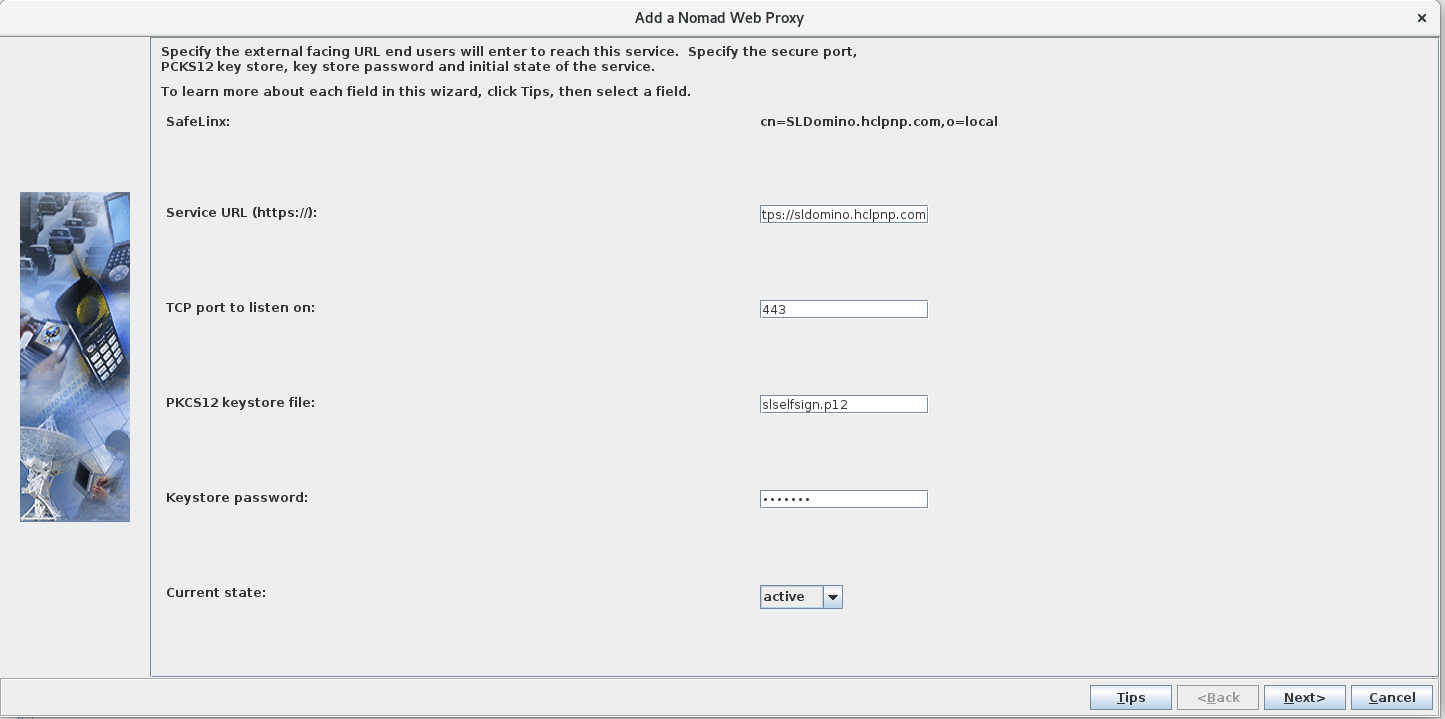
-
At the next window, complete the following fields. When you are done,
click Finish.
Field Description Text: Add two rules for the Nomad application that reflect your server naming conventions and Nomad web static file path. For example: NOMAD /nomad file:///usr/local/
and
NOMAD CN=MyServer/O=JAM nrpc://MyServer.mycompany.com:1352Authentication Profile: Select the LDAP authentication profile created previously, for example, DominoLDAP. Session cookie Domain: Specify the domain that corresponds to your configuration, for example, mycompany.com. 
-
When prompted whether to add an HTTP service for other applications,
click No.

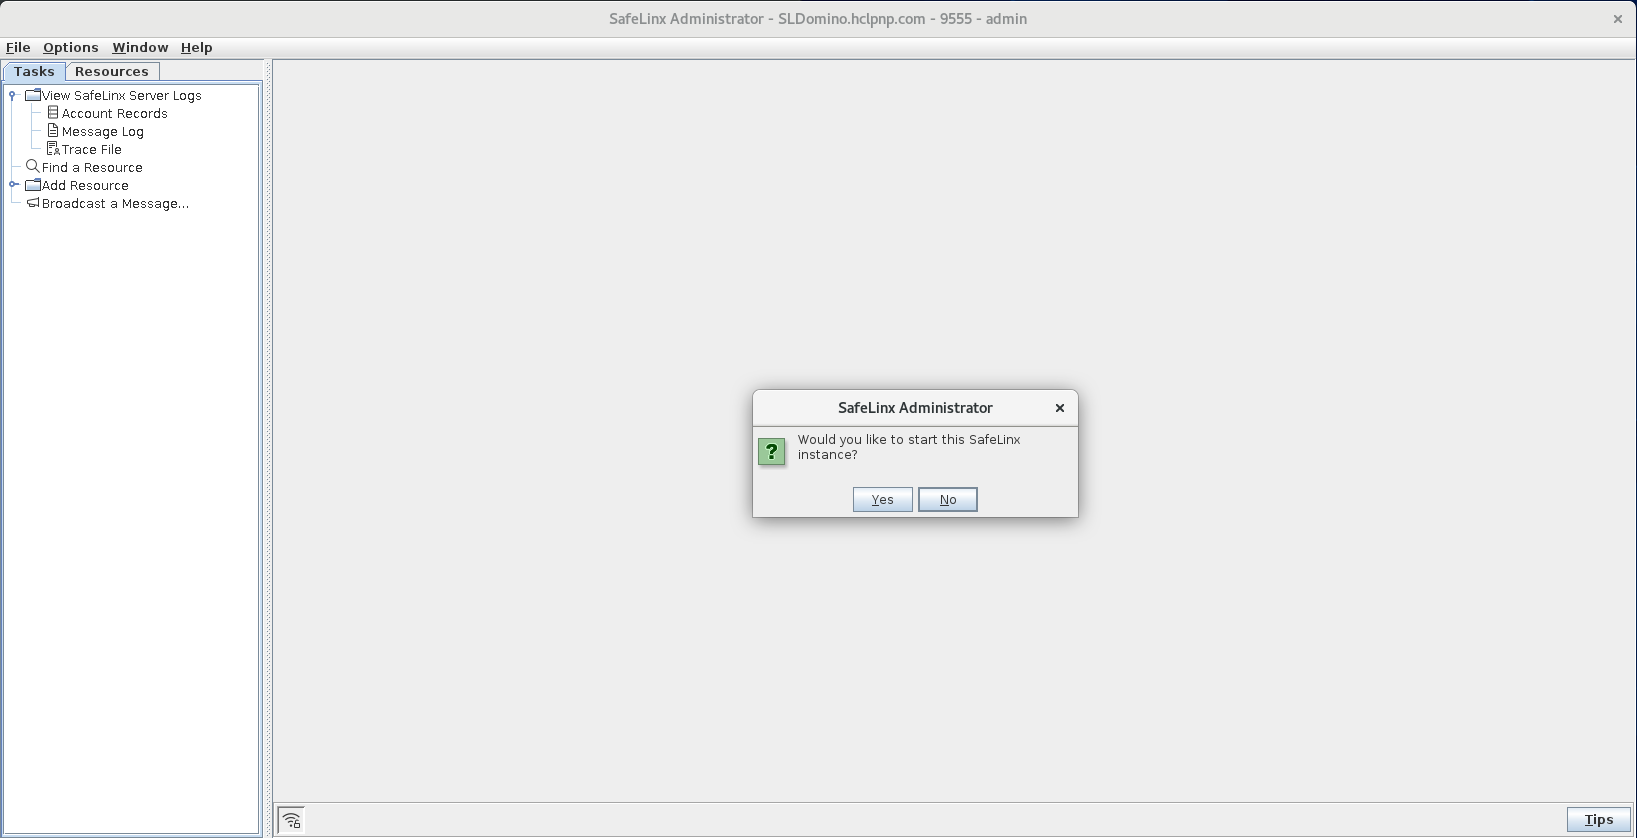
-
When prompted whether to start the SafeLinx instance, click
Yes.
-
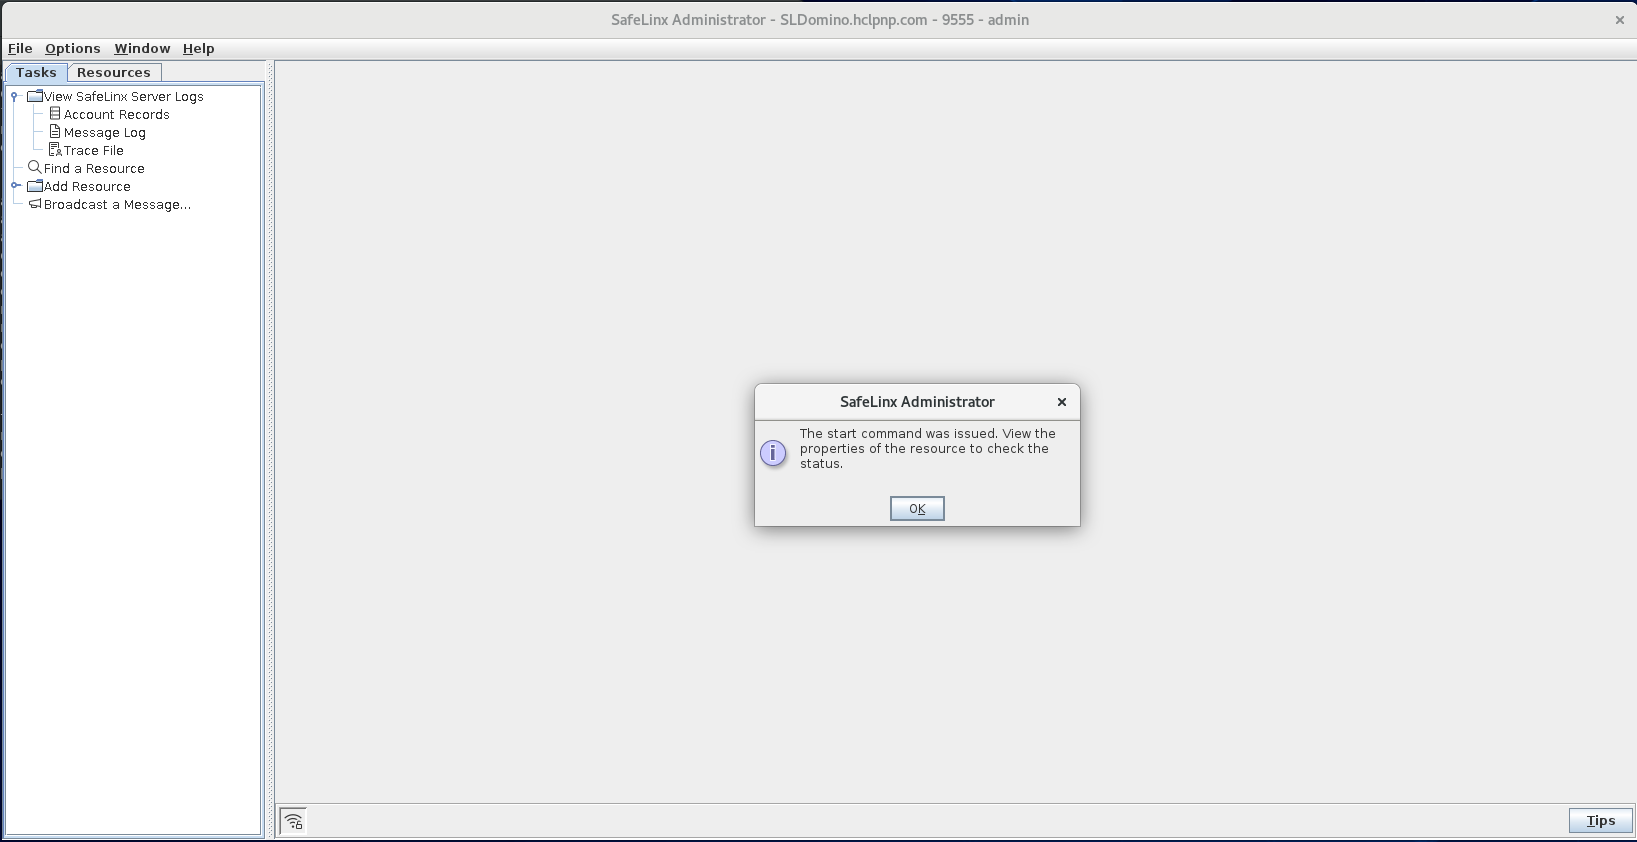
Click OK at the following prompt to complete the
Nomad proxy configuration:
-
At the prompt asking whether to add a Nomad proxy, click
Yes.
-
Confirm the configuration:
-
From the SafeLinx Administrator client, confirm that the Resources tab
looks similar to this:

-
Run the following command to confirm that the
wgatedandwgattachdSafeLinx server processes are running:ps -e | grep wga When you start the SafeLinx server one instance of each process runs.
wgatedruns functions of the SafeLinx Server, such as monitoring the status of network devices, transmitting data, and updating log files.wgattachdmonitorswgatedand restarts it if it fails.
-
From the SafeLinx Administrator client, confirm that the Resources tab
looks similar to this: