The test result indicates the quality of the application under test. Different
stakeholders to the application might want to check the quality of application but do not
have HCL OneTest™ API installed. You can publish the test result reports to HCL OneTest™ Server so that others can view it from a web browser.
Before you begin
You must have completed the following tasks:
- Installed HCL OneTest™ Server and configured a project.
- Logged in to HCL OneTest™ Server and copied the offline user token generated by using the
Create Token option from the menu in the HCL OneTest™ Server
Header. You must have copied the offline user token
in the HCL OneTest™ API UI. For more information, see HCL OneTest™ Server Documentation.
About this task
You can configure the auto-publishing option for publishing test result reports to
HCL OneTest™ Server by using the Project Settings menu option. When the
auto-publishing option is activated, the test result report is automatically
published to HCL OneTest™ Server whenever you run a test suite or test in HCL OneTest™ API.
Procedure
-
Click , and then click the Server Settings
tab.
-
Use the fields under Results Database to create or
modify a database connection:
-
Select the provider and enter the connection details about where and
how the database is set up for HCL OneTest™ API.
-
Click Test Connection to test the connection to
the configured Results Database.
If the test is successful, no further configuration is required. If
the test is unsuccessful, you must verify whether the connection
settings are correct and then try again.
-
In the HCL®
Quality Server section, complete the following steps:
-
Specify the URL for HCL®
Quality Server.
The server URL (https://localhost:5443/RTCP, by
default) must point to the base URL of the server instance that runs
the published stubs and manages the scheduled test runs.
-
Optionally, click Open to open an instance of
HCL®
Quality Server.
-
Select the default domain name to use from the list under
Domain when HCL OneTest™ API publishes stubs to HCL®
Quality Server.
-
Optionally, click SSL to specify SSL connection
details for that server instance.
The Server SSL Options dialog box opens.
-
Select one of the following options if you have opted to specify the
SSL details:
| Option |
Description |
|
Trust all certificates
|
Use this option to accept any certificate that
is presented by the server.
|
|
Trust certificates signed by the inbuilt
certificate authority
|
Use this option to accept any certificate
presented that was signed by the inbuilt
certificate authority.
|
|
Trust specific trust store
|
Use this option to select a specific Java™ keystore
within the project. This keystore contains the
trusted certificates that is used to verify the
certificate that is presented by the server.
|
-
Click Publish results database connection to
publish the details of your results database to the server if you have
configured a results database and a server URL.
-
In the HCL OneTest™ Server section,
complete the following steps:
-
Select the HCL OneTest™ Server check box to enable the fields in this section.
-
Enter the host name of HCL OneTest™ Server.
-
Paste the offline user token that you generated on HCL OneTest™ Server.
-
Optionally, click SSL to specify SSL connection
details for that server instance.
The Server SSL Options dialog box opens.
-
Select one of the following options if you have opted to specify the
SSL details:
Select one of the following options:
| Option |
Description |
|
Trust all certificates
|
Use this option to accept any certificate that
is presented by the server.
|
|
Trust certificates signed by the inbuilt
certificate authority
|
Use this option to accept any certificate
presented that was signed by the inbuilt
certificate authority.
|
|
Trust specific trust store
|
Use this option to select a specific Java™ keystore
within the project. This keystore contains the
trusted certificates that is used to verify the
certificate that is presented by the server.
|
Important: You must enter the offline user token before you
test the connection to HCL OneTest™ Server.
-
Click Test to test the connection to HCL OneTest™ Server.
-
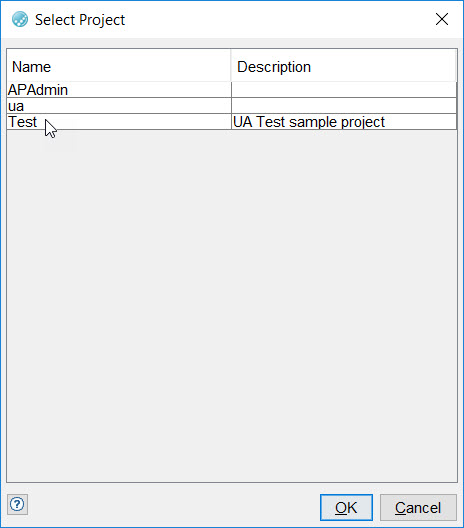
Click Select.
The list of projects on
HCL OneTest™ Server that you
are a member of are displayed.
-
Select the project to which you want to publish test reports.
Notes:
- Select the projects in which you are assigned an owner or
tester role. Only owners or testers can publish test reports
to the project on HCL OneTest™ Server.
- The Publish result after execution
check box is enabled only after you select a project on HCL OneTest™ Server.
-
Click the Publish result after execution check
box.
-
Click OK.
You have configured HCL OneTest™ API to publish test result reports to the selected project on HCL OneTest™ Server.
-
To publish a test result report, open the Test Lab
perspective, and complete the following steps:
-
Select the test suite.
-
Right-click and then click Run.
The selected test suite runs and the test result reports are published to the
selected project on HCL OneTest™ Server.
Results
Test results are automatically published to the selected project on HCL OneTest™ Server whenever the tests are run in HCL OneTest™ API.
What to do next
You can view the test result reports published to HCL OneTest™ Server. See Viewing reports published to HCL OneTest Server.
