Setting object location conditions in a test script
In some cases, recorded actions are not replayed as expected because the objects cannot be found. In the test, multiple location operators are available to improve object recognition.
About this task
For additional details about object recognition in mobile and web UI tests, see Enhancement of test script robustness.
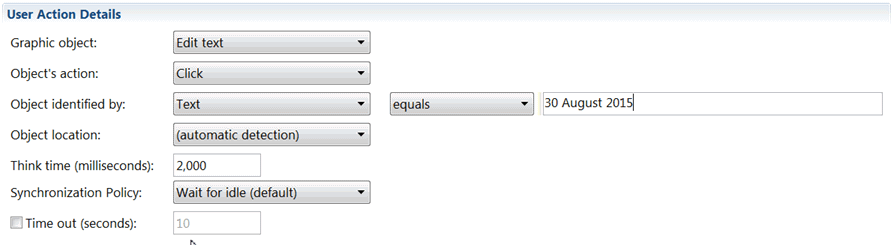
Here is an example where setting object location conditions is helpful: You record a test, and the action on a step, Click on Edit text,, is not clearly identified, with no label, and with variable content, such as a date. When the test is played back, the action cannot be performed because the date has changed.
For this test to play back successfully, you can modify the object location in the test script so the target object can be found during test replay. For example, you can indicate that Edit text is to the right of a stable graphic object that is easily identifiable, for example, an Edit text field whose label is city. You can proceed as follows:
Procedure
- In the test, click a test step.
-
In the User
Action Details area, set Object Identified by to (automatic identification).
Figure 2. Automatic detection 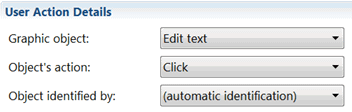
-
Select a location object in the Object location field.
The Object location area expands to include indented fields for Graphic object, Object Identified by, and Object location.
Figure 3. Select an Object location 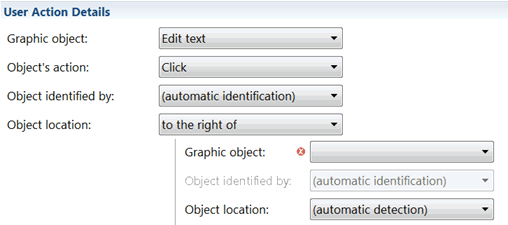
-
Select the graphic object that will be used as the reference object in the indented Graphic
object field, for example, Edit text.
Figure 4. Select a reference object 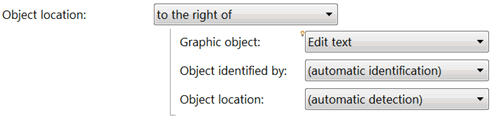
-
Select its property, for example, Text, in the indented Object Identified by field and enter its
value, for example, city.
Figure 5. Select a property and enter a value 
You can verify the property description of the object in the Properties table or in the Elements tab of the UI Test Data view.
-
Define another object location that is helpful to find the
reference object. You can indicate, for example, that the object whose value is city is located near an Analog clock
whose content is Eastern time.
Figure 6. Set an object location condition with a location operator, graphic object, its properties selected and values 
- Save and run the test to verify that the step is successful.
-
Another method of setting object location conditions is to
select an object in the Screen
capture tab, and to drag it on the Object location field. That way, the
property and value of the object selected are automatically entered in the object location
fields.
Figure 7. Drag the object and drop it on the Graphic Object field 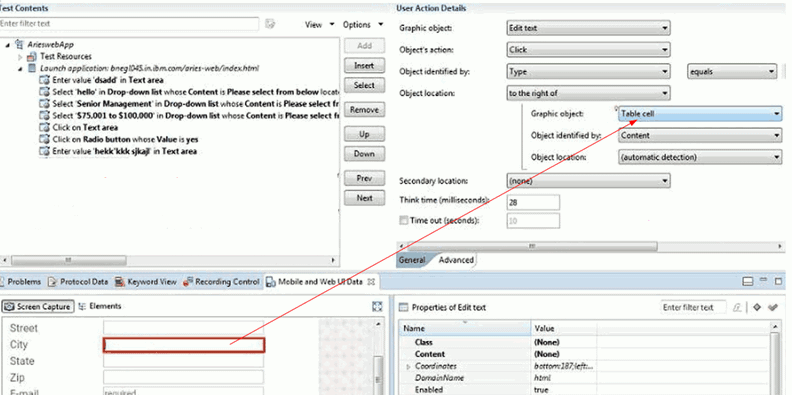
-
You can also set a secondary locator condition to identify
the target object on the step. The object can be found easily if the conditions are met.
This could be useful, for example, in a test using a spreadsheet or a calculator. To set a
secondary condition, you proceed as explained above. In the Secondary location field,
select a location operator, a graphic object, the object property in Identified by, an operator, and enter the
required values.
Figure 8. Set a secondary location condition, with a location operator, a graphic object selected, its properties and values. 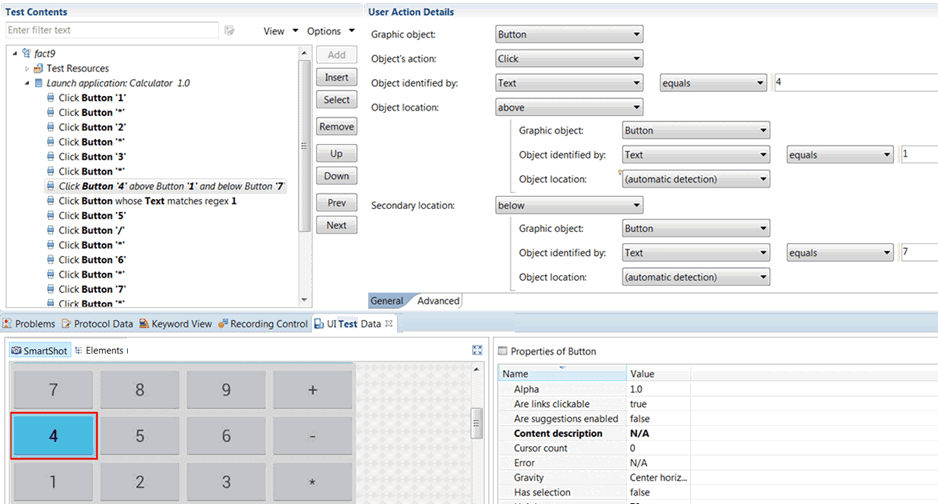
- Save and run the test to verify that the step is successful.