Editing a dataset
You can add, modify, remove, import, or export data from a dataset.
Before you begin
You must have created a dataset or configured a repository that contains the dataset.
About this task
If you are a project Owner or Tester in HCL OneTest™ Server, you can perform basic tasks in the datasets by right-clicking any row, column, or cell in the dataset to organize your data in a better way. For example, you can perform tasks such as updating data in a cell, inserting or deleting rows and columns, or renaming column names.
After you edit the dataset, you can save the changes made to the dataset, and then you can publish the dataset to the Git repository. If you save and close the edited dataset, the Changes page lists the edited dataset and later you can publish it to the Git repository for other members to use.
- Comma
- Semicolon
- Space
- Tab
- Other
Procedure
-
Log in to HCL OneTest™ Server.
The team space that contains your project is displayed.
-
Click to open the project that contains the test assets.
The Overview page of the project is displayed.
-
Click .
The Data page and the Data navigator are displayed.
-
Select the branch that contains your project with the datasets that you want to
edit.
The projects in the selected branch are displayed in the Data navigator. The datasets are listed under the folder you created to contain the dataset within a logical folder named Datasets.
-
Click the dataset in the data navigator.
The dataset opens in the right pane.
- Click Edit.
-
Select your action to either select an existing Edit branch or create
an Edit branch:
- Perform the following steps to select the edit branch:
- Select an Edit branch from the Select branch list if Edit branches already exist in the selected branch of the repository.
- Click Ok.
You selected an existing Edit branch.
- Perform the following steps to create the edit branch:
- Select Create new branch.
- Enter a name for the edit branch.
- Click Save.
You created an Edit branch.
- Perform the following steps to select the edit branch:
-
Perform the following actions to use the options available for editing:
Options Actions Find and Replace 
To find: - Click the Find and
Replace icon .
- Enter the content that you want to search in the Find field.
- Select any or all the following options to find the
search content more effectively:
- Select the Case sensitive checkbox to search the content that is the exact letter case of the content entered in the Find field.
- Select the Match entire cell contents checkbox to search for cells that contain only the characters that you have entered in the Find field.
- Select the Search using regular
expression checkbox to search the
pattern that matches strings.For example, to search a cell that contains any number between 0 to 9, do the following:
- Enter \d in the Find filed.
- Select the Search using regular expression checkbox.
- Click Find.
- Click Find. If the text is found, the cell containing that text is selected.
- Click Find again to find further instances of the search text.
To find and replace:
- Click the Find and
Replace icon .
- Enter the content that you want to search in the Find field.
- Enter the content that you want to replace in the Replace field.
- Select any or all the following options to find and
replace the content more effectively:
- Select the Case sensitive checkbox to find the content that is the exact letter case of the content entered in the Find field.
- Select the Match entire cell contents checkbox to find and replace for cells that contain only the characters that you have entered in the Find and Replace fields.
- Select the Search using regular expression checkbox to find and replace the pattern that matches strings.
- Click Replace to replace the individual instances.
- Click Replace All to replace every instance of the content throughout the dataset.
Undo 
- Click the Undo icon .
- Select the recent changes from the list that you want to undo, and then click the list.
Redo 
- Click the Redo icon .
- Select the recent changes from the list that you want to redo, and then click the list.
Import  You can import variable data into a dataset from the following sources:
-
When there is a large amount of data stored in a CSV file.
-
When you use the data fabrication feature to generate test data.
Importing data from a CSV file
-
Click the Import icon
. -
Select Import a CSV file from the drop-down list.
-
Click Select file and choose the CSV file that contains variable data to import into the dataset.
-
Enable the First row contains headers by using the toggle icon if your CSV file contains the header.
-
Select one of the following options to append or overwrite data in the dataset:
- Enable Overwrite existing data by using the toggle icon to add the rows and columns from the beginning of the dataset.
- Enable Append existing data by using the toggle icon to add rows and columns to the end of the dataset.
-
Click Import.
Importing data by using data fabrication
-
Click the Import icon
. -
Select Fabricate data from the drop-down list.
-
Select a Data definition from the drop-down list.
-
Enter the number of rows that you want to generate in the Number of Rows field.
-
Enter a seed value in the Seed (optional) field.
-
Enable Fabricate headers by using the toggle icon if your schema contains the headers.
-
Select one of the following options to append or overwrite data in the dataset:
- Enable Overwrite existing data by using the toggle icon to add the rows and columns from the beginning of the dataset.
- Enable Append existing data by using the toggle icon to add rows and columns to the end of the dataset.
-
Click Import.
Export 
You can export variable data from the dataset into a CSV file to reuse in future tests when required. You must have opened a dataset from which you want to export the data. Click the Export icon
to download the dataset as a CSV
file.Set as current row During the test run, if you want variable data to be selected from a current row instead of the first row in a dataset, right-click any cell in a row and select Set as current row. When rows are deleted:
If you delete any row between row 1 and the current row, the current row data is taken from the next row. For example, when you set the current row as 6, and then you delete any row between row 1 to row 6, the current row remains at row 6, but the content of row 7 is moved to row 6.
When rows are inserted:
If you insert any new row between row 1 to the current row, the current row data is taken from the previous row. For example, when you set the current row as 6, and then you insert any row between row 1 to row 6, the current row remains at row 6, but the content of row 5 is moved to row 6.
Dataset Configuration You can configure the dataset by clicking the Menu icon  , and then selecting
Configure. In the
Configure Dataset dialog, you can
change the row and column settings and configure the string
values in the dataset that contains variable data for tests
to use when they run.
, and then selecting
Configure. In the
Configure Dataset dialog, you can
change the row and column settings and configure the string
values in the dataset that contains variable data for tests
to use when they run.-
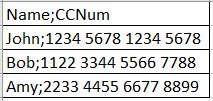
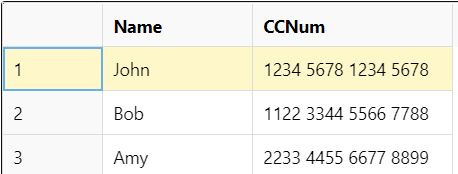
Select any of the separator values that you used in the CSV file.
The available options are Comma, Semicolon, Space, Tab, and Other. In the CSV file, if you have any other separator characters other than the available options, then you can select the Other option, and then can specify a value.
For example, if the data in the CSV file is separated by a character #, then select the Other option and enter # in the field.
-
Configure the following options to change the row and column settings:
-
Column header - Use an up-down control button to increment or decrement the value of the column header.
-
Data start point - Use an up-down control button to increment or decrement the value of the data starting pointer.
-
Current row - Use an up-down control button to increment or decrement the value of the current row.
-
-
Configure the following options to change the string values in the dataset:
-
Treat as null - Enter a string value that is to be treated as null when running the test.
-
Treat as empty - Enter a string value that is to be treated as empty when running the test.
For example, when you run the test and the data 123 in the dataset is to be treated as empty, then you must specify 123 in the Treat as empty field.
-
Treat empty text as null - Select this field when you want the dataset that contains any blank cells, and the value of those blank cells to be interpreted as null.
-
-
Click Update to apply the changes.
Discard 
Click the Menu icon and select Discard to
discard the changes made to the dataset. - Click the Find and
Replace icon
-
Click the Save icon
 to save the changes made to the dataset.
-
Click the Publish icon
 to publish the dataset to the Git repository.