Adding a BusinessWorks project as a synchronization source
You can use a TIBCO BusinessWorks 5 project to automatically create the resources that
are required for testing.
About this task
Resources that are generated from a BusinessWorks project
include the required variables and bindings that are converted from
the TIBCO global variables.
Procedure
Launch the Create a new Synchronization Source wizard
in one of the following ways:
Drag a BusinessWorks project folder from the file system into
the Logical view of the Architecture School perspective.
Click TIBCO > TIBCO
BusinessWorks Project on the menu bar in
the Logical or Synchronization view.
Click the Create Synchronization Source icon
() and select TIBCO
BusinessWorks Project from the Type list
in the Create a new Synchronization Source wizard.
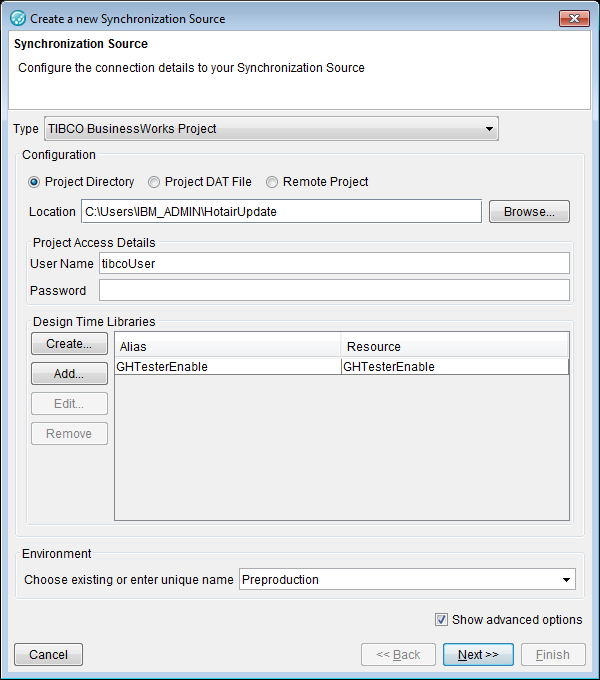
Complete the information on the first page of the Create
a new Synchronization Source wizard that is unique to the
BusinessWorks project.
That information consists of the following fields:
Select one of the following import types:
Project Directory
Project DAT File
Remote Project
Note: If you are using the Remote Project option,
note that newer versions of TIBCO software have an option for Local
Application Data when you create an Administration Domain. If this
(default) option was selected during installation, TIBCO Administrator
does not make projects available as repositories and HCL OneTest™ API
is not able to access them over the network. You
must use one of the other methods to connect to the project files.
Enter the full path to the project or click Browse to
locate and select the project directory or DAT file, or to enter the
details of a remote project.
If you chose the Project Directory option,
the following options are available for Design Time Libraries:
Create
To add a library to the project or link the selected alias to
a library that is not yet part of the current HCL OneTest™ API project.
Navigate to the location of a .projlib file in the local file system.
Add
To add a reference to a library that exists in the current
HCL OneTest™ API project. Select a resource in the current project.
Edit
To modify an existing reference to a library that is already part
of the current HCL OneTest™ API project.
Remove
To remove the selected reference.
Complete the remaining fields on the first
page of the Create a new Synchronization Source wizard.
Only environments associated with
the current project are displayed in the list for the Environment field.
If you enter a new name, a new environment is created with that name
for the current project.
If you want to specify a name, component location, or
synchronization option for the new sync source, select the Show
advanced options check box. Those options are displayed
on the third page of the wizard.
Click Next to continue.
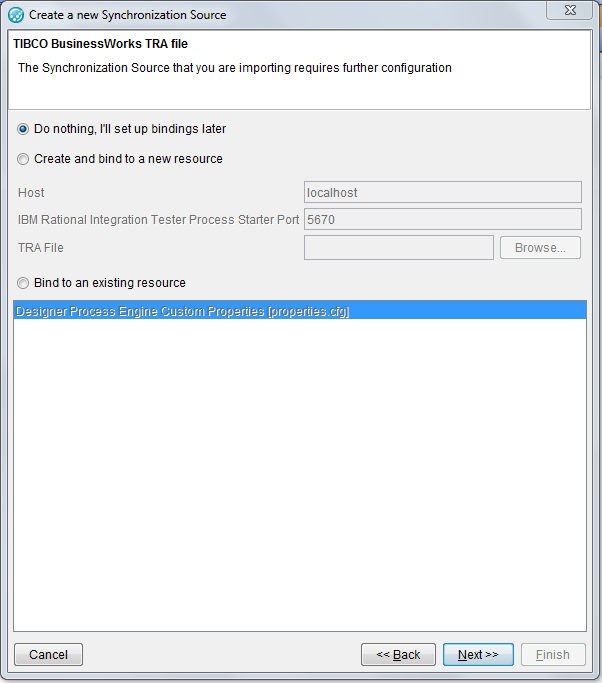
On the TIBCO BusinessWorks TRA
File page, complete the following steps:
Select Create and bind to a new resource.
Provide the name of the Host where
the TIBCO Runtime Agent (TRA) file is located. Alternatively, you
can specify localhost to use a local TIBCO
Designer configuration file.
Specify the initial port for the host.
Navigate to the location of the TRA File.
If a configuration is already declared in the project,
then click Bind to an existing resource to
select that configuration.
Click Next to continue.
The BusinessWorks project is created in the Logical view
and the TRA file is created in the Physical view. The project and
the file are associated by means of an entry in the Environment.
 ) and select TIBCO
BusinessWorks Project from the Type list
in the Create a new Synchronization Source wizard.
) and select TIBCO
BusinessWorks Project from the Type list
in the Create a new Synchronization Source wizard.