Message actions
A number of messaging-related actions are available for HCL OneTest™ API.
The following message-based actions are available for HCL OneTest™ API tests:
Common concepts
All message actions are opened in the message editor. For information about the parts of a message that you can edit, see Messages.
- Linked actions
- Linked actions are always found together in a test. Whenever you add a Send Request action you also add a Receive Reply; likewise, a Receive Request is always paired with a Send Reply.
- Timeout
- For several actions you can specify a timeout period in milliseconds. If no messages are received within this period, the action fails.
- Tolerance
- Where you specify a timeout, you can also specify a tolerance. If a message is received after the timeout but during the additional tolerance period, the test still fails and no validation is performed. The console reports that the message was received late.
The default timeout and tolerance values of actions created by message exchange patterns are specified in the Default Timeout and Default Tolerance fields on the Test Editor page of the Preferences window.
Publish
The Publish action is used to send messages to a subject, topic, or queue. To publish messages, at least one transport must be configured in the project.
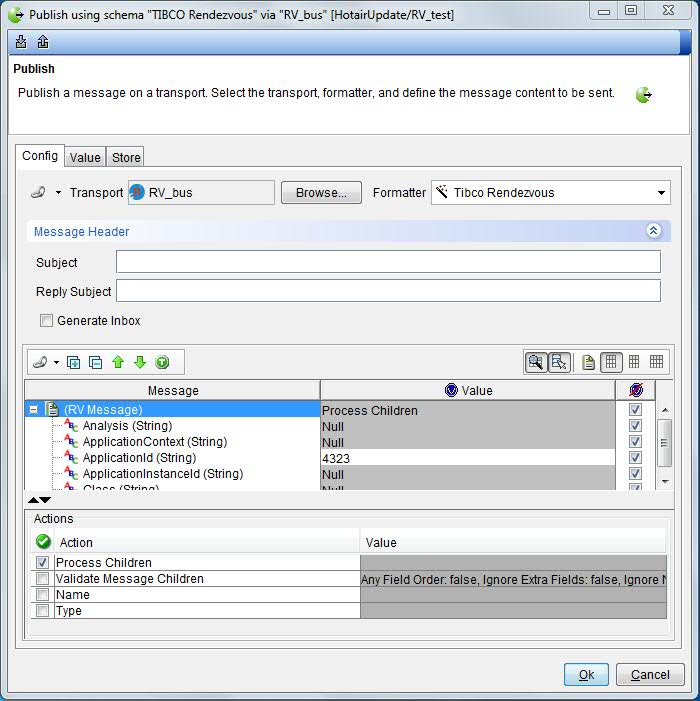
- The Config page is checked to make sure the transport and queue information is correct.
- Message data is populated on the Value page.
- Data used on the Value page can be stored into tags on the Store page.
Both the header and the body of the message are evaluated.
Before you consider the body of the message to send, you must first configure the context of the message on the Config page:
- Click Browse to select a transport from the resource selection dialog. For more information, see Messaging transports, formatters, and dynamic formatters.
- Select a formatter for the specified transport, as detailed in Messaging transports, formatters, and dynamic formatters.
- Configure the message header, as described in Message headers. The contents of the header depend on the transport you choose. The header provides information for the transport to use in sending the message.
The message configuration varies according to the transport in use. For more information, see Message bodies. Note, however, that the header and the body of the message must both be defined. The body has meaning for the applications that consume, receive, or subscribe to the message. Typically, the body structure is either arbitrary or defined at design time and stored in a schema.
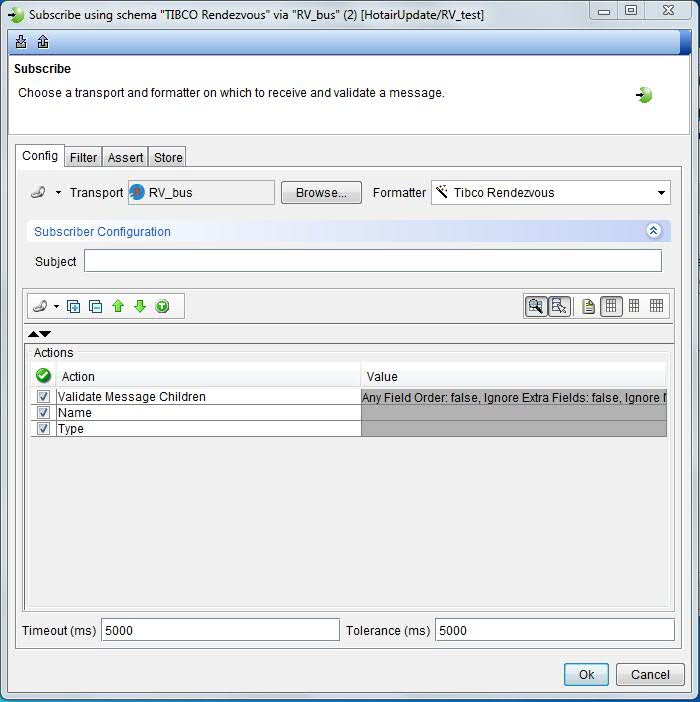
Subscribe
The Subscribe action is used to receive messages from a subject, topic, or queue. For each Subscribe action, a transport and formatter must be selected, and you must specify the requirements for the messages that are received. The success or failure of the action depends on whether the received messages conform to the requirements.
In the example, the field called "ID" is set so that the subscriber does not attempt to validate its content, but stores the content in a tag also called "ID". The content of the field called "Live" is set to be validated but not stored.
- The Config page is checked to make sure the transport and queue information is correct.
- Any messages that do not match the criteria on the Filter page are discarded silently.
- Messages that pass the filter are validated according to the criteria on the Assert page.
- Messages that pass validation can store values in tags on the Store page.
Both the header and the body of the message are evaluated.
For information about the Timeout and Tolerance fields, see the Common concepts section of this topic.
To differentiate between multiple web services over a single URL, see Filtering header values.
Unsubscribe
When you are using JMS messaging, it is possible to subscribe to a topic-based destination by using a durable subscription. This can be enabled by selecting the Durable option when you are creating or modifying a Subscribe action. A durable subscription instructs the applicable messaging broker to retain any messages that arrive while the subscription is inactive. These retained messages will be presented to the application the next time it connects.
If you want to stop receiving such messages without changing the subscription, you can use the Unsubscribe action.
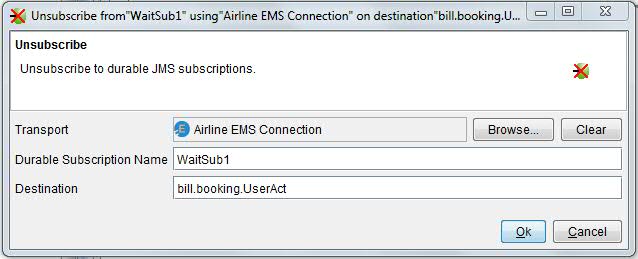
To unsubscribe, specify the Transport, the Durable subscription name and the Destination that were configured previously in the applicable Subscribe action.
Send Request
The Send Request action is essentially the same as a Publish action, except that the request is intended for another specific action, the Receive Reply. When you are creating a Send Request, the corresponding Receive Reply is created at the same time.
You can insert different step actions between the Send Request and Receive Reply, so a list of mappings is offered for each response.
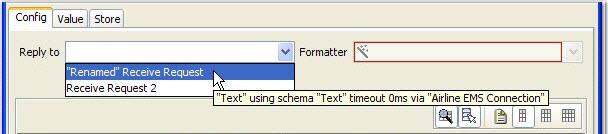
In the Receive Reply, the name that is displayed in the "Reply to" combination list is a numbered step, unless the step is renamed in the Business View. If the step is renamed, the assigned name is shown instead. However, a tooltip on each entry in the combination list will detail the Technical View name for that step.
If the mapping selected in a Receive Reply action becomes invalid, a red border is displayed around the combination list. An action can become invalid if it is placed above the Send Request action or the Send Request action is deleted.
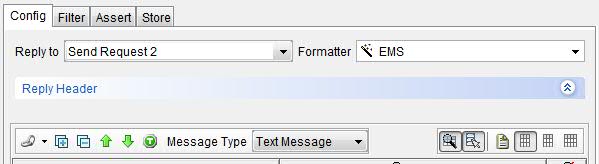
Receive Reply
The Receive Reply action is essentially the same as a Subscribe action. The difference is that the transport is defined in the Send Request action and, therefore, there is no need to set it. For more information, see Send Request.
For information about the Timeout and Tolerance fields, see the Common concepts section of this topic.
Receive Request
A Receive Request action is identical to a subscriber, with one difference. It is used together in a test with a Send Reply action and must come before the Send Reply in a test.
For more information, see Send Reply.
Send Reply
A Send Reply action is the same as a Publish action. The only difference is that a Send Reply action must be used somewhere after a Receive Request action (since it is supposed to reply to it). Therefore, instead of selecting a transport, you select an existing Receive Request action. The remainder of the action and the message are edited in the normal way.
The name that is displayed in the "Reply to" box is a numbered step, unless the step is renamed in the Business View. If the step is renamed, the assigned name is shown instead. However, a tooltip on each entry in the combination list will show the Technical View name for that step. For more information, see Test views.
Message Switch
Within the message switch, you can add Message Cases, described later. Each case is intended to handle a different message. The final case (created with the message switch) is the Default case that catches any message in case none of the other cases are matched. Matching a received message occurs sequentially, from top to bottom, until a match is found. The matching is manipulated with filters in the Message Case.
Within each Message Case, you can insert more actions to be carried out when the case is matched. For example, you can send a reply to the request, or insert a value in the database.
Message Cases
Message cases are not actions in themselves, but are used in Message Switch actions. To add a Message Case to an existing Message Switch action, right-click the Message Switch action and select Add Message Case from the menu.
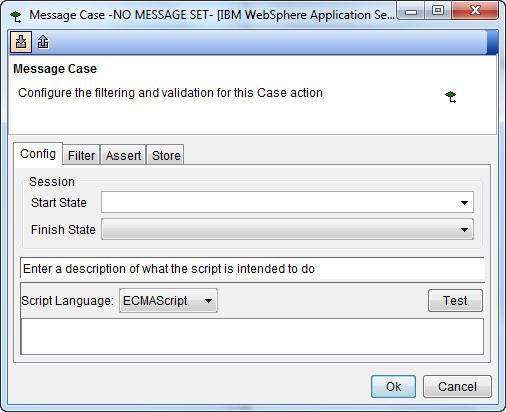
Each Message Case is configured to match a specific message that was captured more generically by the Message Switch action. When combined, the Message Switch action and any one of its message case work like a complete Subscribe action. The Message Switch action specifies the general transport and destination information, while the Message Case performs detailed filtering and contains the assert and store options.
If the Message Switch action is part of a stub, the Config tab provides the option to check and set the state of the stub. Under Start State and Finish State, you can select one of the available session states (configured under the Properties tab of the stub). If a start state is selected, the actions within the message case are executed only if the stub session equals the selected state. If a finish state is selected, the session is set to that state once the actions under the message case finish executing.
- Any filter expressions that are added on the Config page must evaluate to true.
- If the OR expressions option is enabled, filter expressions must evaluate to at least one.
The standard Filter, Assert, and Store tabs are available. For more information, see Subscribe.
The Message Case contains its own actions that can be carried out when a matching message is received.