Setting up a Relying Party Trust for the ID vault server used by Nomad federated login
After you create the IdP configuration document for Nomad federated login and export the ServiceProvider.xml file, set up a relying party trust for your IdP to import the ServiceProvider.xml file into your IdP.
About this task
Procedure
- From ADFS, select .
- Navigate to the Relying Party Trusts folder.
- Select .
- Click Start to run the Add Relying Party Trust wizard.
- Click Under Welcome, select Claims-aware.
-
In the Select Data Source window select Import data about the
relying party from a file, select the
ServiceProvider.xml file that you exported from the IdP
configuration document. Then, click Next. Items imported
from the .xml file are shown. You can edit these items.
- Some items are not supported by ADFS; the system sends a message in this case.
- Display name is used to identify the relying party trust.
- Default permissions are set to Permit Everyone.
-
The Finish window displays the message
The
                        relying party trust was successfully added
. In that window, select the option Configure claims issuance policy for this application and click Close. - Right-click the name of the Relying Party Trust that you created, and select Edit Claims Issuance Policy
- In the Edit Claims Rules dialog, click Add Rule.
- In the Select Rule Template dialog, for Choose Rule Type, select Send LDAP Attributes as Claims, and click Next.
-
Complete the Configure Rule dialog box:
- For Claim rule name, enter EmailAddressToNameID.
- For Attribute store, select Active Directory.
- For LDAP Attribute, select E-Mail-Addresses.
- For Outgoing Claim Type, select Name ID.
- Click Finish.
- In the Edit Claim Rules dialog, click Apply and OK.
-
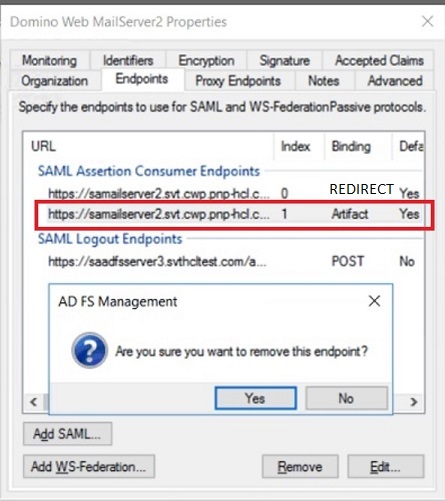
In the folder:
-
For SAML Assertion Consumer Endpoints, verify
that there is a REDIRECT binding URL for the Nomad Safelinx server. In
addition, if there is an Artifact binding URL, remove it.
Note: If you use the notes.ini setting SAML_REDIRECT_BINDING_SIGN=0 to enable POST binding, verify the POST binding URL for Domino.
-
For SAML Assertion Consumer Endpoints, verify
that there is a REDIRECT binding URL for the Nomad Safelinx server. In
addition, if there is an Artifact binding URL, remove it.