Backup and recovery procedures | HCL Digital Experience Containerization
This section shows the deployment architecture and provides the instructions to
create and manage backup and recovery of HCL Digital Experience components in containerized
DX 9.5 environments.
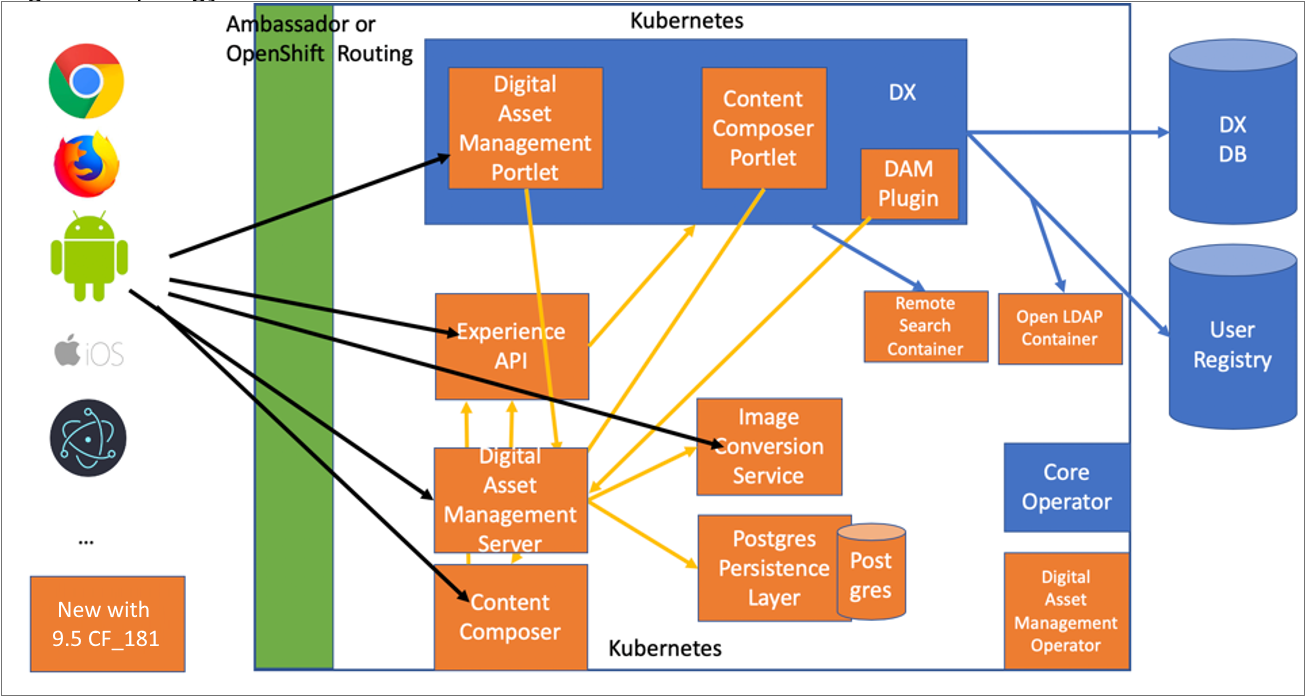
Digital Experience 9.5 Container Deployment Architecture
Learn about the HCL DX 9.5 Container deployment architecture to get a better
understanding of the backup and recovery options.
Instructions to back up the Digital Experience 9.5 Container components
The following sections describe how the administrators can create and manage backups
and recovery of DX 9.5 Container components such as wp_profile,
persistence layer - database, and the media in Digital Asset Management.
1. wp-profile backup
Backup the file systems in the Digital Experience 9.5
container profile (Persistent volume claimwp_profile). Refer to the Backup and Restore topic and component backup
guidance for more information.
The entire
/opt/HCL/wp_profile directory
is backed up.
In the command line interface, run the
following command to back up the Digital Experience 9.5
Persistent volume claim wp_profile:
Before running the tar
command, ensure that the backup file system that
you are using has ~50% free
profile.
cd /opt/HCL/wp_profile

tar -cvpzf backup.tar.gz --exclude=/backup.tar.gz --one-file-system /opt/HCL/wp_profile/*
Figure 2. Example:
After the tar backup command is completed,
it is recommended that a copy of the
backup.tar.gz file is created
and placed to alternate long term storage.
Recover from wp_profile pervasive
volume backup
You can extract the backup of the
wp_profile volume to recover
any files you need to restore.
If the version of the backup matches the current fixpack
level, you can use the extracted files to populate the
original pervasive volume.
The procedure to do this depends on how the backup was
created.
Any changes that occurred after the backup was created
will not be recovered.
The portal database must be restored to the backup that
was created when the backup of
wp_profile was created.
2. Persistence layer - database backup
Run the following command to back up the container components that
are managed through the DX Persistence layer:
pg_dump name_of_database > name_of_backup_file
Figure 3. Example:
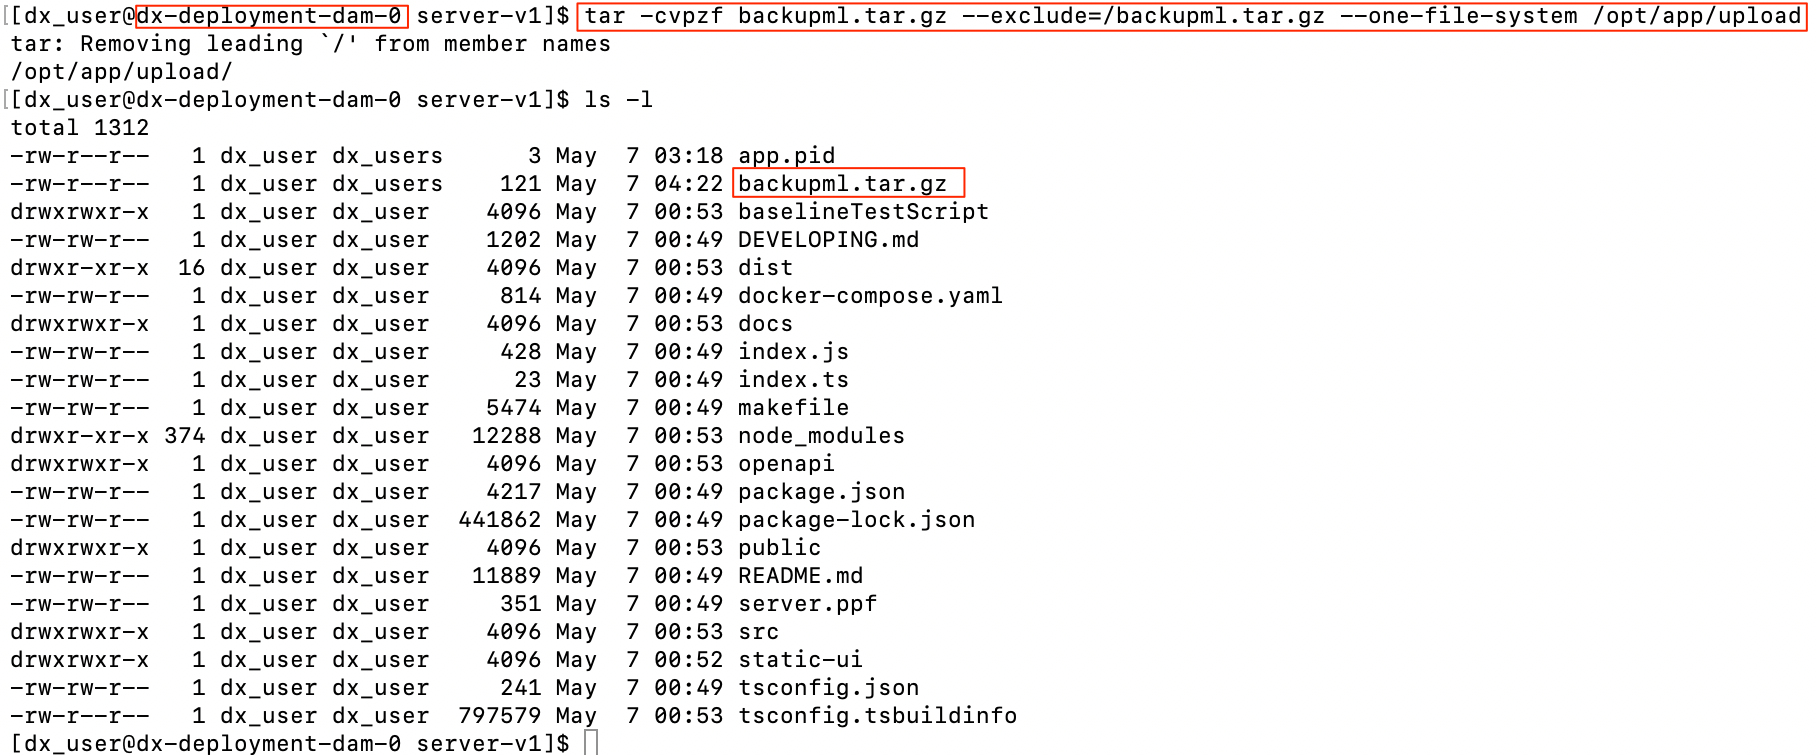
To back up the system components on a remote
system:
Use the following commands to back up the Digital Asset Management
media uploads volume:
A command similar to the backup command outlined in Step 1 to create a backup of
wp_profile can be used to back up
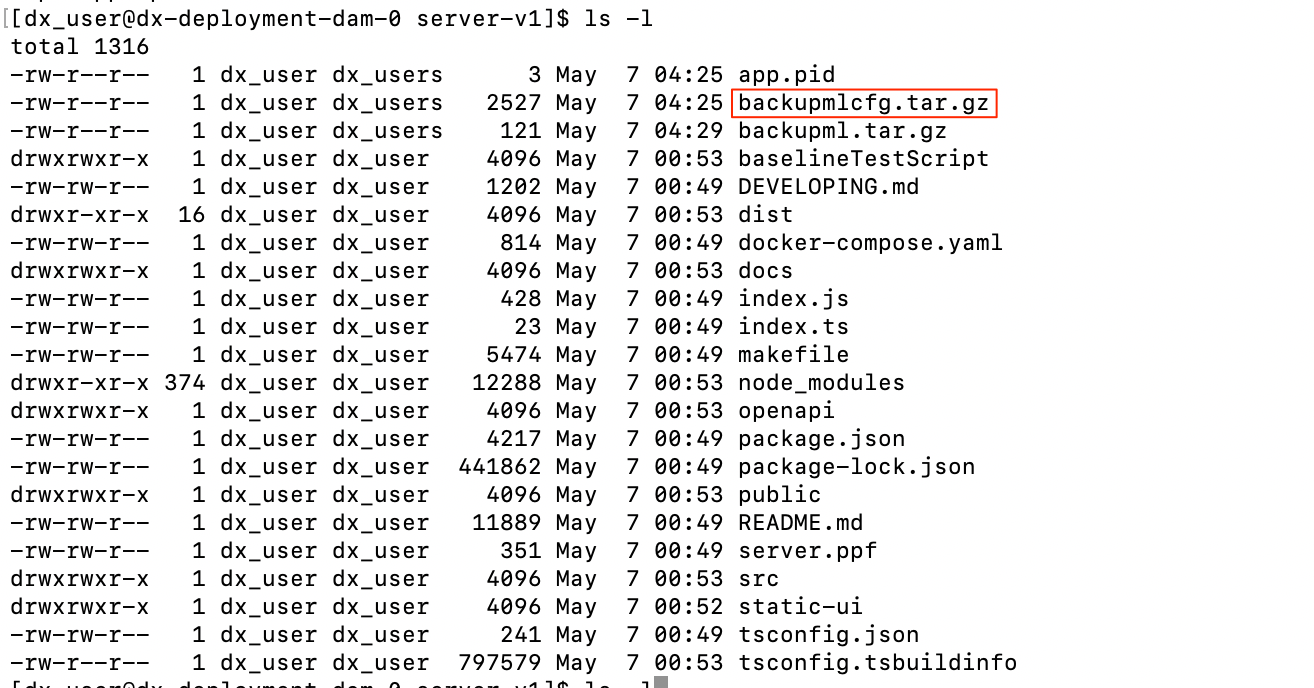
the two /opt/app/upload and
/etc/config Digital Asset
Management mount points.
Refer to the following
examples:
tar -cvpzf backupml.tar.gz --exclude=/backupml.tar.gz --one-file-system /opt/app/upload
Figure 4. Example 1
tar -C/ -cvpzf backupmlcfg.tar.gz --exclude=/backupmlcfg.tar.gz --one-file-system etc/config/*
Note: If either of the methods described in
Step 2 or Step 3 is used, it is important to
understand fuzzy backups with the
wp_profile. A fuzzy backup is a copy
of data files or directories that were operating in one state
when the backup started, but in a different state by the time
the backup completed. In case a volume snapshot or Container
Storage Interface (CSI) volume cloning approach is used with the
wp_profile, it is important that the
snapshot is taken with the Digital Experience instance in
shutdown state to ensure that recovery is performed.
HCL Digital Experience has successfully tested the volume snapshot
and CSI volume cloning methods with HCL Digital Experience 9.5
container deployments. It is recommended that customers perform the
additional testing if they are using options Step 2 and Step 3 to manage the
wp_profile backup.