Creating a Data definition by using the modified settings of the basic generators
You can create a Data definition in HCL OneTest™ Server by using the modified settings of the basic generators.
Before you begin
- Ensured that you are assigned a role as a Project Owner or Tester in the project. See Managing access to the server projects.
- Read information about using Data definitions to fabricate test data. See Overview of data fabrication.
- Created a project in your team space in HCL OneTest™ Server. See Adding a project.
- Added the remote Git repository that contains the test resources to the project. See Adding repositories to a server project.
Procedure
-
Log in to HCL OneTest™ Server.
The team space that contains your project is displayed.
-
Click to open the project that contains the test assets.
The Overview page of the project is displayed.
-
Click .
The Data page and the Data navigator are displayed.
- Select the branch in the project repository from the Branch list.
-
Perform any of the following actions:
- Click the Open action menu icon
 in the Data
navigator, and then click Data
definition.
in the Data
navigator, and then click Data
definition. - Click Add files in the right panel, and then click Data definition.
The Edit branch dialog is displayed.
- Click the Open action menu icon
-
Select your action to either select an existing Edit branch or create
an Edit branch:
- Perform the following steps to select the edit branch:
- Select an Edit branch from the Select branch list if Edit branches already exist in the selected branch of the repository.
- Click Ok.
You selected an existing Edit branch.
- Perform the following steps to create the edit branch:
- Select Create new branch.
- Enter a name for the edit branch.
- Click Save.
You created an Edit branch.
- Perform the following steps to select the edit branch:
-
Perform the following actions in the Create data
definition dialog:
-
Select the location in the Location
field to store the Data definition in the folder you
specified.
For example, if you entered MyFolder/MyDataDefinition in the Name field, and then selected MyProject as the location to create the Data definition in the folder, then the Data definition is created under the MyProject/MyFolder/MyDataDefinition path.
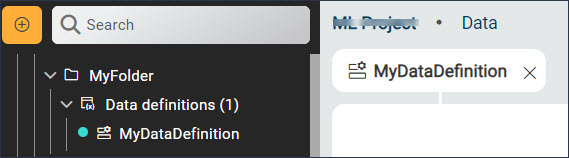
The new Data definition opens in the Data page, and the Data definition is also listed in the Data navigator within the project. The Data definition created is listed under the logical folder Data definitions under the physical folder MyFolder that you created.
-
Select the location in the Location
field to store the Data definition in the folder you
specified.
-
Drag a basic generator from the Catalog panel to the Data
definition.
The basic generator is added as a field in the Data definition.
- Drag other basic generators from the Catalog panel to the Data definition to complete the data structure that you want in the fabricated data.
-
Perform the following steps to modify the parameter configurations of a basic
generator in a field of the Data definition:
-
Click the Save icon
 to save the changes made to the Data definition.
Note: The changes you made are only visible and available to you in the Edit branch. You must publish the changes in the Edit branch to the branch in the project repository for the changes to be visible to the other members of the project.
to save the changes made to the Data definition.
Note: The changes you made are only visible and available to you in the Edit branch. You must publish the changes in the Edit branch to the branch in the project repository for the changes to be visible to the other members of the project. -
Click the Publish icon
 to publish the changes made to the Data definition to the
branch in the project repository.
to publish the changes made to the Data definition to the
branch in the project repository.
Results
What to do next
- Preview the test data generated by
using the generators added as fields in the Data definition by
clicking the Preview icon
 .
. - Generate the test data by using the
generators added as fields in the Data definition by clicking the
Generate icon
 .
.