
Assign template to layout
allows users to assign templates to any layout that is created for the selected store.
Procedure
- Open Management Center Tools.
- From Hamburger menu select . A landing page opens which lists all the existing pages.
- This landing page consists of two sections, Pages, and Layouts. Select Layouts to design a template for the layout.
- Select the store from Store filter, for which you want to design a new layout.
- Enter the name of the layout in Search column. All the layouts related to search term will be listed on the screen.
- Double click on the layout name for which you want to assign the layout template.
-
Select a template from the list of available templates. All the available
templates will be listed as shown in the image below:
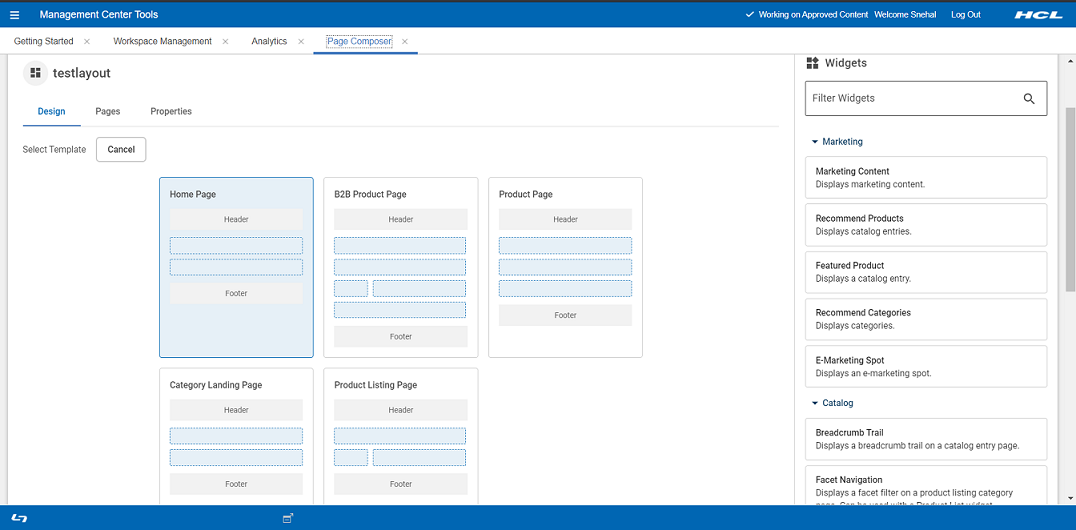
- Select the template by clicking on the template.
- Each template have number of predefined slots. The number of slots and their relative positions are defined by the template.
- Once the template is selected, you can select widgets from widget palette.
- To assign a widget to a slot, from the list of widgets available on the right side window drag and drop the widgets to add them in the template.
- You can assign multiple widgets to a slot. You can also leave a slot empty. You can reposition widgets within a slot using drag and drop. You can move a widget from one slot to another using drag and drop.
- Once the widget is assigned to a slot, you can start modifying the widget's properties. Click on the widget that you want to edit. The Widget properties will be displayed on the right. Some widgets only allow you to change the name. Other widgets allow you to select additional properties like Products or an E-Marketing spot.
- Where possible, any change that you make is getting saved automatically. In some cases, there is an explicit Save button. The explicit Save is used when you are editing text such as the name of the widget.