Creating Locations

About this task

Use the Location Property wizard to create one or more named properties that allow agents to identify themselves according to their current network location or status. As soon as the property is created, it will be propagated to all clients and applicable computers will pick up the setting (that is, their configuration status may change according to the choices you have in place.)

Before you begin, you should know or have a list of the subnets used in your organization and their respective geographic locations. Alternatively, you can create a custom relevance expression to dynamically map retrieved client properties using a key/value set. For more information, see the Relevance Language Guide in IBM Knowledge Center.

Note: The purpose of the procedure below is to create a property that will define the geographic location of an endpoint according to its subnet. Using the same principles, you could also create a property based on connection type, relay, operating system, or any other characteristics and use it in conjunction with the CPM firewall, CPM malware protection, and CPM Web Reputation.

Procedure

  1. Log on to the console as Master Console Operator.
  2. From the console menu, click All Content on the bottom left pane.
  3. From the upper left navigation pane, go to Wizards > All Wizards > Location Property Wizard. The Location Property Wizard screen opens.
  4. Choose one of the following and then click Next.
    • Create a retrieved property that maps subnet to location: For each location you want to identify, type the subnet IP address. If a single location includes more than one subnet, type each subnet IP address followed by the same location name on a new line. Clients will self-determine their relevance to a given location by comparing their current IP address with the value(s) specified here. Note that clients with multiple NICs may self-identify using their W-LAN or LAN IP address, so you may need to include both subnets.

    • Create a retrieved property that maps subnet to location using only the first two octets: Use this option to support a larger block of IP addresses. As above, clients will self-identify their relevance to this IP address block. Clients not included in the block will either inherit the default configuration that is not location-specific, or not be covered by any location property.

    • Create a retrieved property that maps IP address range to location: Only one range per line is supported. Do not delimit multiple ranges.

    • Create a retrieved property that uses a custom relevance expression and maps the result using a key/value set: For more information, see the IBM BigFix Installation Guide in IBM Knowledge Center.

  5. Give the property a name that will clearly identify its purpose and click Next.
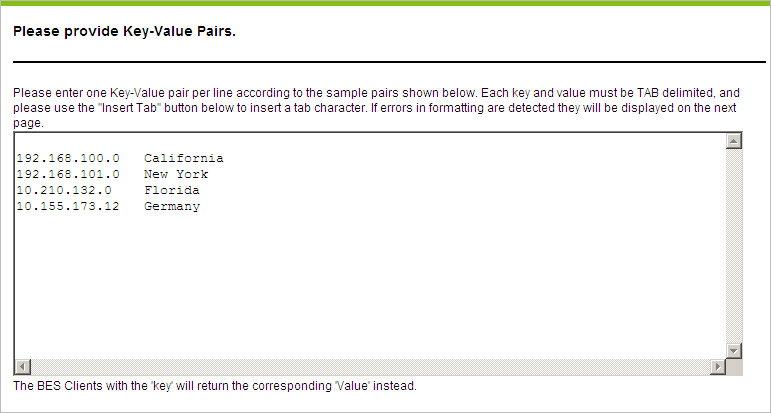
  6. For each location, type the subnet addresses; click the Insert Tab button, and then type a name. Use only one IP/location pair per line as shown in the following screen. Create multiple lines for the same location if it uses multiple subnets.

    Note: Be careful not to "overlap" any IP addresses when specifying ranges. Computers included in multiple locations will constantly be updated as they re-evaluate and recognize their relevance to one location and then another.
  7. Click Next, and if no valid IP/location pairs are displayed, click Next again.
  8. Accept the defaults that are selected in the Additional 
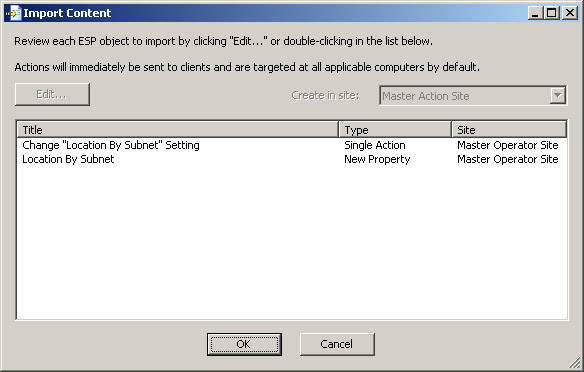
Options window and click Finish. The Import Content window opens.

  9. Click OK and then type your private key password and click OK to deploy the Action.
  10. In the Action | Summary window that opens, monitor the "Status" and "Count" of the Action to confirm that it is "Running" and then "Completed".
  11. Close any open windows to return to the console view.

    Now that locations have been defined, the next step is to create a couple of different configuration settings and bundle them into a Task. You can then associate these Tasks with the Locations you just created.