Manual tests
About this task
The Manual Test feature lets you send your own tests and save them as security issues, to be included in your reports.
You can create a manual test as soon as you have Explore results. Manual tests are saved for the current scan only. Note that if you re-scan the test will be lost.
You can base your manual test on an existing test, or you can create a new one from scratch.
Procedure
- To base the manual test on an existing variant:
- On the Result List, click a test variant, or
- On the Result List, click a test, then in the Detail Pane use the toolbar to browse to the required variant.
Alternatively, to create a new variant from scratch, simply open the Manual Test dialog box (next step) without selecting an existing variant.
- Open the Manual Test dialog-box:
- On the Tools menu, click Manual Test, or
- Right-click on a node in the Application Tree or the Result List, and select Manual Test from the pop-up menu, or
- Click the Manual Test button in Application Data > Detail Pane for the selected variant.
The Manual Test dialog box appears, displaying the properties of the selected test variant.
- In the Hostname/IP address field, enter the server to which the test will be sent.
- In the Port field, enter the port to be used by AppScan to reach the server.
The default port is 80; unless SSL is selected, in which case 443 is the default port.
- If necessary, you can edit the Request itself.
- In the Options list, select or clear the following
options:
Option
Click to
SSL
Send request in SSL.
Login before sending request
Send login request to the application before sending the manual test.
Auto content length
Automatically update the Content-Length HTTP header in the request, to the value that equals the request content as you edit the request.
If this option is selected, the user cannot edit the content length value.
If the request header does not have the Content-Length parameter, this option has no effect.
- Click Send.
The request is sent, and the response is displayed in the Response text area (lower pane).
- To view the response in the embedded browser, click Show in Browser.
- To add this manual test to the current scan, click Save.
The Select Issue Type dialog box appears, with the User-Defined Test radio button selected by default.
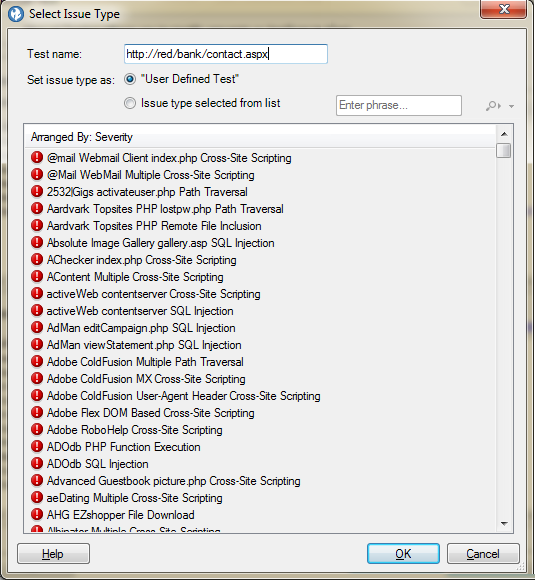
- In the Test name field, you can leave the default name (the URL) or define a new name.
- To save the test under an existing test type (rather than
the default User-Defined test type), select the second radio button,
and then click on a test type in the list.Note: To locate an issue in the list using the Search feature, type part of the issue name into the Search field. Click on the magnifying glass icon to move from one search result to the next.
- Click OK.The dialog boxes closes. The new test is added to the results, and will be included when you continue the current scan (Scan > Continue > Scan/Test).Note: If you rescan the test is not included.