ASE-side configuration
Complete the additional SAML properties setup for the AppScan Enterprise application you have integrated in the Microsoft ADFS in the Attribute Mappings page.
Procedure
-
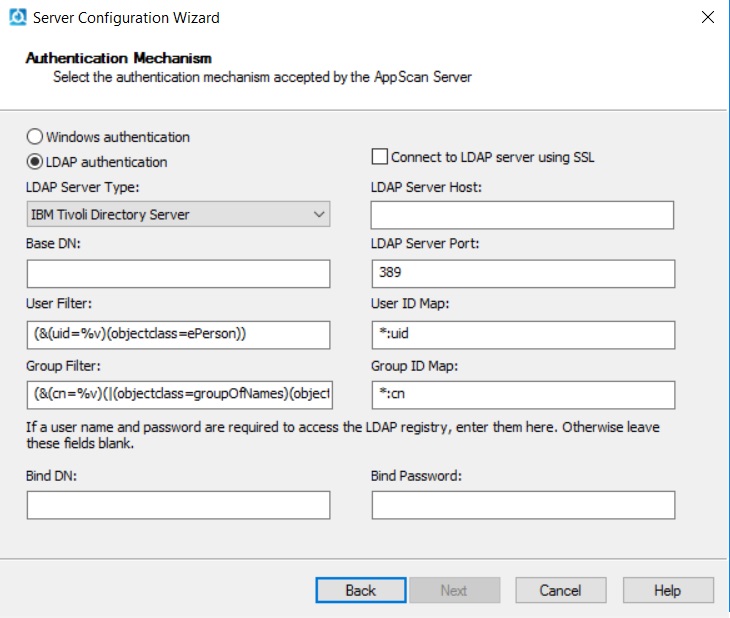
Install ASE and run the configuration wizard:
- For the Authentication Mechanism, select LDAP Authentication.
- For LDAP Server Type, select Microsoft Active
Directory.

- Complete the wizard.
-
Navigate to the configuration files folder in the directory where your ASE software package
is installed. For example:
<installation directory>\AppScan Enterprise\Liberty\usr\servers\ase\config -
Locate the file named
onelogin.saml.properties.template, rename itonelogin.saml.propertiesand open it in a text editor. -
Update the file with the following custom properties:
- onelogin.saml2.sp.entityid
-
https://<host_name>:<port_number>/<ase_instance_name>/metadata.jsp - onelogin.saml2.sp.assertion_consumer_service.url
-
https://<host_name>:<port_number>/<ase_instance_name>/api/saml - onelogin.saml2.idp.single_sign_on_service.url
-
https://<<adfs_domain_name>>/adfs/ls - onelogin.saml2.idp.x509cert - Base-64 encoded X.509 (.CER) in single line string format.
To obtain this do the following:
- Go to ADFS Management > Services > Certificates > Token Signing > View Certificate > Detail > Copy file to > Select the Export option as Base-64 encoded X.509 (.CER)
- Convert the certificate data into the single line string format.Tip: You can use the https://www.samltool.com/format_x509cert.php tool to do this.
- onelogin.saml2.sp.entityid
-