Implementing AWS Secret Manager
To implement AWS Secret Manager on your setup, complete the following steps:
Procedure
- Using a command line interface, restrict access to your pods using IAM roles for service accounts. Alternatively, you can also restrict access using a console.
-
To turn on Open ID Connect (OIDC), run the following eksctl command:
eksctl utils associate-iam-oidc-provider --region=<REGION> --cluster=<CLUSTERNAME> --approveNote:- You must run the earlier mentioned command only once.
- In the command, mentioned earlier, replace <REGION> and <CLUSTERNAME> with relevant and appropriate values.
-
For retrieving secrets from AWS Secret Manager, create a policy by running the
following command:
aws iam create-policy --policy-name <my-policy> --policy-document file://policyA sample policy file follows:
{ "Version": "2012-10-17", "Statement": [ { "Effect": "Allow", "Action": [x` "secretsmanager:GetResourcePolicy", "secretsmanager:GetSecretValue", "secretsmanager:DescribeSecret", "secretsmanager:ListSecretVersionIds" ], "Resource": "arn:aws:secretsmanager:ap-south-1:385481138434:secret:*" }, { "Effect": "Allow", "Action": "secretsmanager:ListSecrets", "Resource": "*" } ] } -
Create a service account role to associate the policy (created in Step
2) with your service account. To create a service account, run the following
command:
eksctl create iamserviceaccount --name <SERVICE_ACCOUNT_NAME> --namespace <NAMESPACE> --cluster <CLUSTERNAME> --attach-policy-arn <IAM_policy_ARN> --approve --override-existing-serviceaccountsNote: In the command, mentioned earlier, replace <NAMESPACE>, <CLUSTERNAME>, <IAM_policy_ARN>, and <SERVICE_ACCOUNT_NAME> with relevant and appropriate values. -
To install the Kubernetes secrets store CSI driver, using helm with
syncSecret.enabled=true, run the following
commands:
-
To install the ASCP, run the following command:
kubectl apply -f https://raw.githubusercontent.com/aws/secrets-store-csi-driver-provider-aws/main/deployment/aws-provider-installer.yaml -
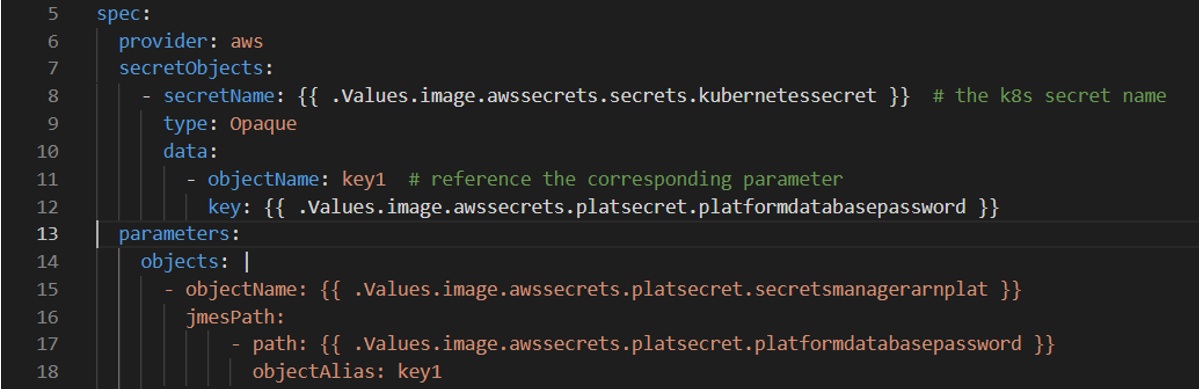
Create the custom resource SecretProviderClass and deploy
it to sync with AWS secret with Kubernetes. For details, access the
spc.yaml inside the Unica helm chart.
-
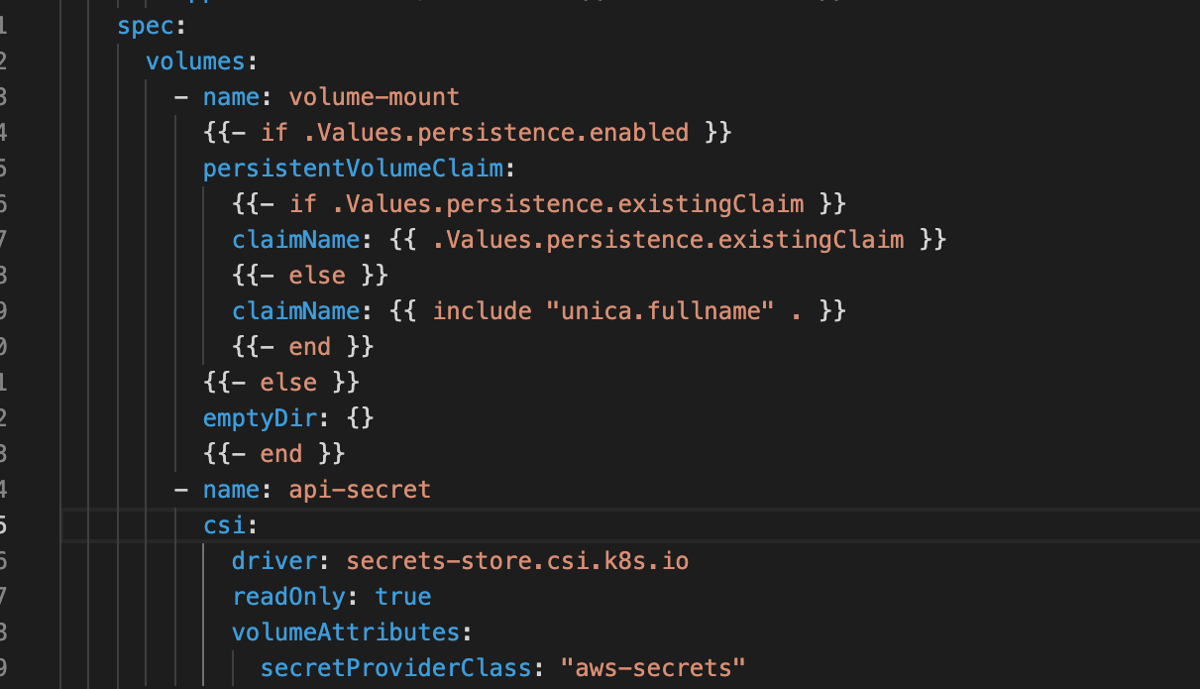
Configure and deploy the pods to mount the volumes based on the configured
secrets.

-
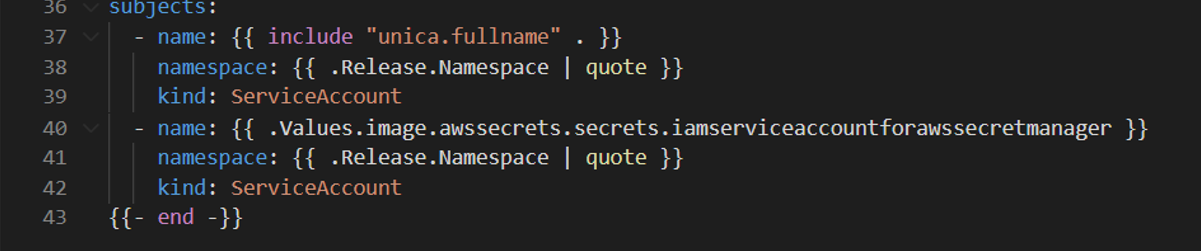
In the rbac.yaml file, assign the
ClusterRoleBinding permissions to the
iamservice account, created in Step 3, for
internal Kubernetes communication.