Segmenting data with queries
You can use the Segment process to segment data based on the results of a query that you create.
Before you begin
About this task
Segmenting by query is most useful when it is necessary to filter the data in a field to create the required segments. For example, assume that you want to divide your customers into high-value (more than $500), medium-value ($250-$500), and low-value (under $250) segments that are based on their purchase history over the last year. The PurchaseHistory field in your customer database stores the total dollar amount of each customer's purchases. Use a separate query to create each segment, selecting records with values in the PurchaseHistory field that meet the criteria of the segment.
Procedure
- Open a flowchart for editing.
-
Drag a Segment process
 from the palette to your flowchart.
- Connect at least one configured process, such as a Select process, as input into the Segment process.
-
Double-click the Segment process in the flowchart to open the Segment process
configuration dialog.
Cells from processes that are connected to the Segment process appear in the Input list.
- On the Segment tab, open the Input list and select the input to the Segment process. To select multiple cells, use the ellipsis button (...) next to the Input list.
- Select Segment by query.
- Determine the number of segments that you want to create, and enter that number in the # of segments field.
-
Now you will construct a query for each segment: Select the first segment and click
Edit to open the Edit segment dialog.
Note: For reference information about each available control, see Segment process: New segment and Edit segment controls.
- If you want to include all IDs from the segment or table that you selected as the Input source, choose Select all <audience> IDs (The word <audience> indicates the audience level, such as Customer, that is specified for the selected input data source.)
-
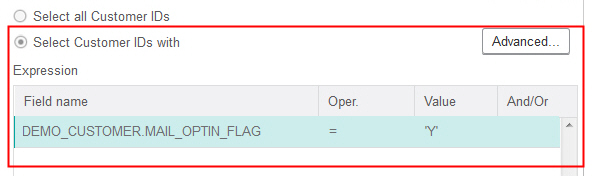
If you prefer to use a subset of IDs from the selected data source, choose Select
<audience> IDs with, so you can do a query for the records that you want.
The Expression box shows columns labeled Field name, Oper, Value, and And/Or.
When the button says Text Builder, you can build expressions by populating the columns labeled Field name, Oper, Value, And/Or.
When the button says Point & click, you can view or edit raw SQL and you can use the Formula helper to pick macros, operators, and string functions from a list.
With either method (Text Builder / Point & click), you can select fields from the Available fields list, including Unica Campaign Generated Fields and Derived fields.
-
Construct a query to determine which records will be used to create the segment:
You now have an expression that consists of a field name, operator, and value.
- Click Check syntax to confirm whether the query syntax is valid. Checking the syntax does not put any load on the database server.
-
To add and combine multiple expressions, follow the guidelines below:
- To add another expression, click the And/Or cell, then double-click AND or OR in the Values list to indicate how to combine the expressions.
- Build your next expression, consisting of a field name, operator, and value.
- To add parentheses to control evaluation order, double-click the Field Name in any row to display the For selected expression list. In the list of expressions, double-click Add ( ) to add a set of parentheses, Remove ( ) to remove a single set of parentheses, or Clear all ( ) to remove all of the parentheses in the selected expression. Parentheses allow you to group expressions when defining complex queries. For example, (AcctType = 'Gold' AND Rank = 'A') OR NewCust = 'Yes' is different from AcctType = 'Gold' AND (Rank = 'A' OR NewCust = 'Yes').
- To reorder the selected expression, double-click Move up or Move down.
- To add a blank row below the selected expressions, double-click Insert.
- To delete the selected expression, double-click Delete.
-
Optionally, click the Text Builder button so its label changes to
Point & click. When the button says Point &
click, you can view or edit raw SQL. You can also use the Formula
helper to pick macros, operators, and string functions from a list.
Note: If your query includes a table field that has the same name as an Unica Campaign generated field, you must qualify the field name. Use the following syntax:
<table_name>.<field_name>. - Click the Point & click button to change back to the original query mode. The button label changes back to Text Builder.
-
(Optional) Use Test query to see how many IDs the query returns.
A progress bar is displayed while the query is being tested. Close the progress window if you want to cancel the test. When testing is complete, Unica Campaign indicates the number of rows the query returned.
Important: Global suppressions and cell size limits are not applied in test query counts. Test queries might also return non-normalized data. To obtain an accurate result count, test run the process. - Click OK to save the query for this segment and close the Edit segment dialog.
- In the Segment process configuration dialog, edit the remaining segments to define queries for them.
- Continue configuring the Segment process by using the controls on the Segment, Extract, and General tabs. For more information, see the following topics:
-
Click OK to save your selections and close the Segment process
configuration dialog.
The process is now configured. You can test the process to verify that it returns the results you expect.