Manage collections | HCL Digital Experience
Learn more about creating, configuring, and deleting media asset collections using Digital Asset Management.
Prerequisite
HCL Digital Asset Management should be installed and configured to HCL Digital Experience 9.5 Container Release Update CF181 and higher. See the Install the HCL Digital Experience 9.5 Container components topic for instructions.
Browse and search media assets in a collection
Follow these steps to work with Collections in HCL Digital Experience 9.5 Digital Asset Management.
- From the HCL Digital Experience 9.5 Digital Asset Management interface, click
Collections. The HCL Digital Experience 9.5 Digital Asset
Management interface allows you to see previews of media assets for a
specified collection. For example, a curated set of media assets are grouped
in a collection named Furniture Gallery as shown
below.
Figure 1. Digital Asset Management user interface 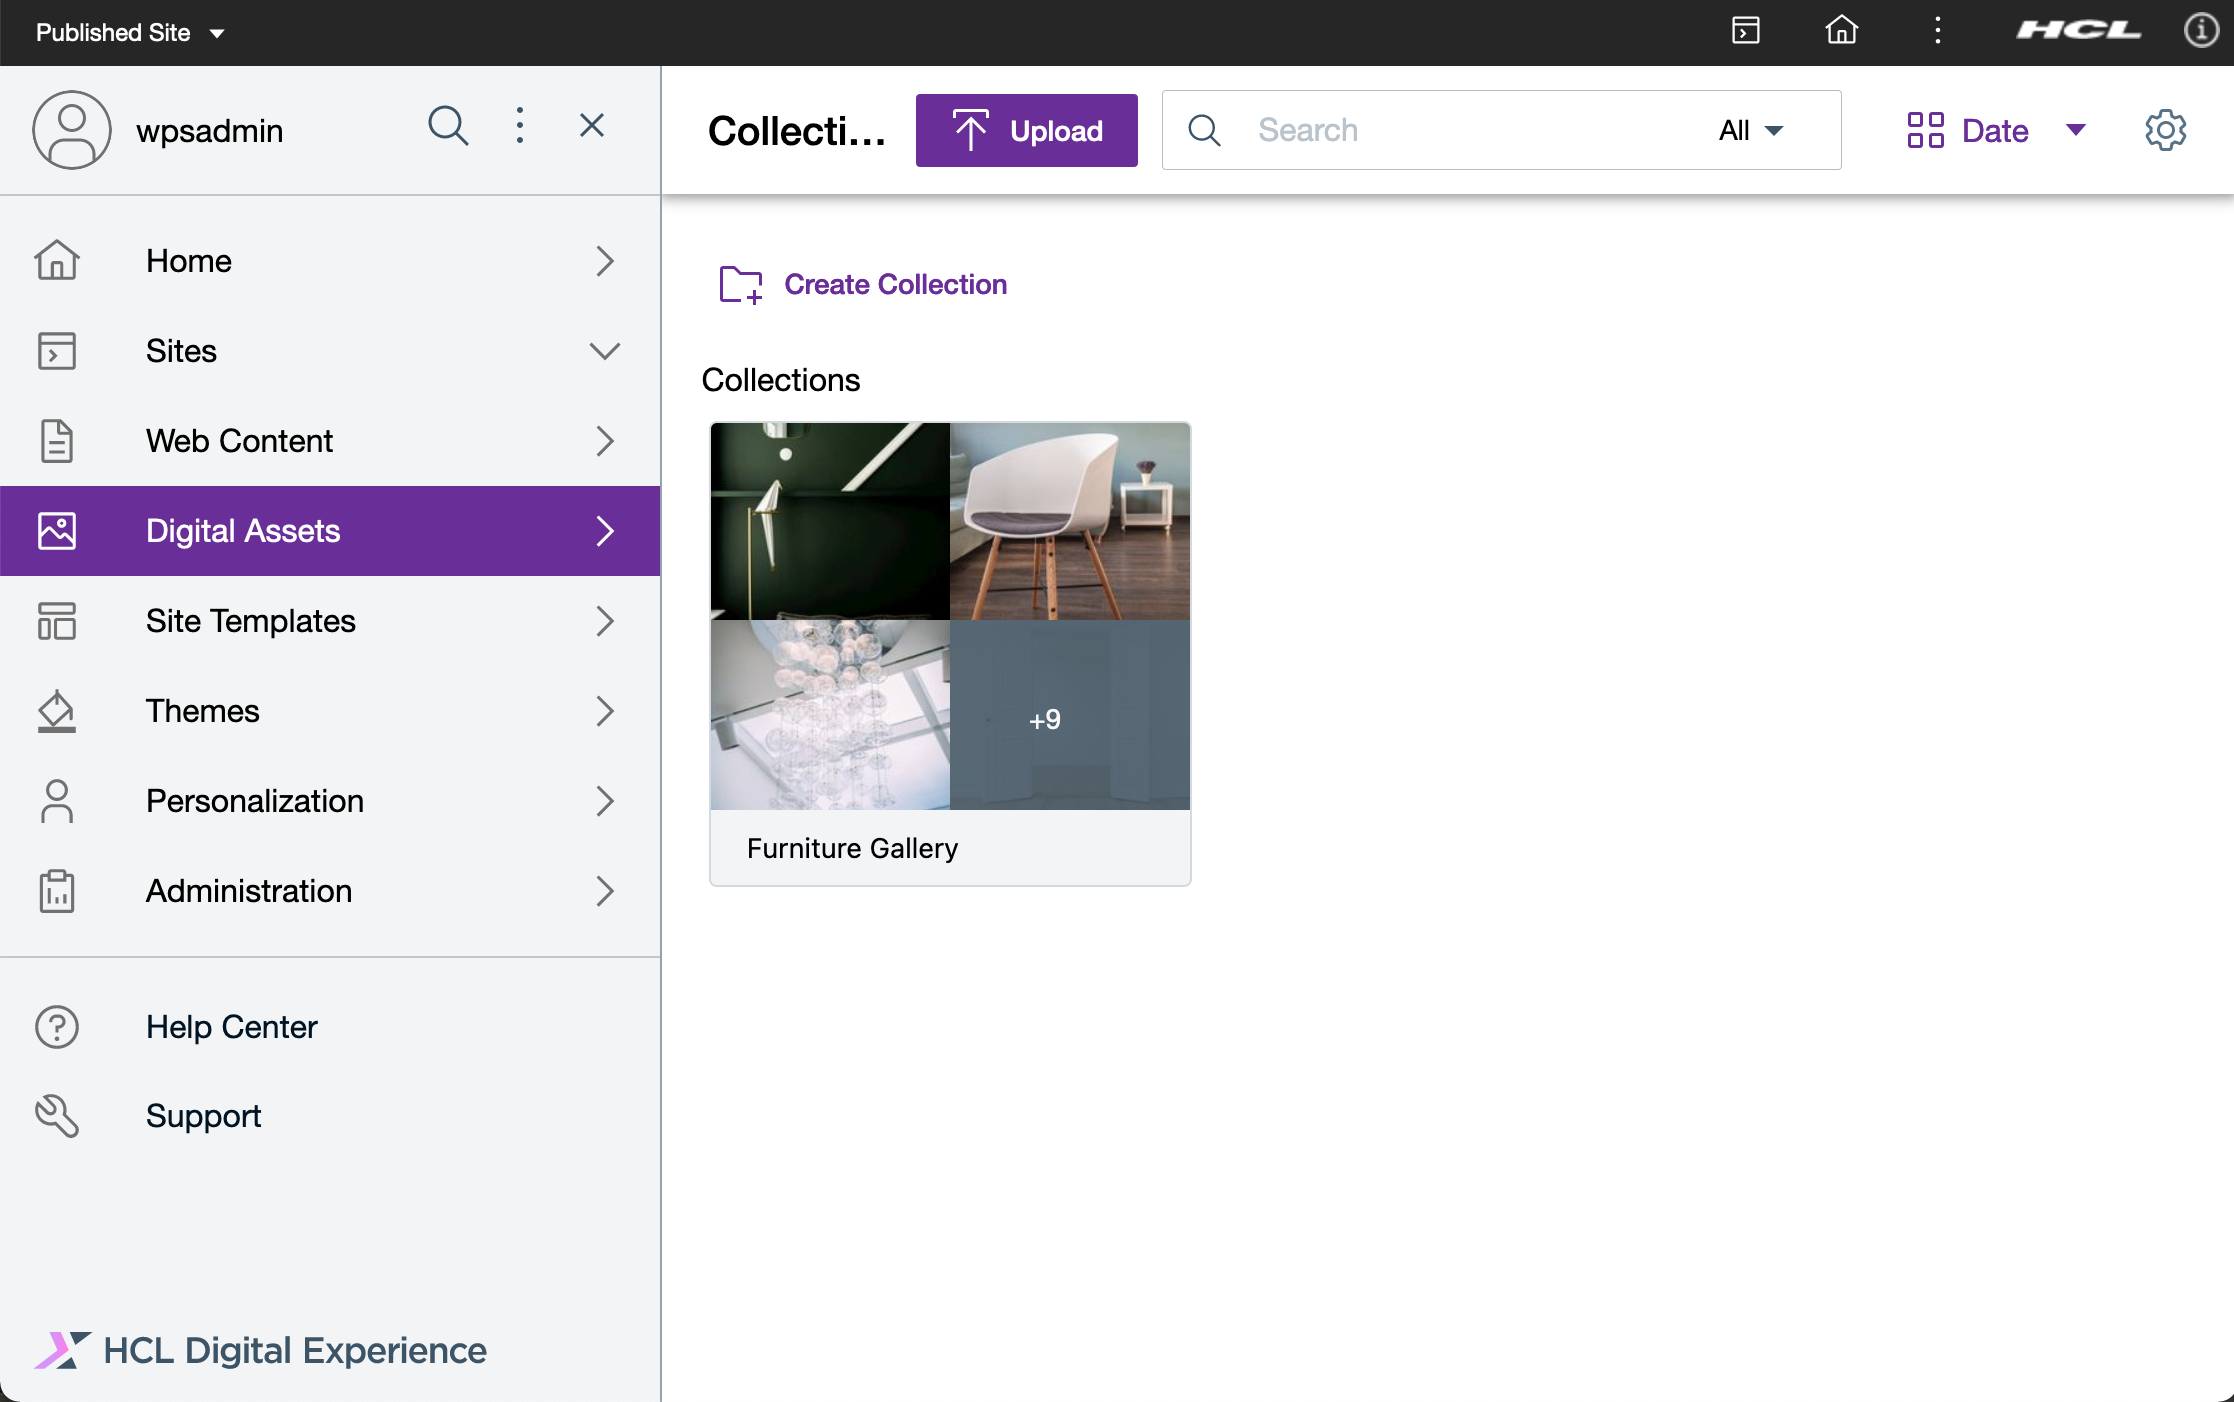 This Collections interface presents you with the following options:
- Create Collection - Create a new collection or a new nested collection (when used inside an existing collection)
- View information - opens the Information panel and shows
Access Control
Figure 2. Information Panel 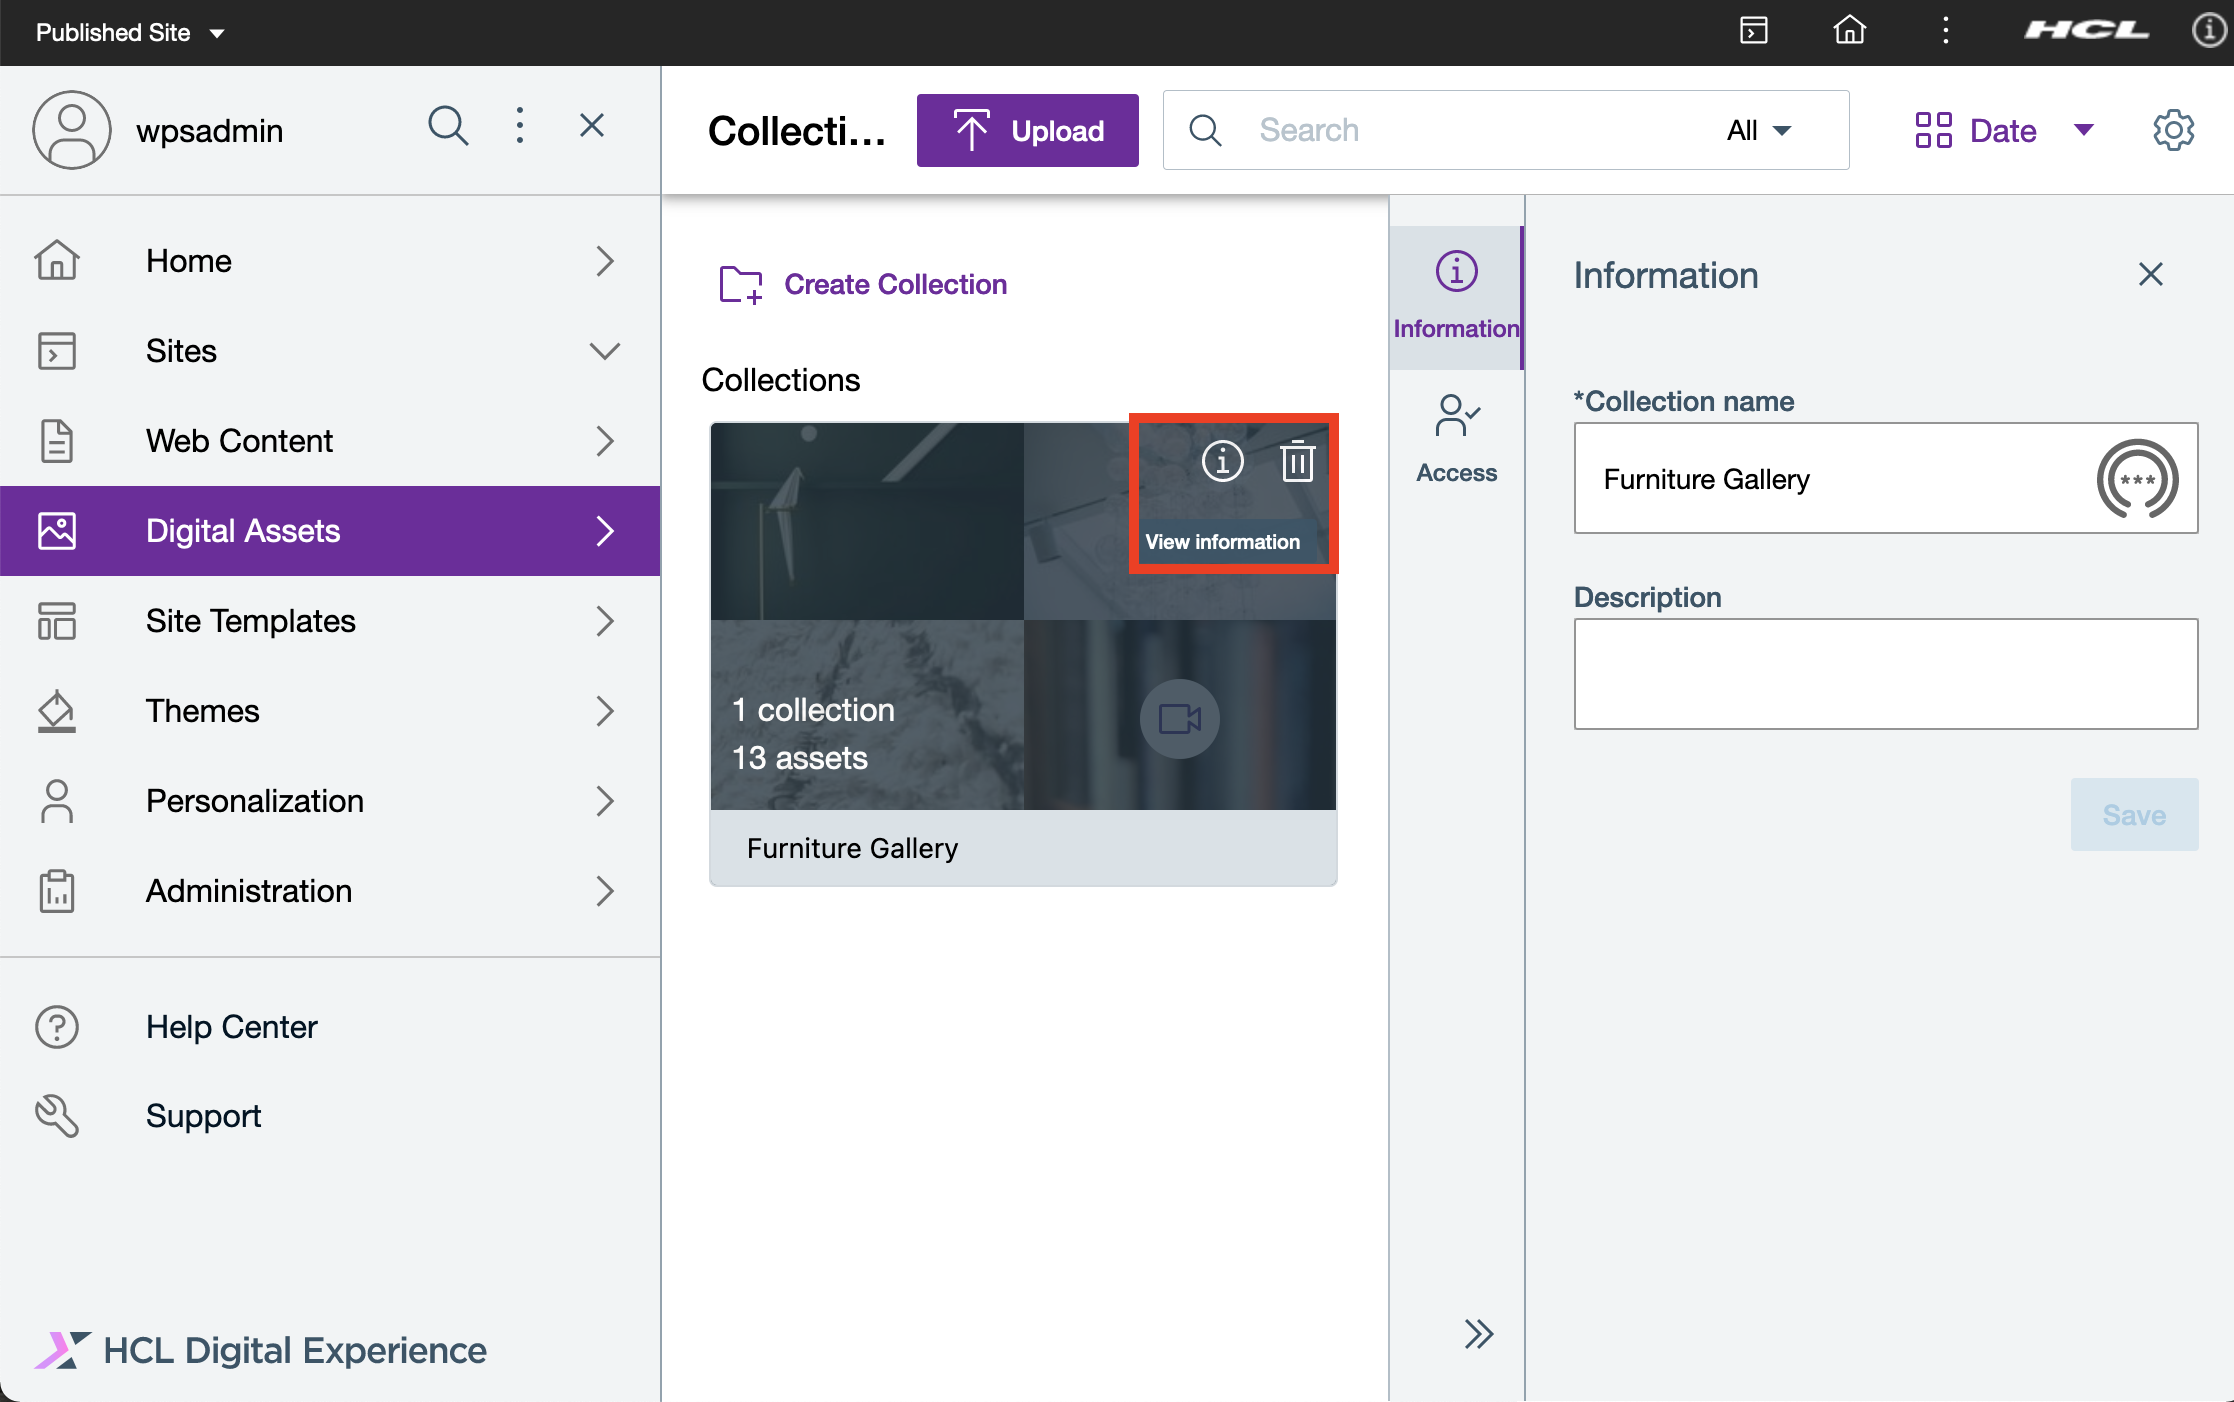
- Information - Allows you to update the Collection name and description.
- Access Control - Allows you to set who can access the media assets in the Collection.
- Delete Collection - Deletes the selected Collection.
- Select the Filter option to filter media asset
results by Favorites, by Asset
types, or Asset size.
- Favorites - Filters media assets added to your favorites.
- Asset types - Filters media assets by type. You can further refine search results by selecting a specific file type.
- Asset size - Filters media assets by size.
Figure 3. Filter options  Note: Asset size filter is available in HCL DX CF192 and later.
 - On the top right, click the Grid or List icon (Open
view options) to change how the media assets or collections
are displayed:
Figure 4. Open view options 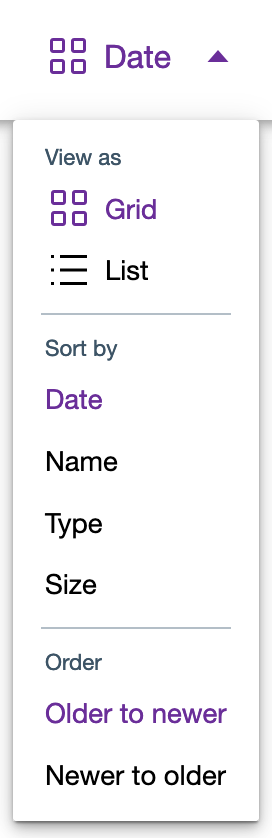
- View as - Lists options to view media assets or
collections.
- Grid - Shows media assets in an equal-sized thumbnail view. This is the default display view.
- List - Shows media assets in a standard list. Use this view to access a media asset when you can recognize the asset by its attributes, such as its file name.
- Sort by - Lists options to sort media assets or
collections:
- Date
- Name
- Type
- Size
- Order - Lists options to sort order of media assets or
collections depending on the selected Sort by option:
- Date
Figure 5. Date > Newer to older 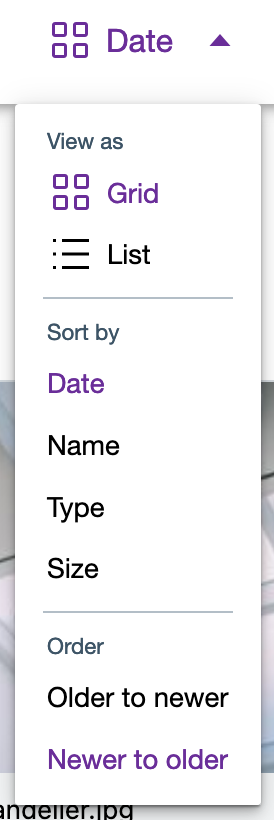
- Order by file name by Older to newer date
- Order by file name by Newer to older date
- Name
Figure 6. Name > Z to A 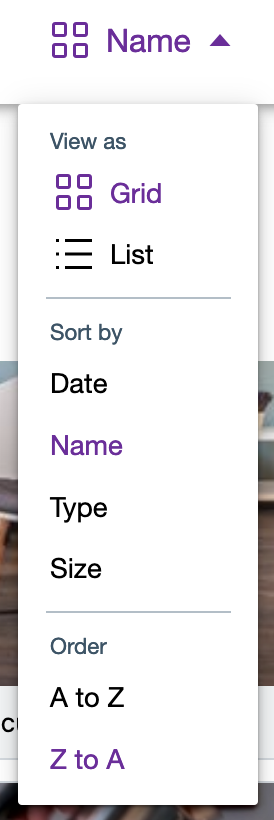
- Order by file name from A-Z
- Order by file name Z-A
- Type
Figure 7. Type > Descending 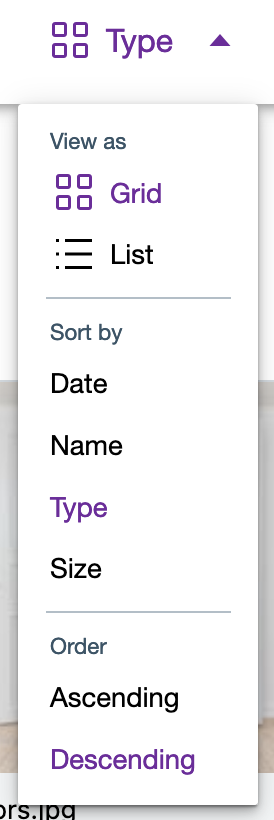
- Ascending
- Descending
- Size
Figure 8. Size > Larger to smaller 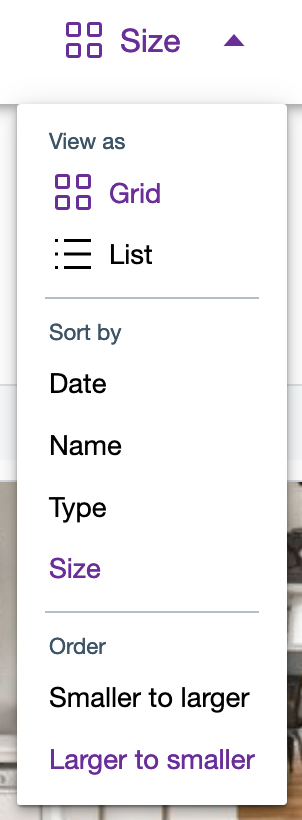
- Smaller to larger
- Larger to smaller
- Date
- View as - Lists options to view media assets or
collections.
Modify information metadata of a media asset collection
- From the HCL Digital Experience 9.5 Digital Asset Management interface,
hover over a collection and click the Information
icon (small i).
Figure 9. DAM Collection Information 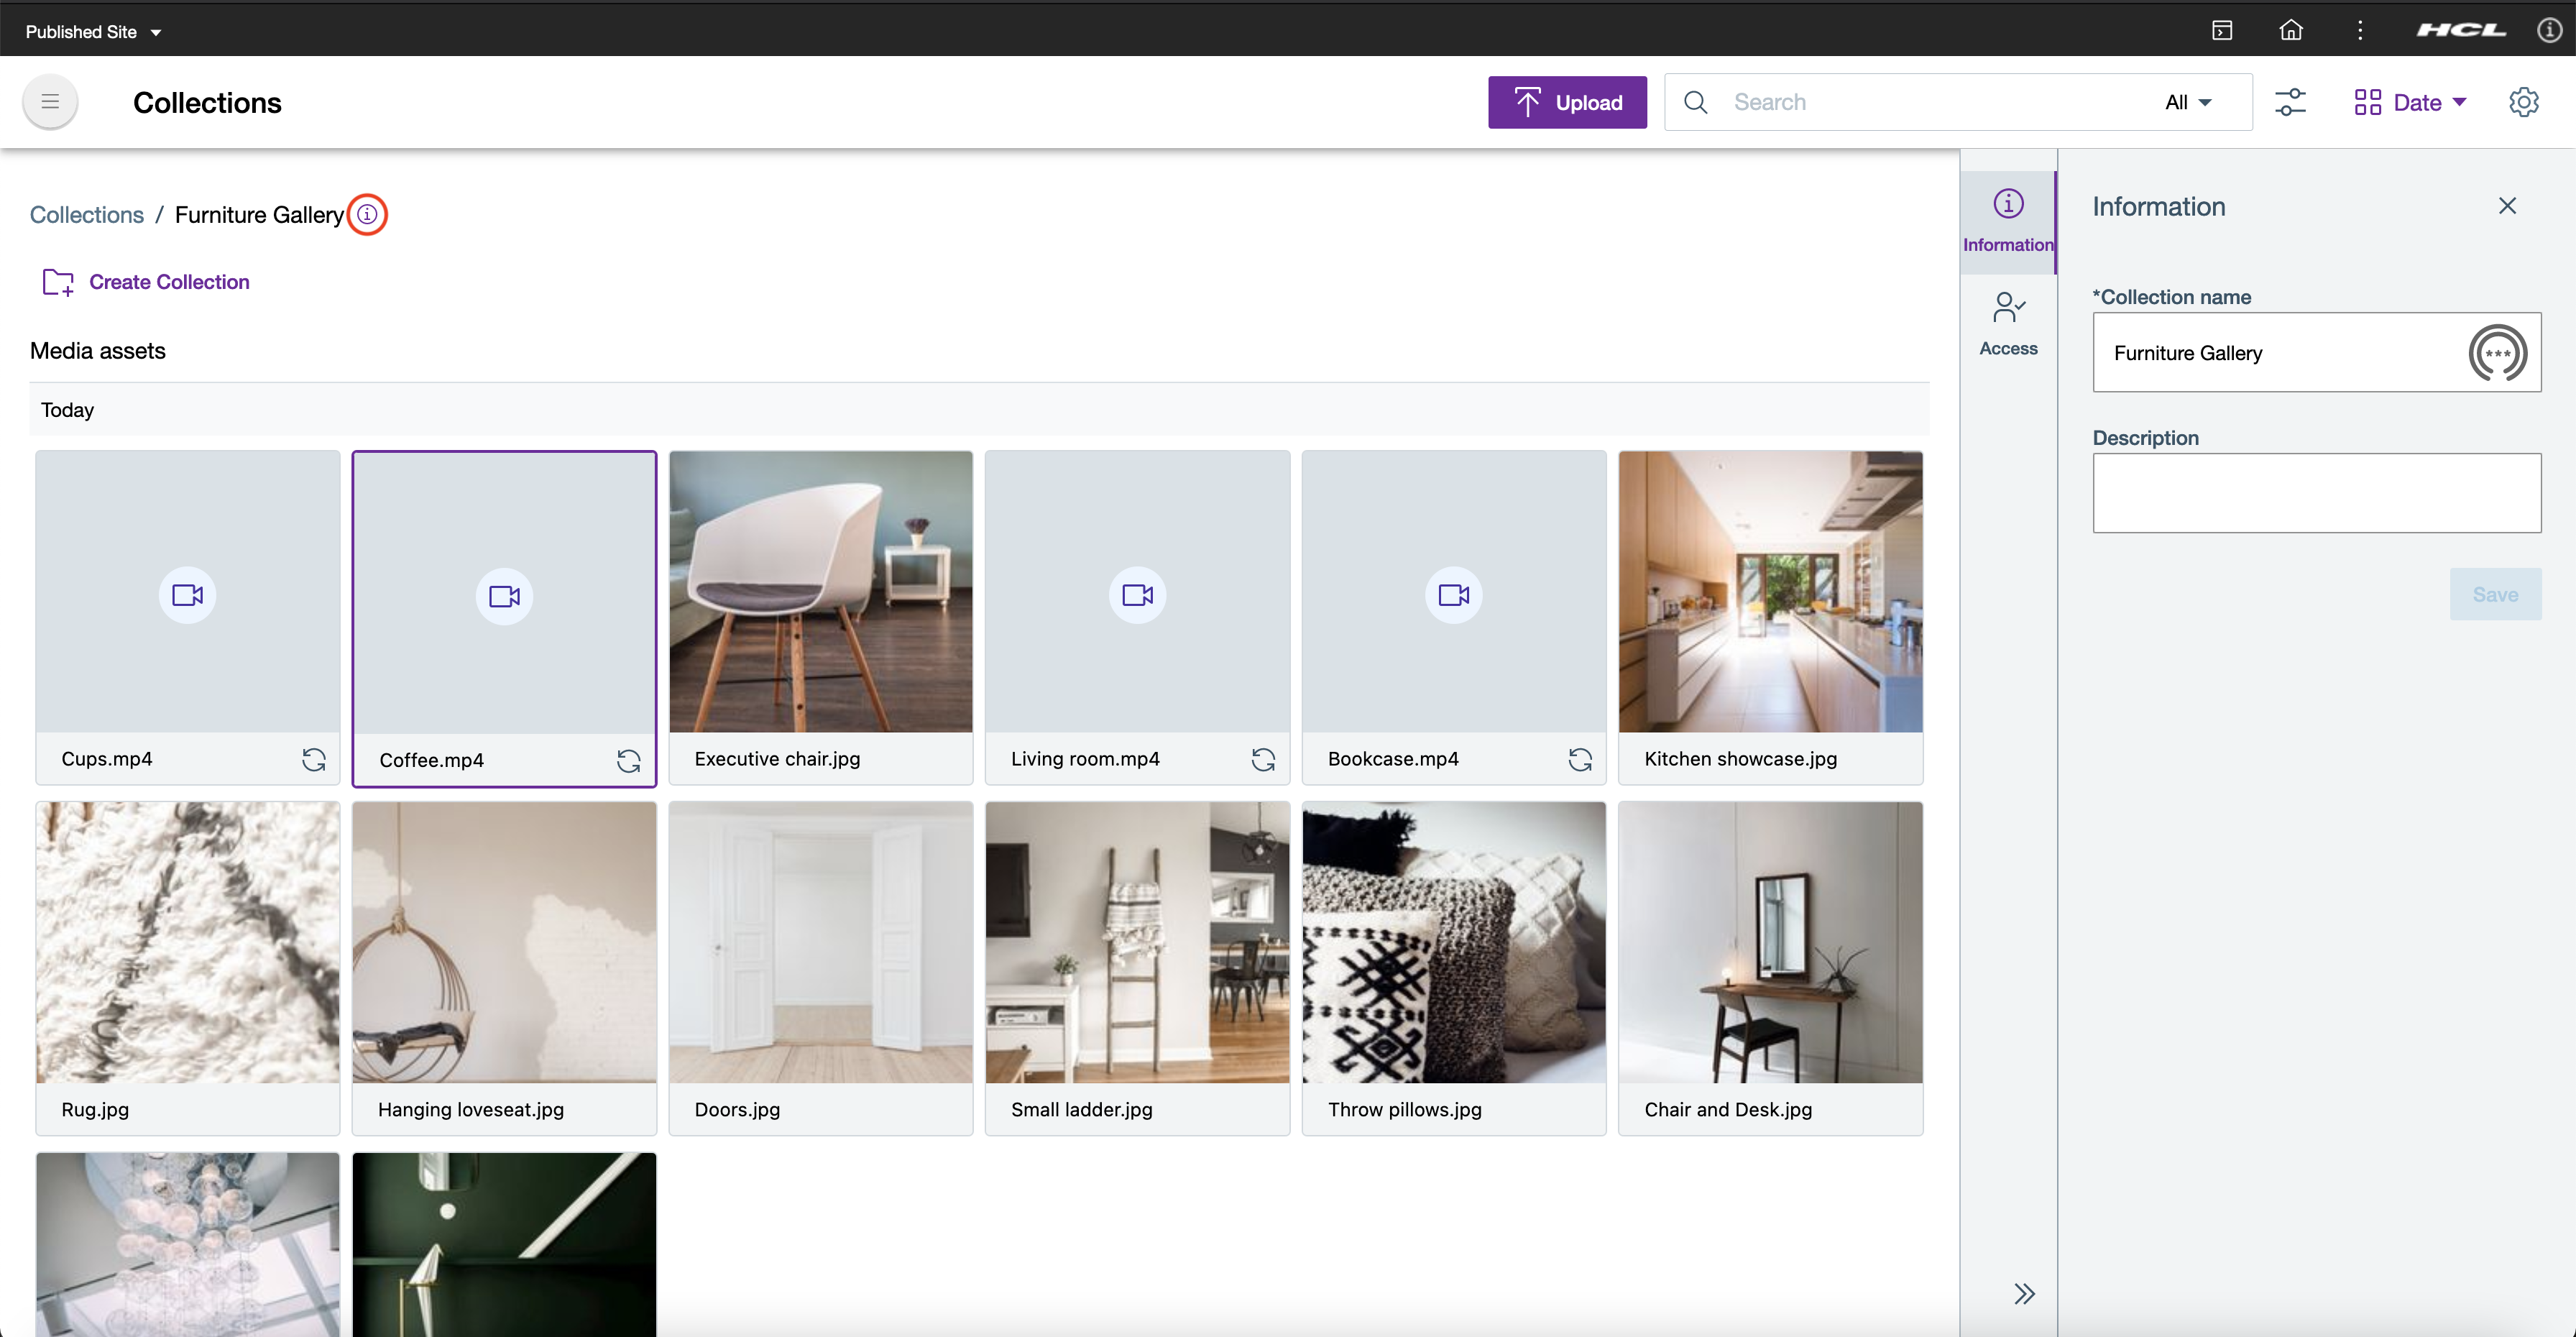
- On the Information panel, edit the Collection name and Description as applicable.
- Click Save to save changes.
Manage user access permissions of a media asset collection
Video: Configuring user access permissions to Digital Asset Management assets
- From the HCL Digital Experience 9.5 Digital Asset Management interface, hover over a collection and click Information (small i).
- Click Access.
- Assign levels for other users to access media items stored within the
collection by clicking Add user.
Figure 10. Access Control > Add user 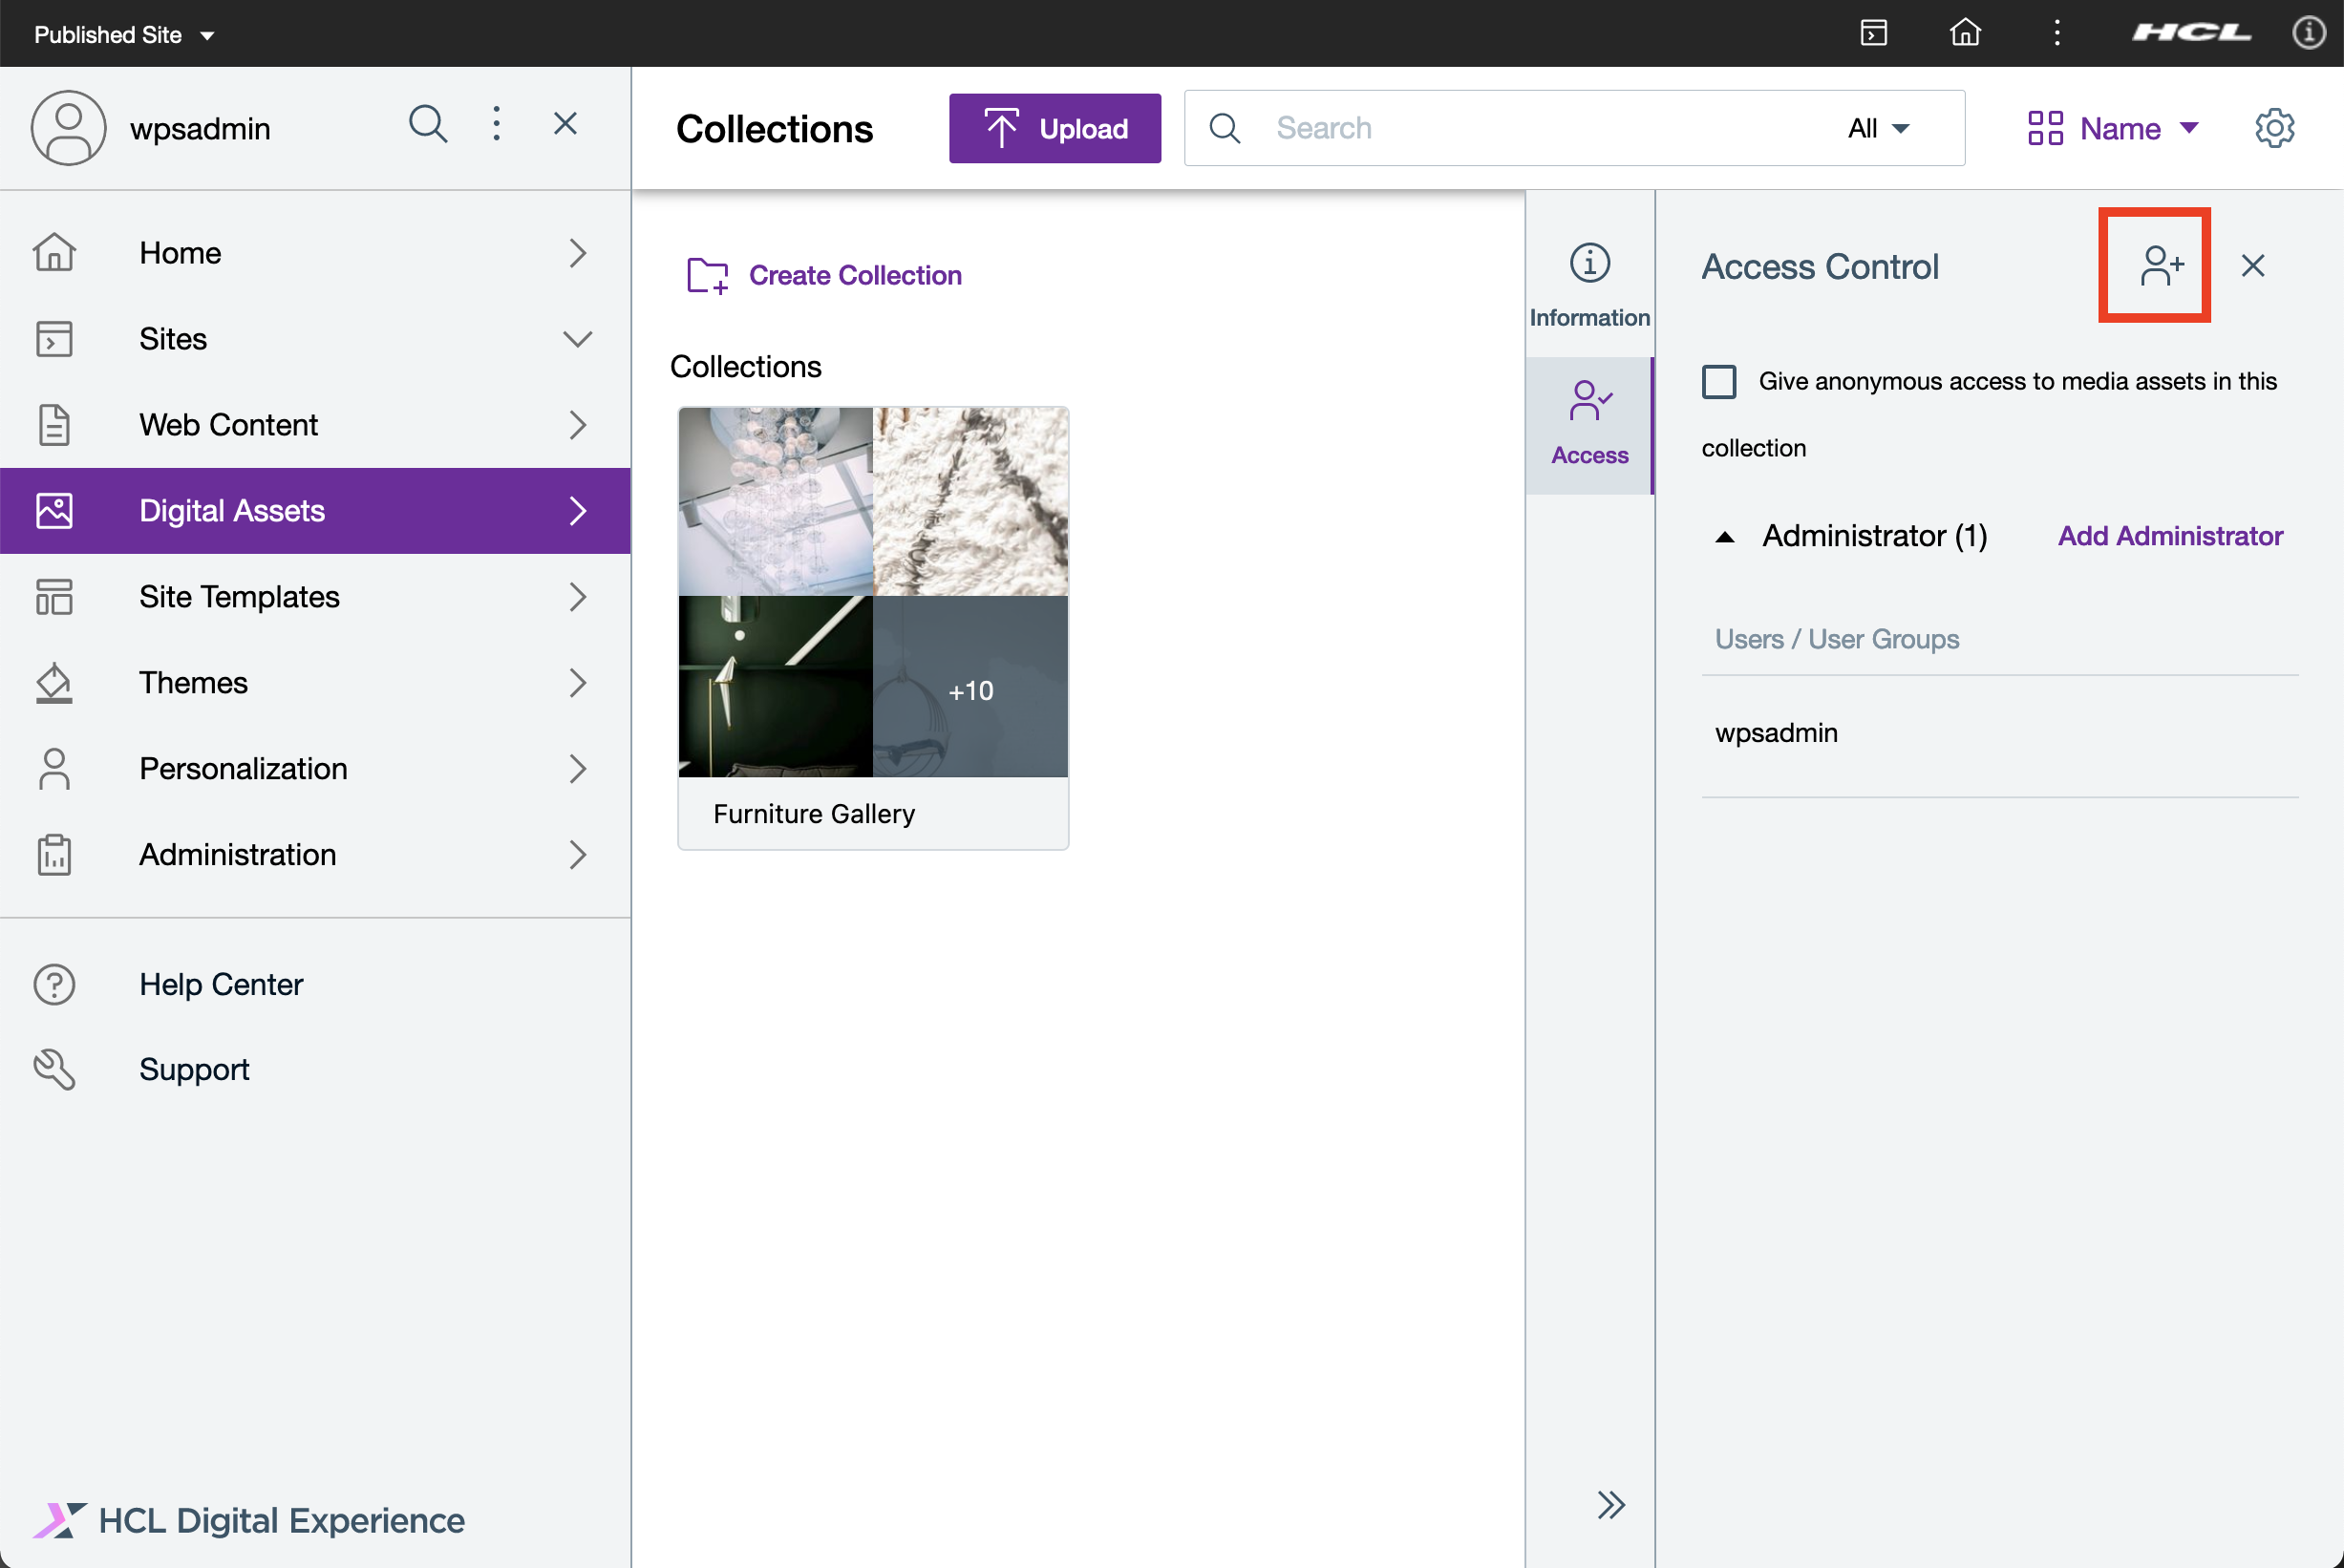
- When you click Add User, a pop-up displays options to
add these user access levels for individuals and groups as defined by the
user directory integrated to your Digital Experience platform. Select the
appropriate member. In this example, click Administrator.
Figure 11. Access Control > Assign members 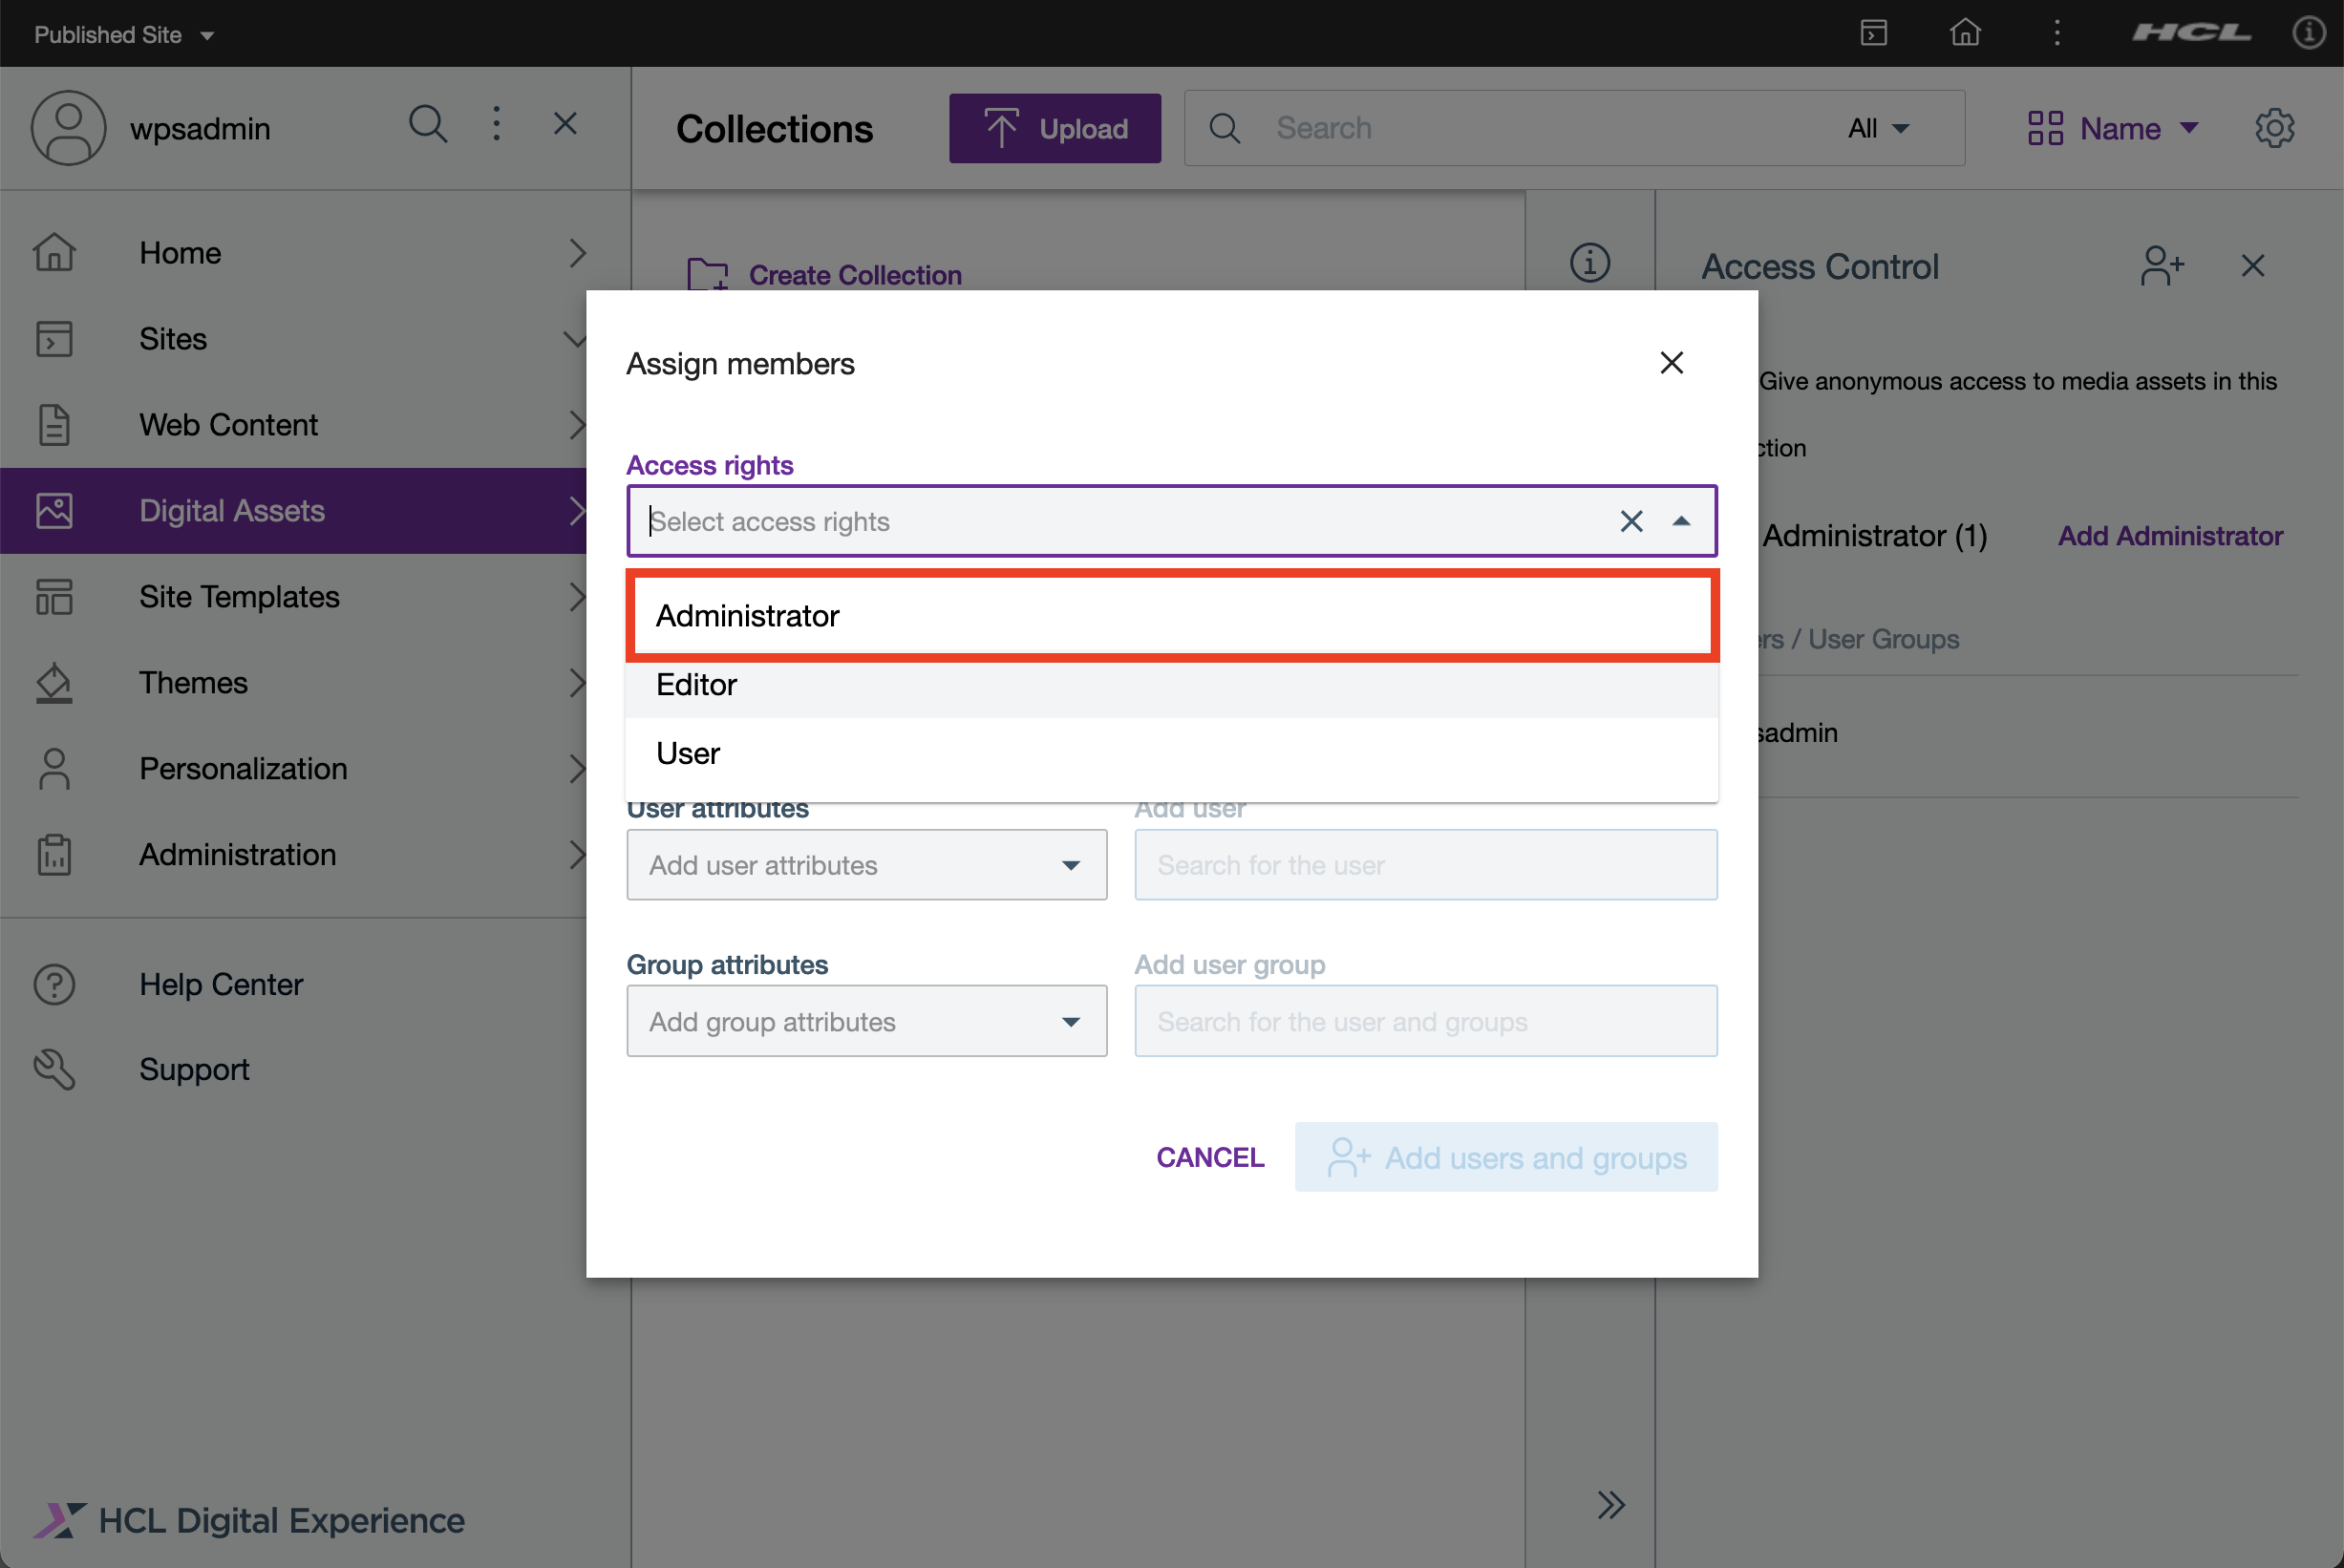
- Select the appropriate Access rights. For this
example, click All authenticated DX users.
Figure 12. Assign access rights > All 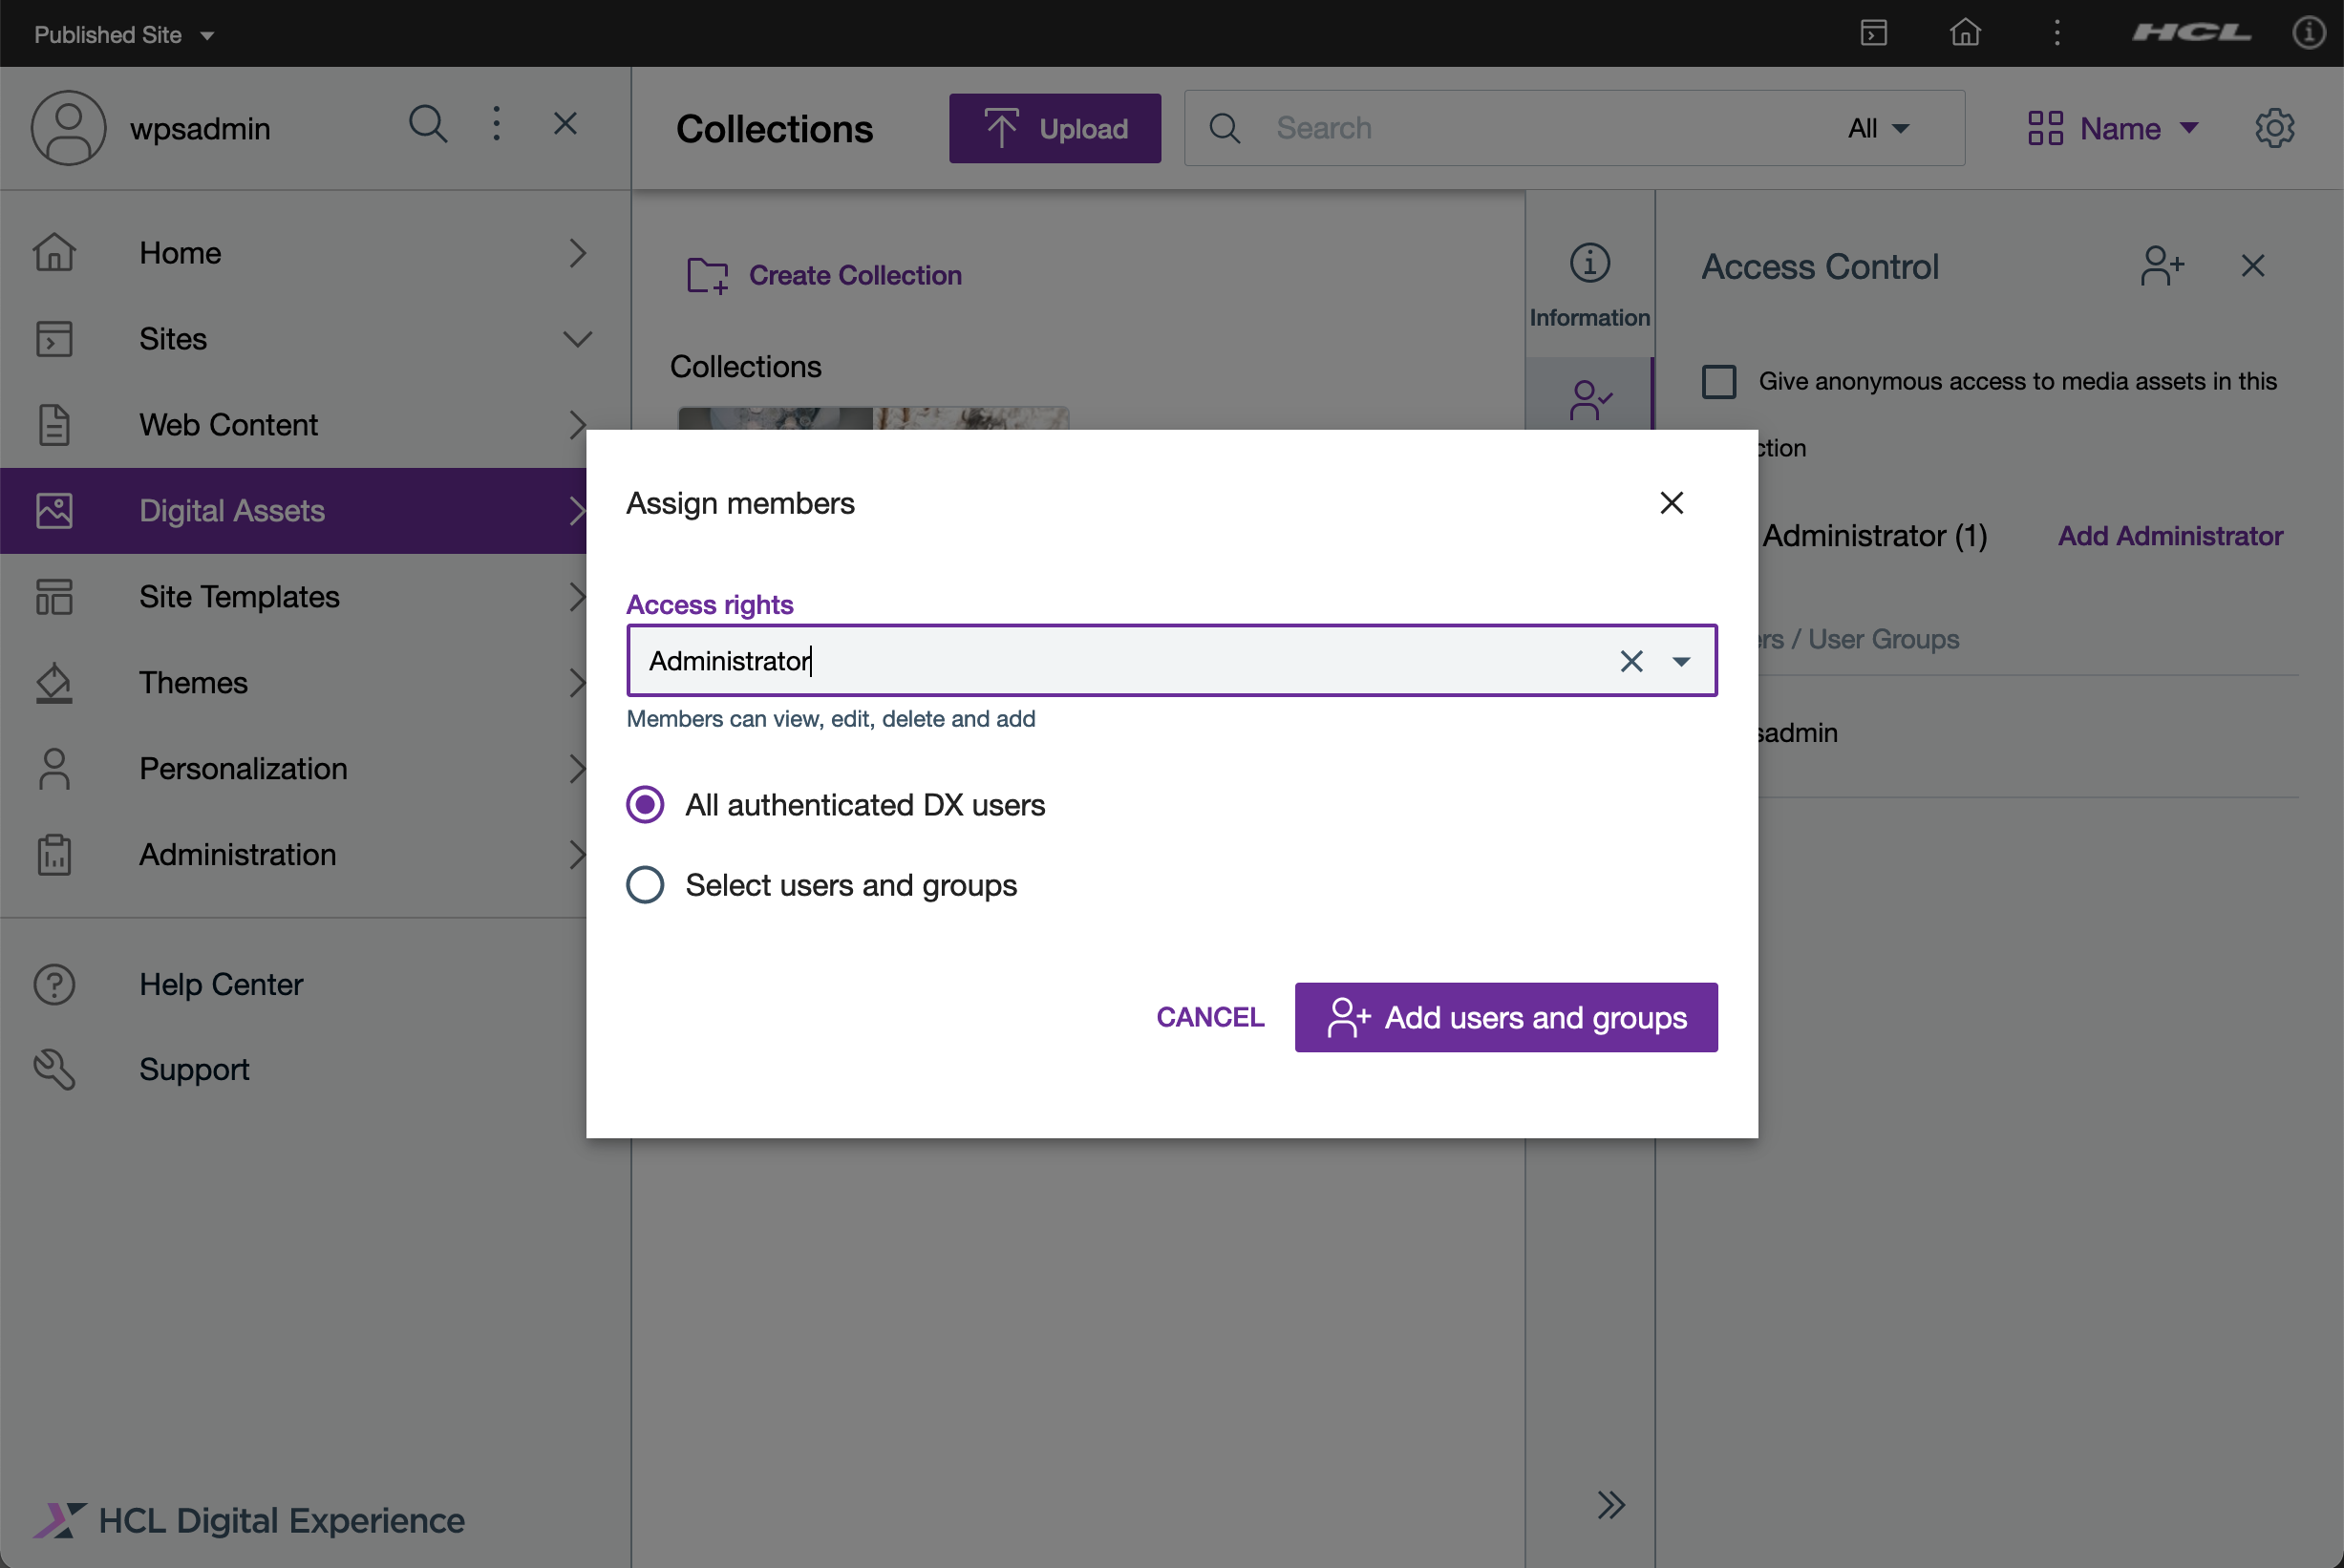
- Click Add users and groups to save changes.
- Once added, you can specify additional users for the selected access right.
Select the access right to add a member or groups. For this example, click
Add Administrator.
Figure 13. Add Administrator 
Figure 14. Assign access rights > Select 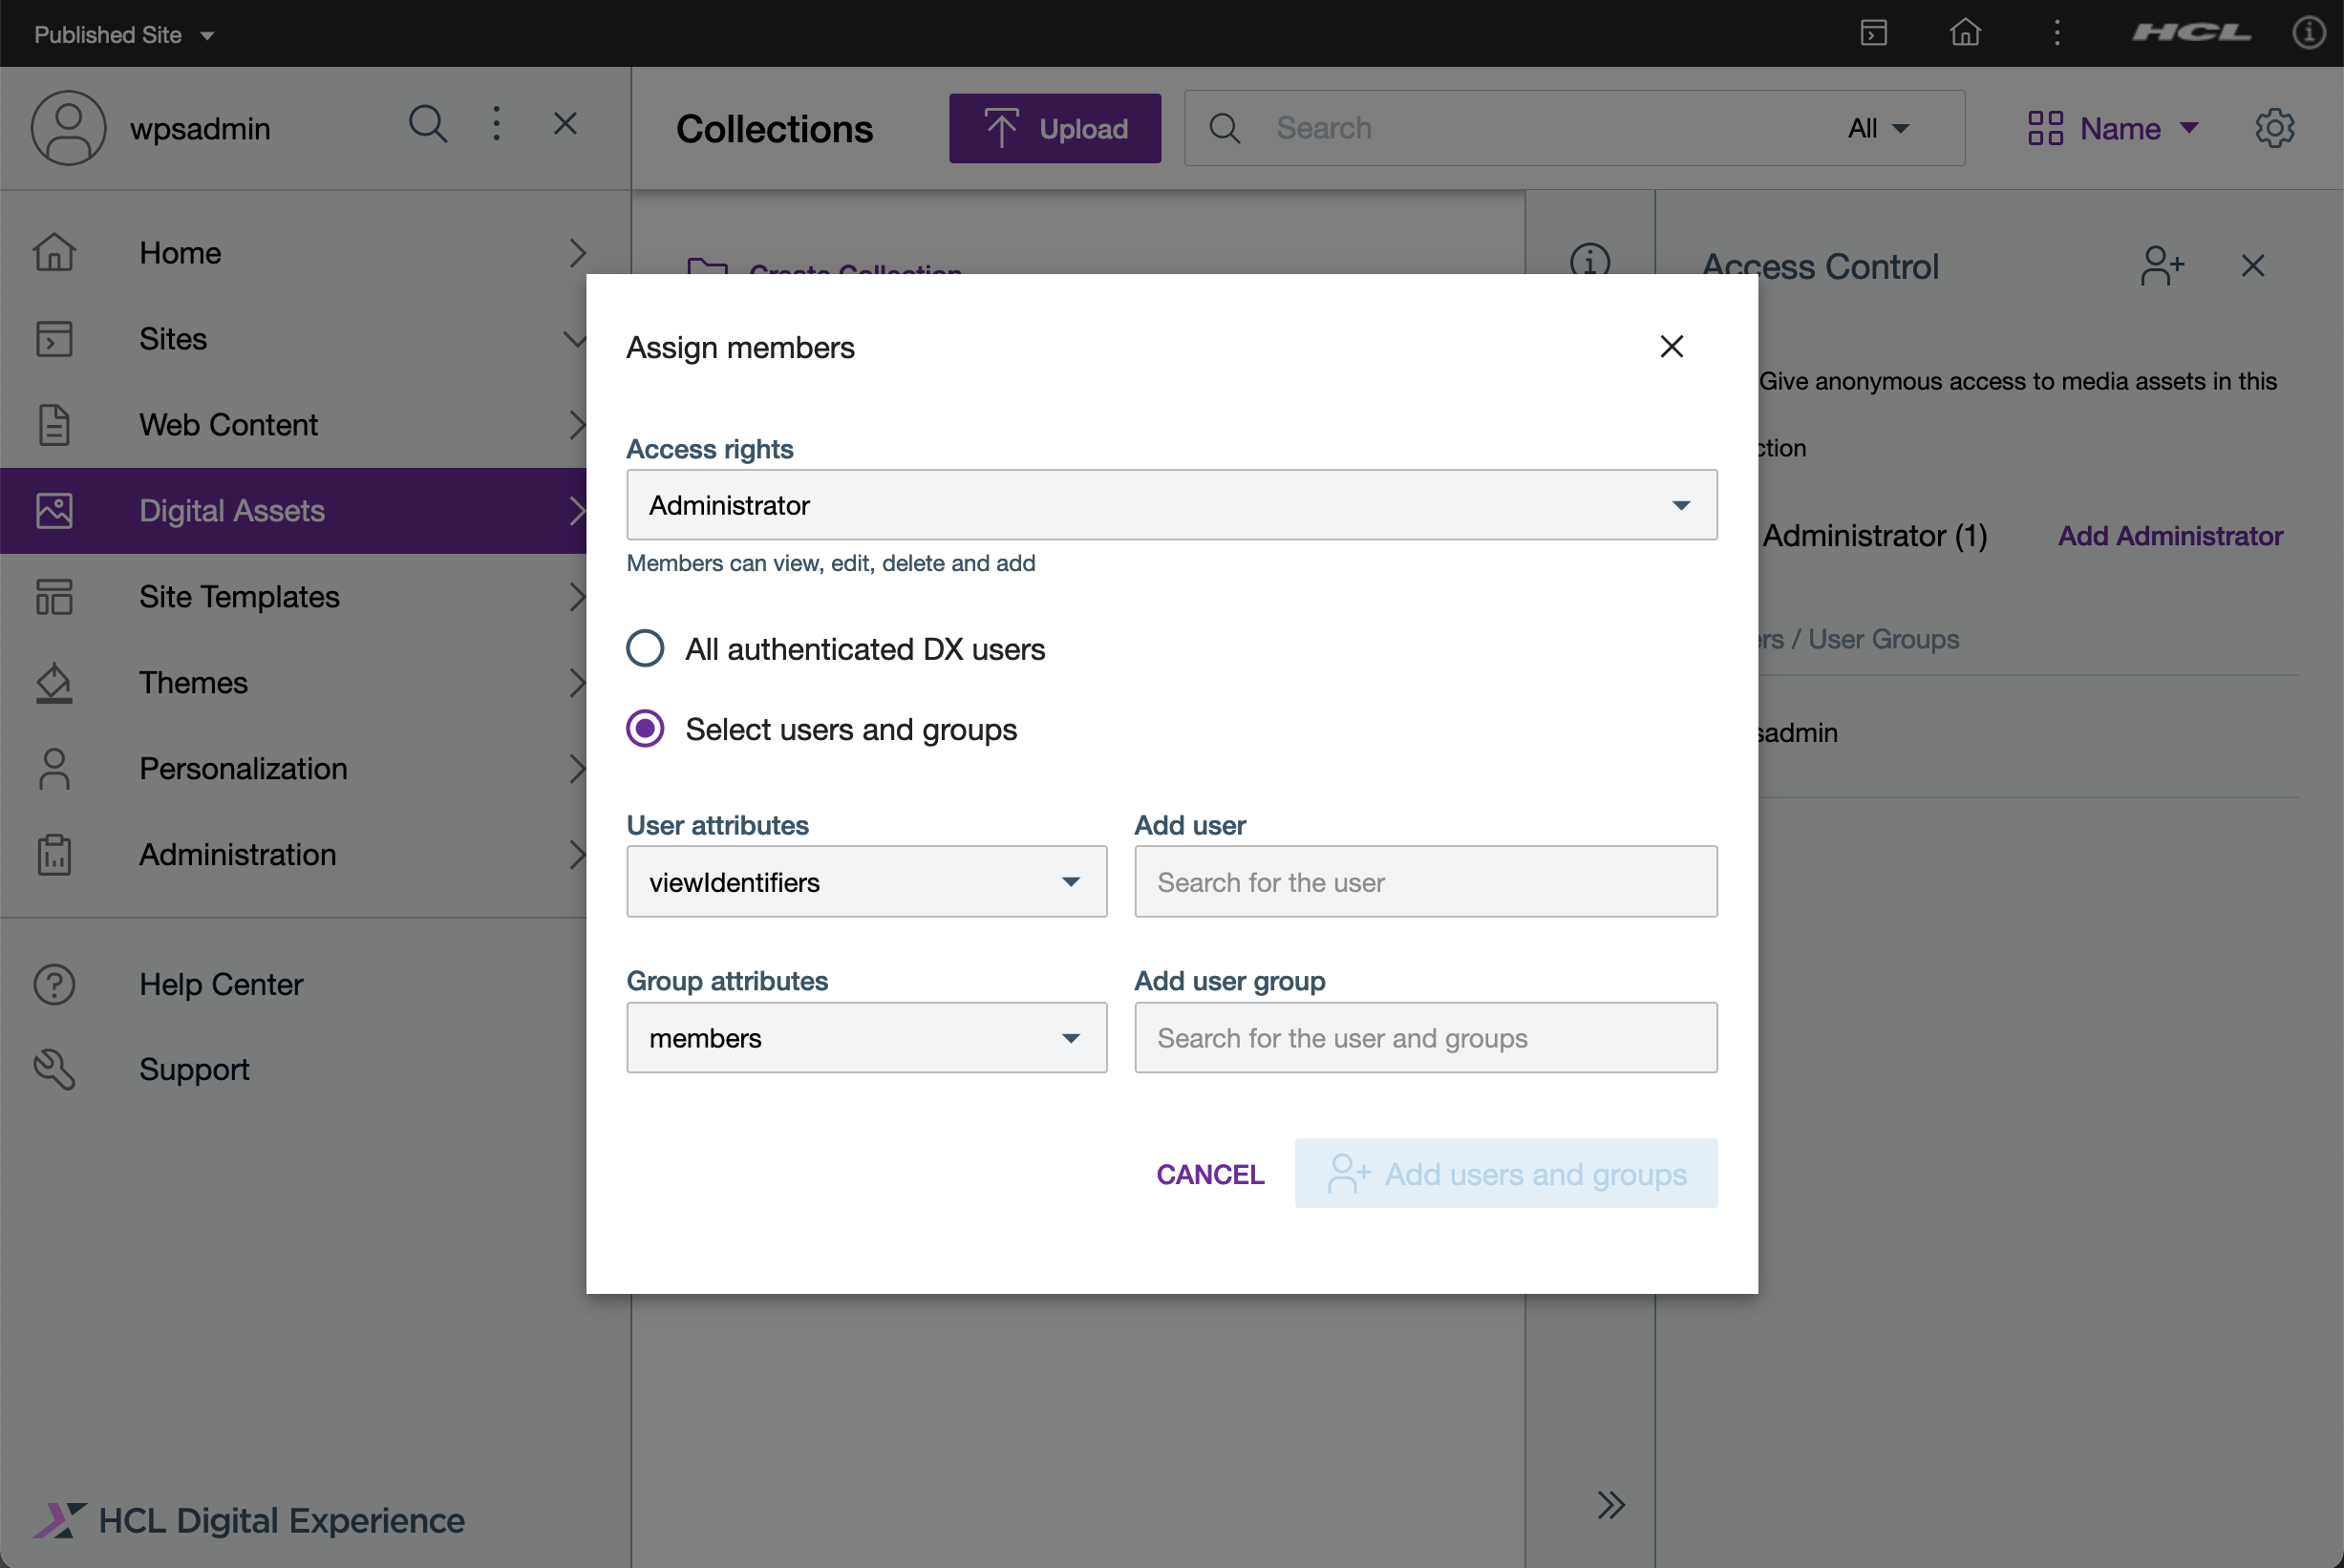
- Once done, click Add users and groups to save changes.
Delete a collection
- From the HCL Digital Experience 9.5 Digital Asset Management interface, hover over a collection and click Delete.
- A pop-up message displays to confirm your action. Once a collection is deleted, you can no longer retrieve it, including the media assets, renditions, and versions you have used as your web content.
- Click Delete to proceed with deleting the collection.
HCL Digital Experience Solution Feedback
HCL Digital Experience is interested in your experience and feedback working with HCL Digital Experience 9.5 release software. To offer comments or issues on your findings, please access the HCL Digital Experience 9.5 Feedback Reporting application.