Integrate Google Analytics with HCL Digital Experience
This section includes information set up integration of Digital Experience sites with Google Analytics and to view the resulting web analytics tracking to assess the effectiveness of your DX site pages with end user audiences.
Google Analytics provides ways for website owners to collect data on the visitors of their website, their activity and their interactions.
Complete the following steps to integrate Google Analytics to the HCL Digital Experience platform and to apply the integration to assess the effectiveness of DX sites with your target user audiences.
Installation
HCL Digital Experience utilizes the platform Active Site Analytics framework, which includes application scripts, called Aggregators, to collect page interactions data sent to external web analytics services for analysis. HCL DX administrators and page owners can manage the aggregators. They can assign an aggregator to one or more DX labels or pages.
In HCL DX 9.5 CF19 and higher, a new Active Site Analytics aggregator for Google Analytics is available.
Adding an Active Site Analytics aggregator to a DX site page
- Add the DX GoogleAnalyticsAggregator.js to the
HCL DX theme profile.In HCL DX 9.5 CF19 and higher, the GoogleAnalyticsAggregator.js file is located in the PortalServer_root/doc/js-samples directory.
- If using a WebDAV-based theme, copy the GoogleAnalyticsAggregator.js file to mycontenthandler/dav/fs-type1/theme/{your-custom-theme}/js.
- If using a WAR-based theme, include the GoogleAnalyticsAggregator.js file in the static theme WAR file.
For example, when using a WAR-based theme, the location of the GoogleAnalyticsAggregator.js file after installing to the <YourTheme> WAR file will be deployed under
wp_profile:wp_profile/installedApps/<cell>/<YourTheme.ear>/<YourTheme.war>/themes/<YourTheme>/js
Refer to the file tree below how the custom theme app will be deployed:wp_profile ---> installedApps ---> <cell> ---> <YourTheme.ear> ---> <YourTheme.war> ---> themes ---> <YourTheme> ---> js ---> GoogleAnalyticsAggregator.js - Add the DX GoogleAnalyticsAggregator.js to the
HCL DX theme profile.Note: The theme profile used by the page(s) needs to include
wp_analyticsor at leastwp_analytics_aggregator.- HCL DX without Practitioner Studio installed:
- a. On Site Manager, select
- HCL DX 9.5 with Practitioner Studio installed:
- a. Select to access the Manage
Pages interface.
Figure 1. Using Manage Pages to add Google Analytics tracking to specified DX pages 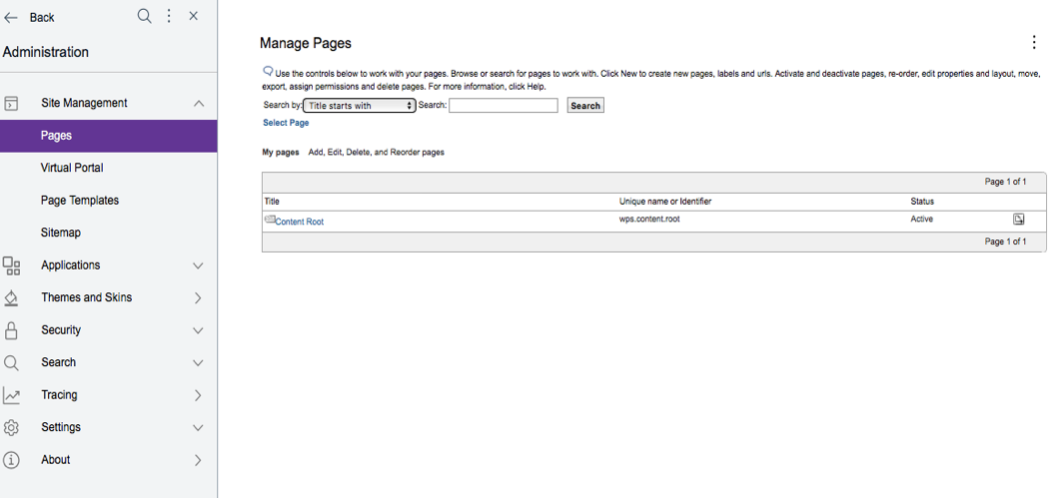
Note: Child pages inherit the script that is set on the parent page. If you want to use a different aggregator on a child page, follow the same procedure that is previously addressed for the child page to make the appropriate assignment. If you want to block inheriting the aggregator setting from the parent page, follow the same procedure, but leave the value empty. As a result, the page has no aggregator that is assigned any longer, and all child pages of the parent page inherit the new setting. - Log in to your Google Analytics account and obtain the
GA_MEASUREMENT_IDin your Google Analytics Dashboard. It is also referred to as Tracking ID.Example: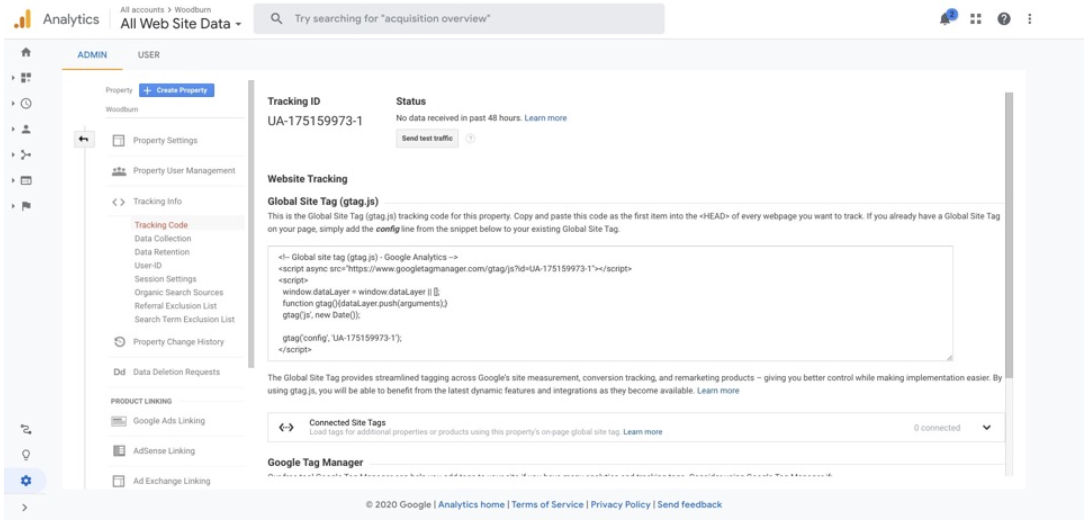
- Add the following metadata in your target HCL DX page(s) properties:
asa_dependency: https://www.googletagmanager.com/gtag/js?id=GA_MEASUREMENT_IDasa_aggregator: GoogleAnalyticsAggregator.jsasa_js_ga_measurement_id: GA_MEASUREMENT_ID
Example:Figure 2. Adding the Google Analytics Aggregator metadata to specified HCL DX page(s) for analytics tracking 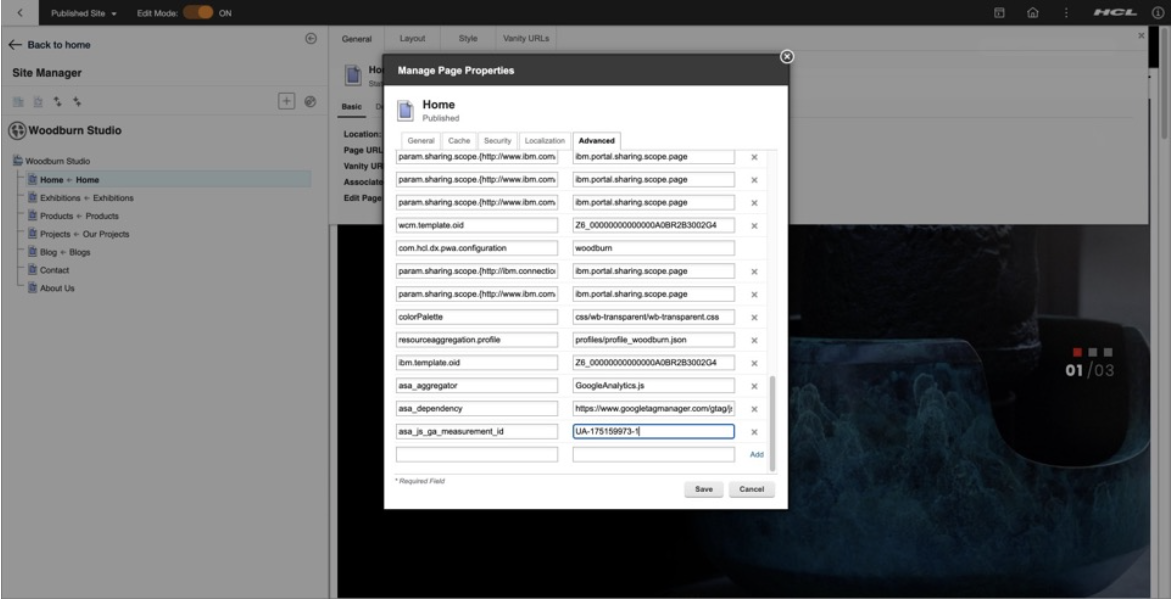
Optionally, you can register the Active Site Analytics tags/microformats as custom dimensions or metrics in the Google Analytics Dashboard and configure the aggregator to use your custom map. See Google Analytics Custom Dimensions & Metrics.
For a list of Active Site Analytics tags associated with HCL DX site pages that can be tracked by the Google Analytics Aggregator, see How Active Site Analytics data is represented in the portal and Supported aggregator tags.
Figure 3. Optionally configure the DX Google Analytics Aggregator to use a custom map 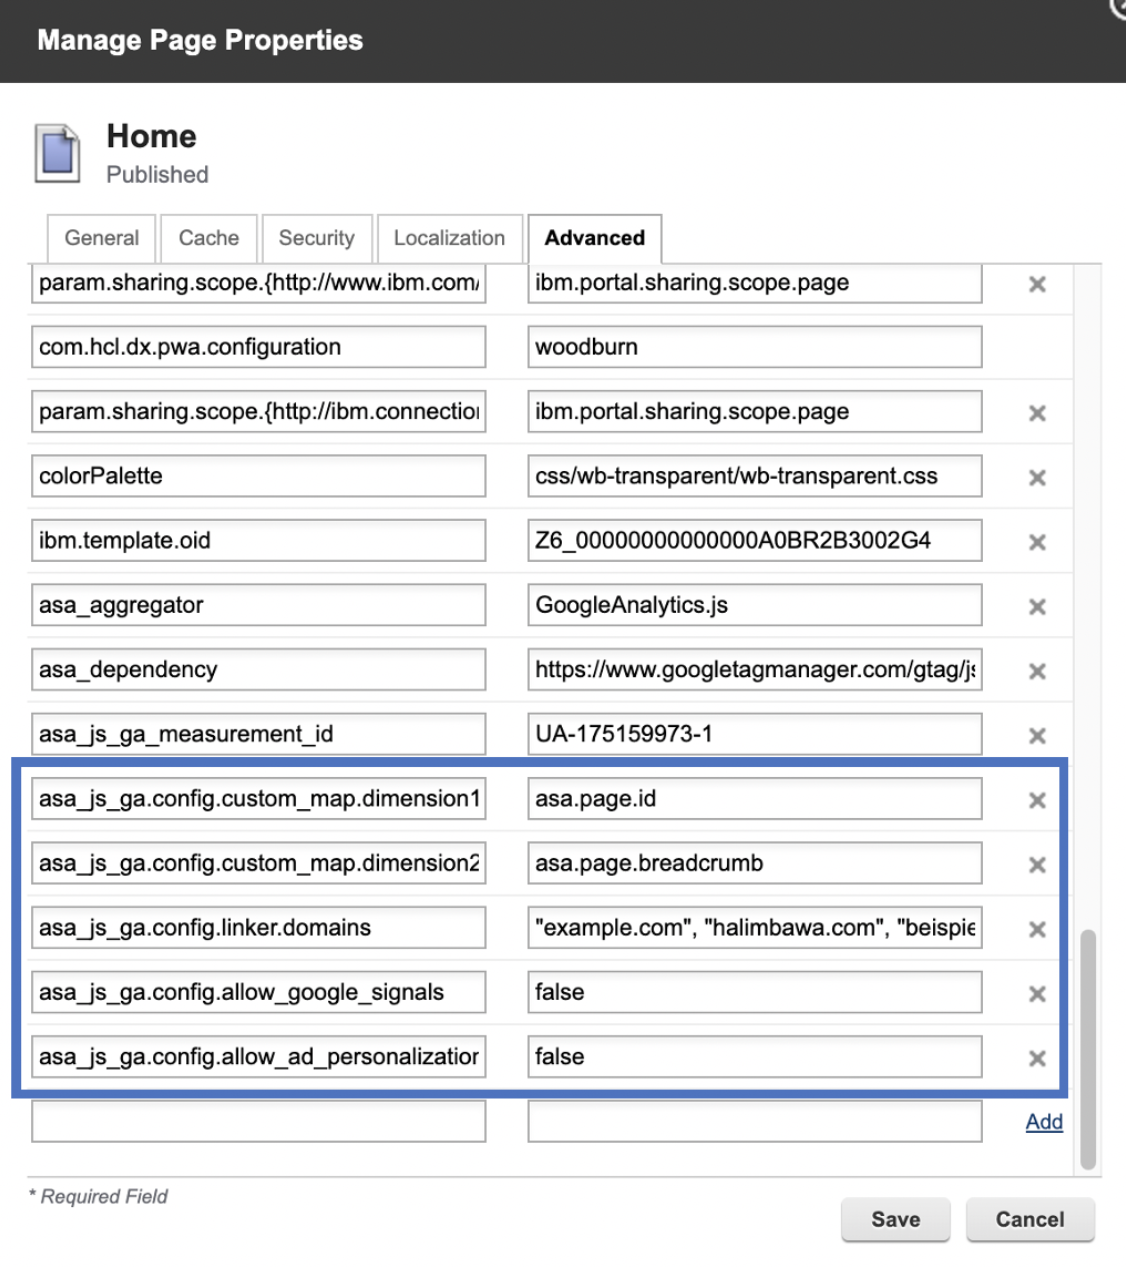
- Access the HCL Digital Experience site page analytics from Google
Analytics analyze HCL DX site activity.
After installing and configuring the aggregator to track analytics from specific HCL DX site pages using the steps above, DX content authors and site owners with access to Google Analytics can view the DX site activity tracked and reflected in Google Analytics Dashboard's real-time reports as an increase in the pageviews and active users.
See the following example:Figure 4. In page analysis of HCL DX 9.5 Woodburn Studio site user interactions in Google Analytics 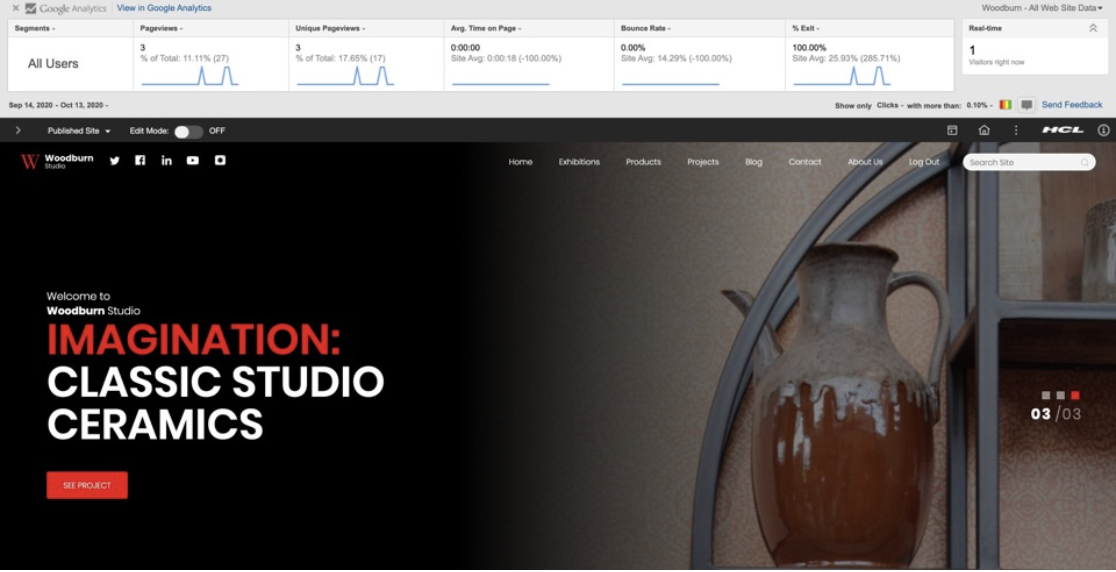
Refer to the Analytics tags and site promotions topics for more information on how to add additional tags and site promotions in addition to the out-of-the-box ones.
Configuration options for the HCL DX Google Analytics Aggregator
asa_dependency) by adding the following ‘opt-out’ metadata
in to the DX page(s)
properties:asa_js_ga.optout: truewindow['ga-disable-GA_MEASUREMENT_ID'] = trueSee Disable Google Analytics measurement for additional information.