Configuring HCL Compass Web server for cross-server communication
Use the Cross-Server Communication window of the Site Configuration interface to specify a target OSLC service provider with which you want to establish server-to-server communication.
About this task
Procedure
-
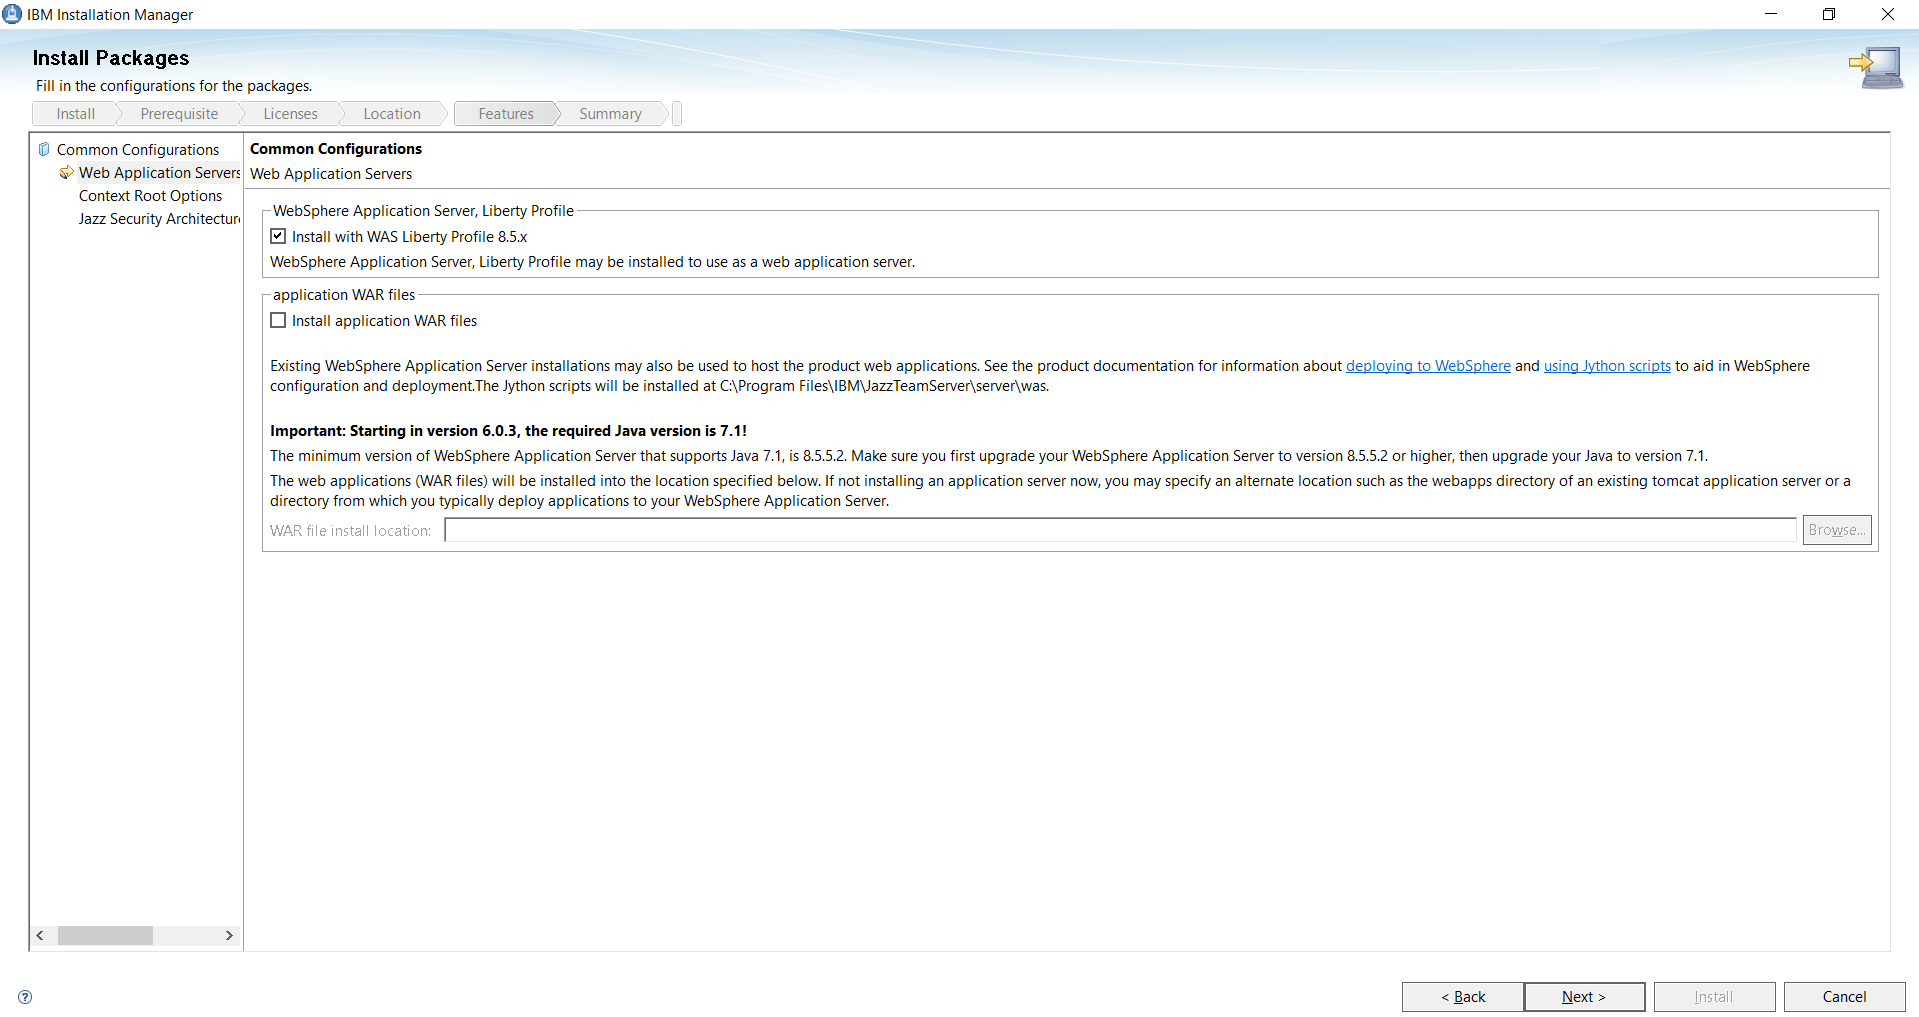
Install CLM server using the IBM Installation Manager.
- Download Collaborative Lifecycle Management (CLM) software from https://jazz.net/downloads/clm/releases/6.0.3?errno=2&p=allDownloads to
your local machine. Create a trial account, if you do not have one, or access to
\\smanas01\dbtst1\devtools\RTC601to get a permanent CLM account and the activation kit. - Install the Installation Manager application. For details, see the Installation Manager and Packaging download documents technote.
- Click Install Jazz Team Server as Evaluation
Installation.

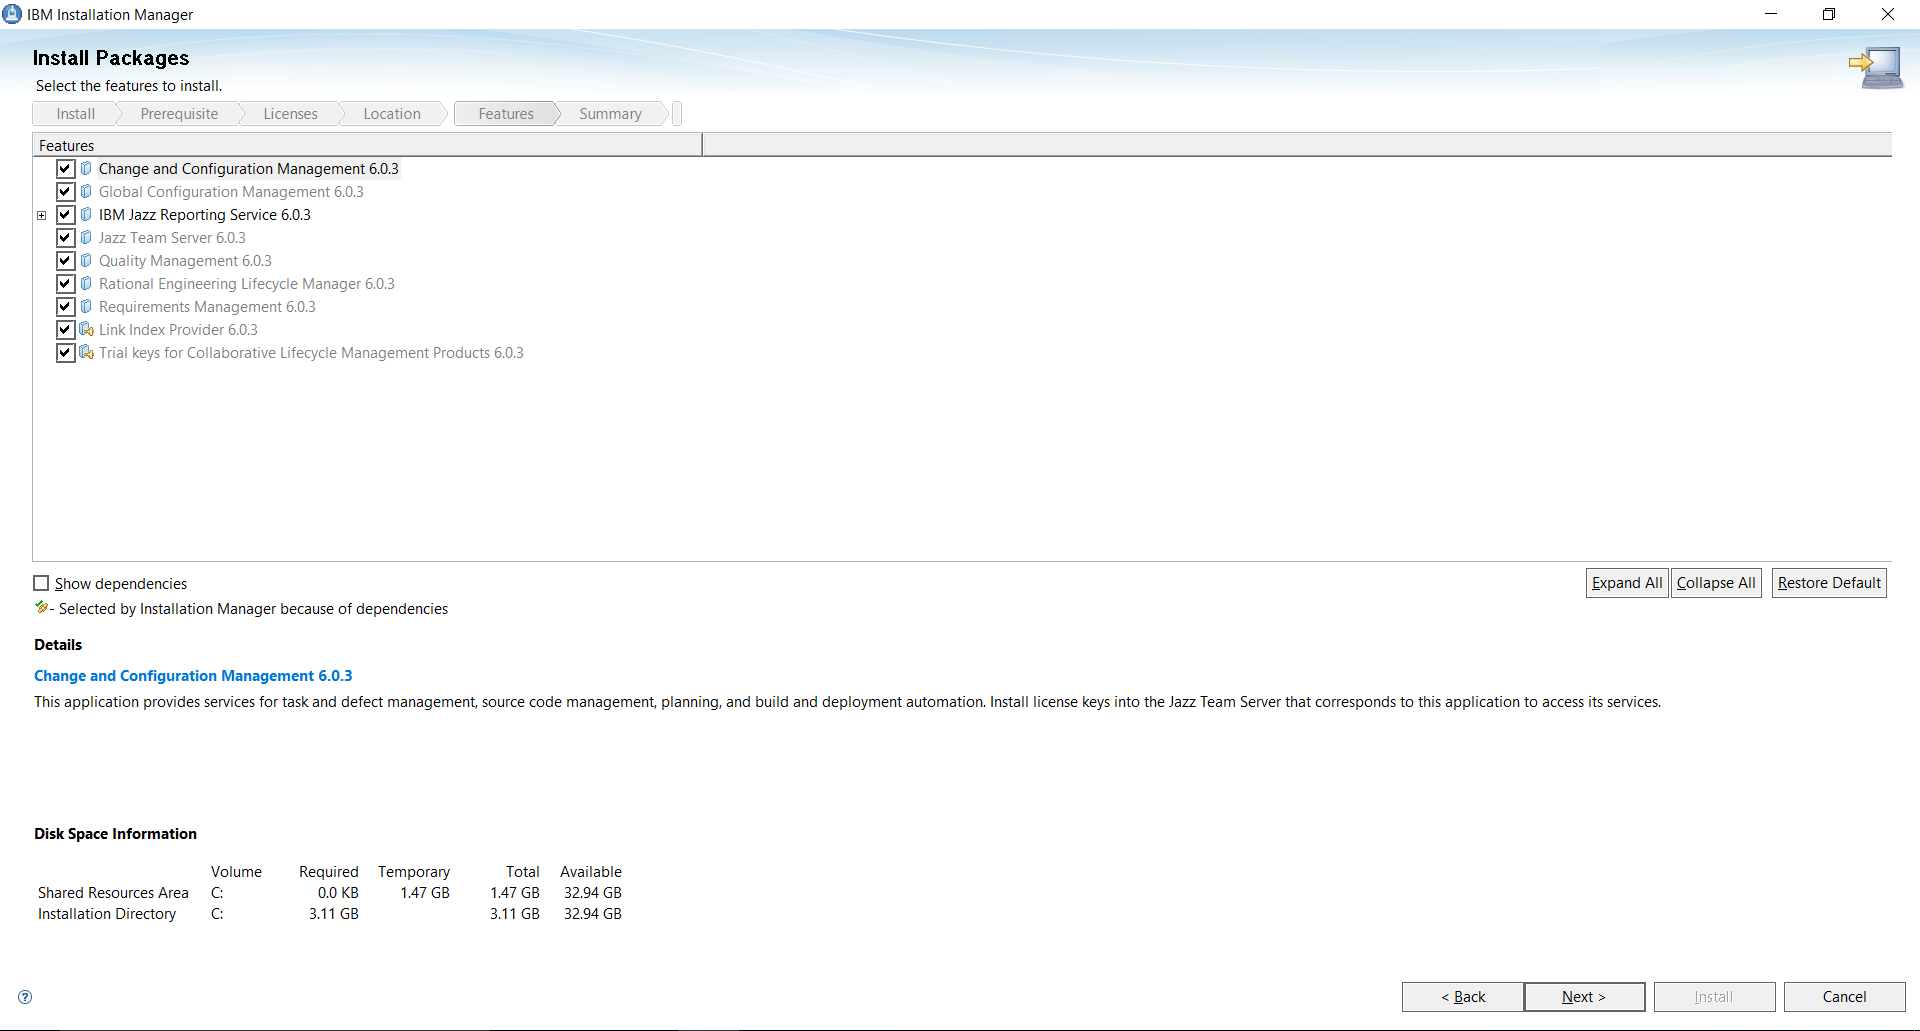
- Check all the components that you want installed, and click Finish.
- Download Collaborative Lifecycle Management (CLM) software from https://jazz.net/downloads/clm/releases/6.0.3?errno=2&p=allDownloads to
your local machine. Create a trial account, if you do not have one, or access to
-
Setup the CLM server.
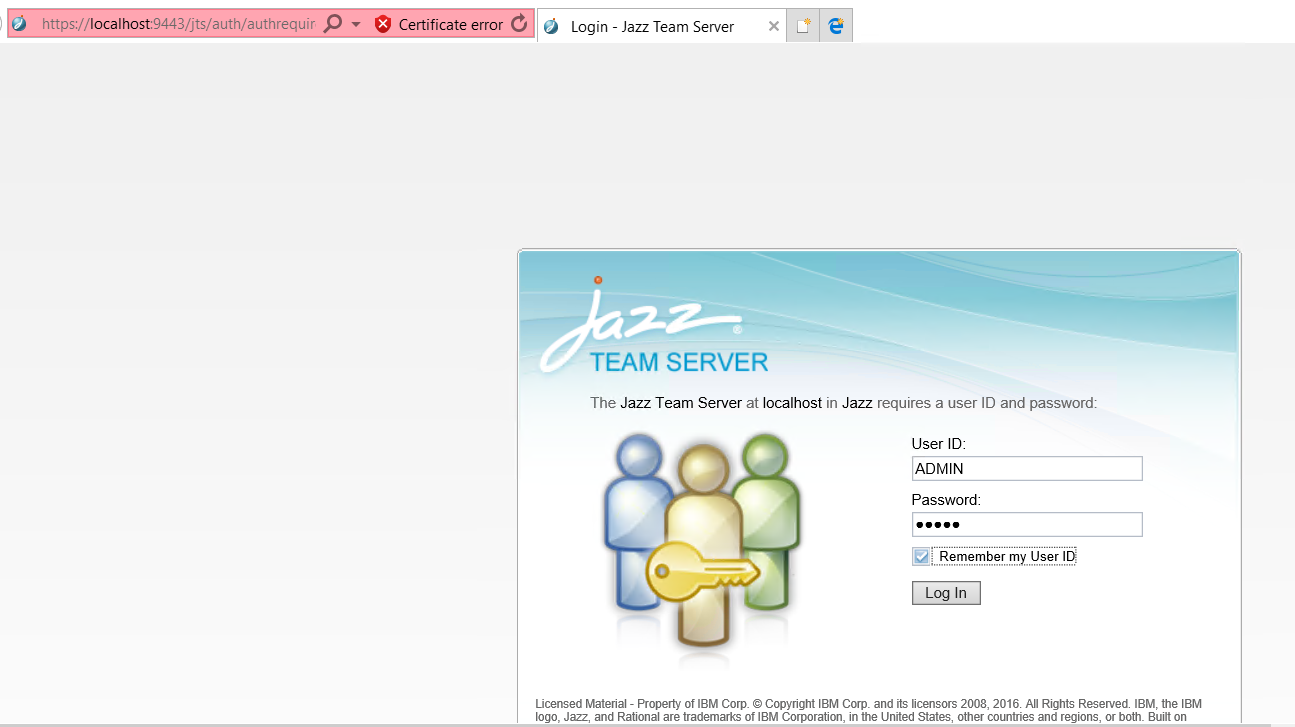
- The CLM does not start automatically, so go to C:\Program Files\IBM\JazzTeamServer\server and select “server.startup”, and run it as administrator.
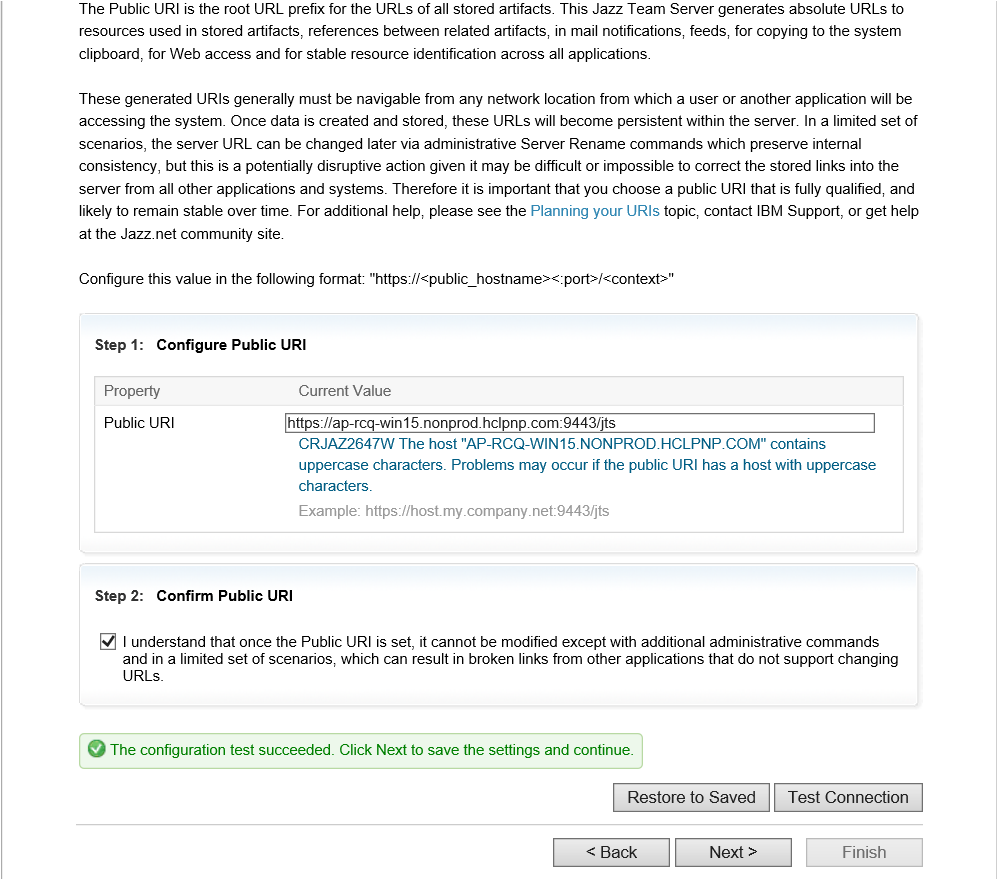
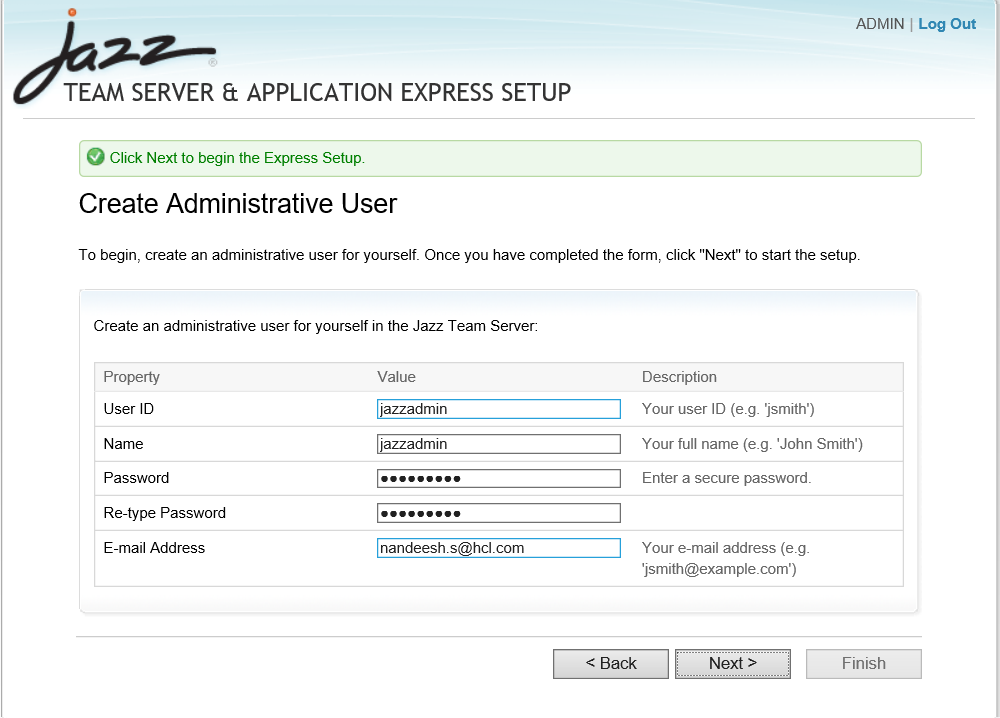
- Launch https://localhost:9443/jts/setup. It is recommended to provide your system ip for hostname
instead of localhost. The Username is ADMIN and the password is ADMIN.
- Go to cmd and type hostname to get your hostname and append it with
nonprod.hclpnp.com.
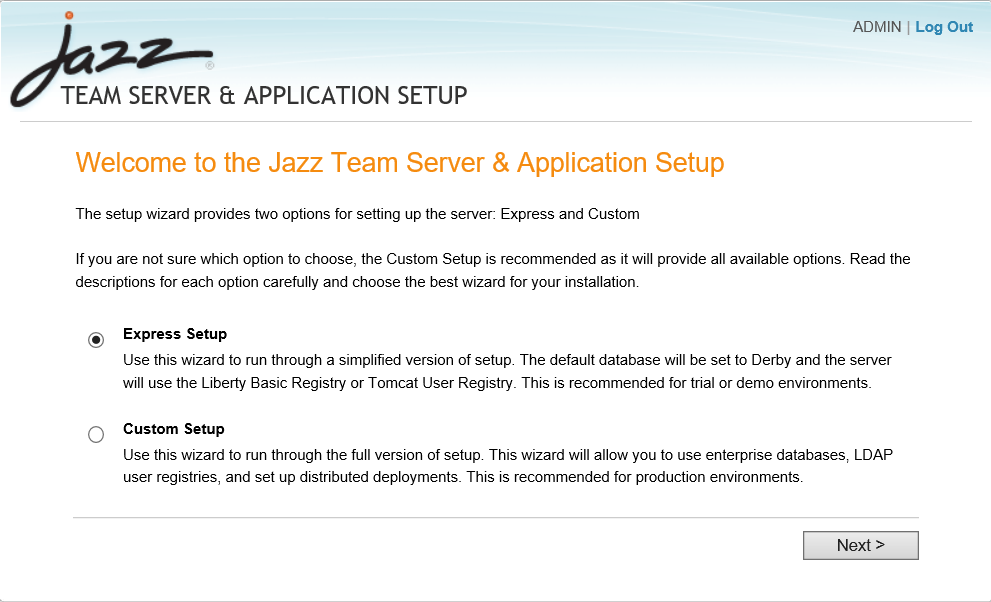
- Click Next and wait for few minutes to start the process.
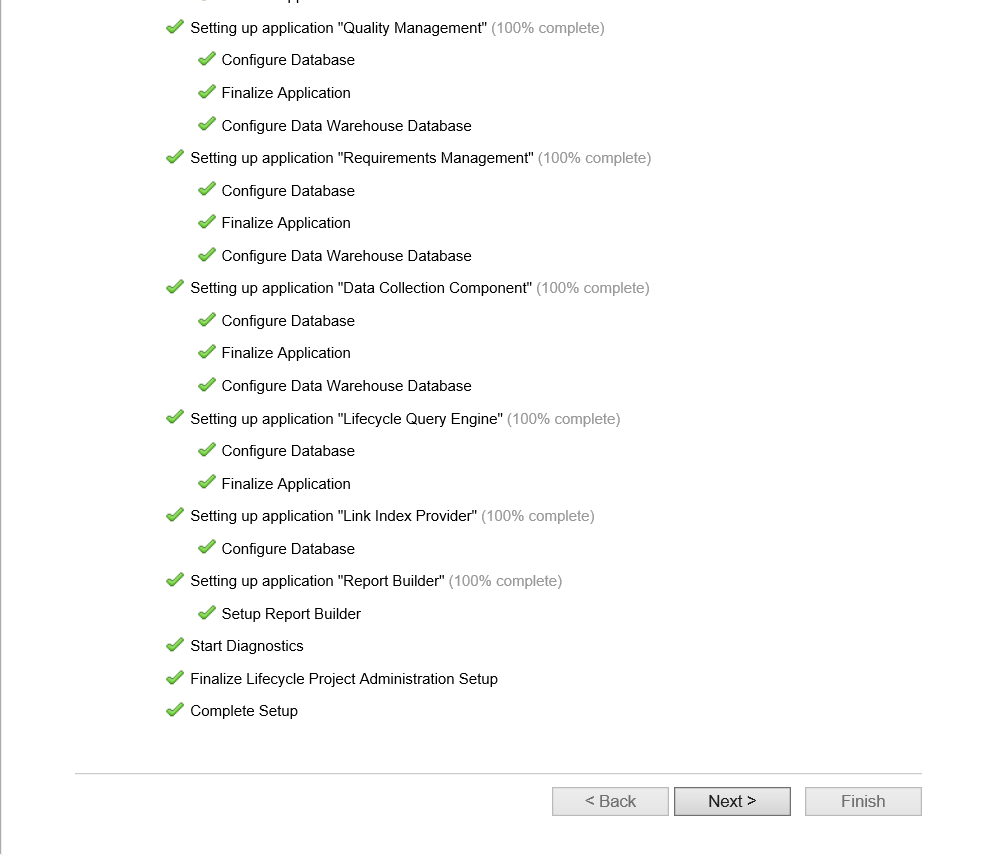
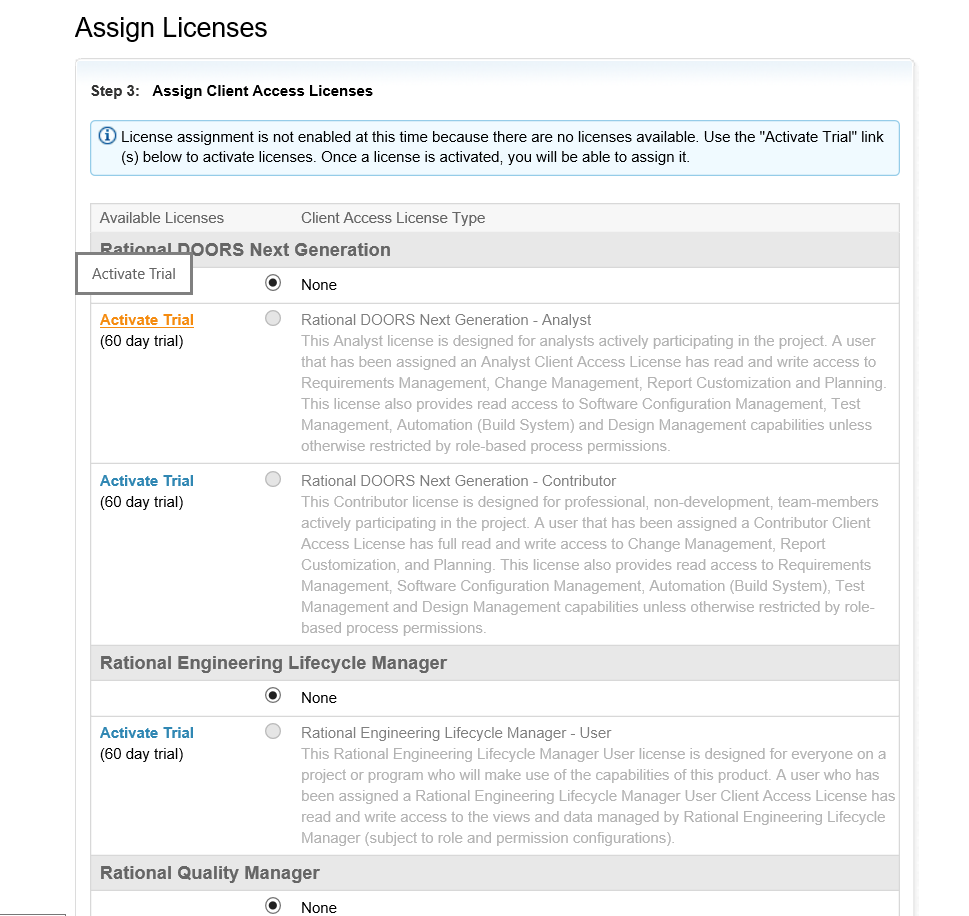
- Activate all trial packs one by one, if you are using trial version, and click
Finish. The CCM home page opens.
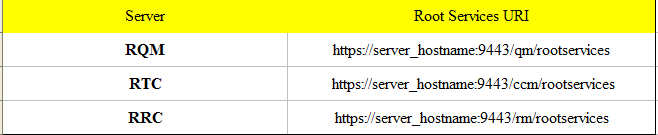
Note: These are the access link samples for the CLM product:- Rational® Team Concert server (RTC): https://hostname:9443/ccm
- Rational Quality Manager server (RQM): https://hostname:9443/qm
- Rational Requirements Composer server (RRC): https://hostname:9443/rm
-
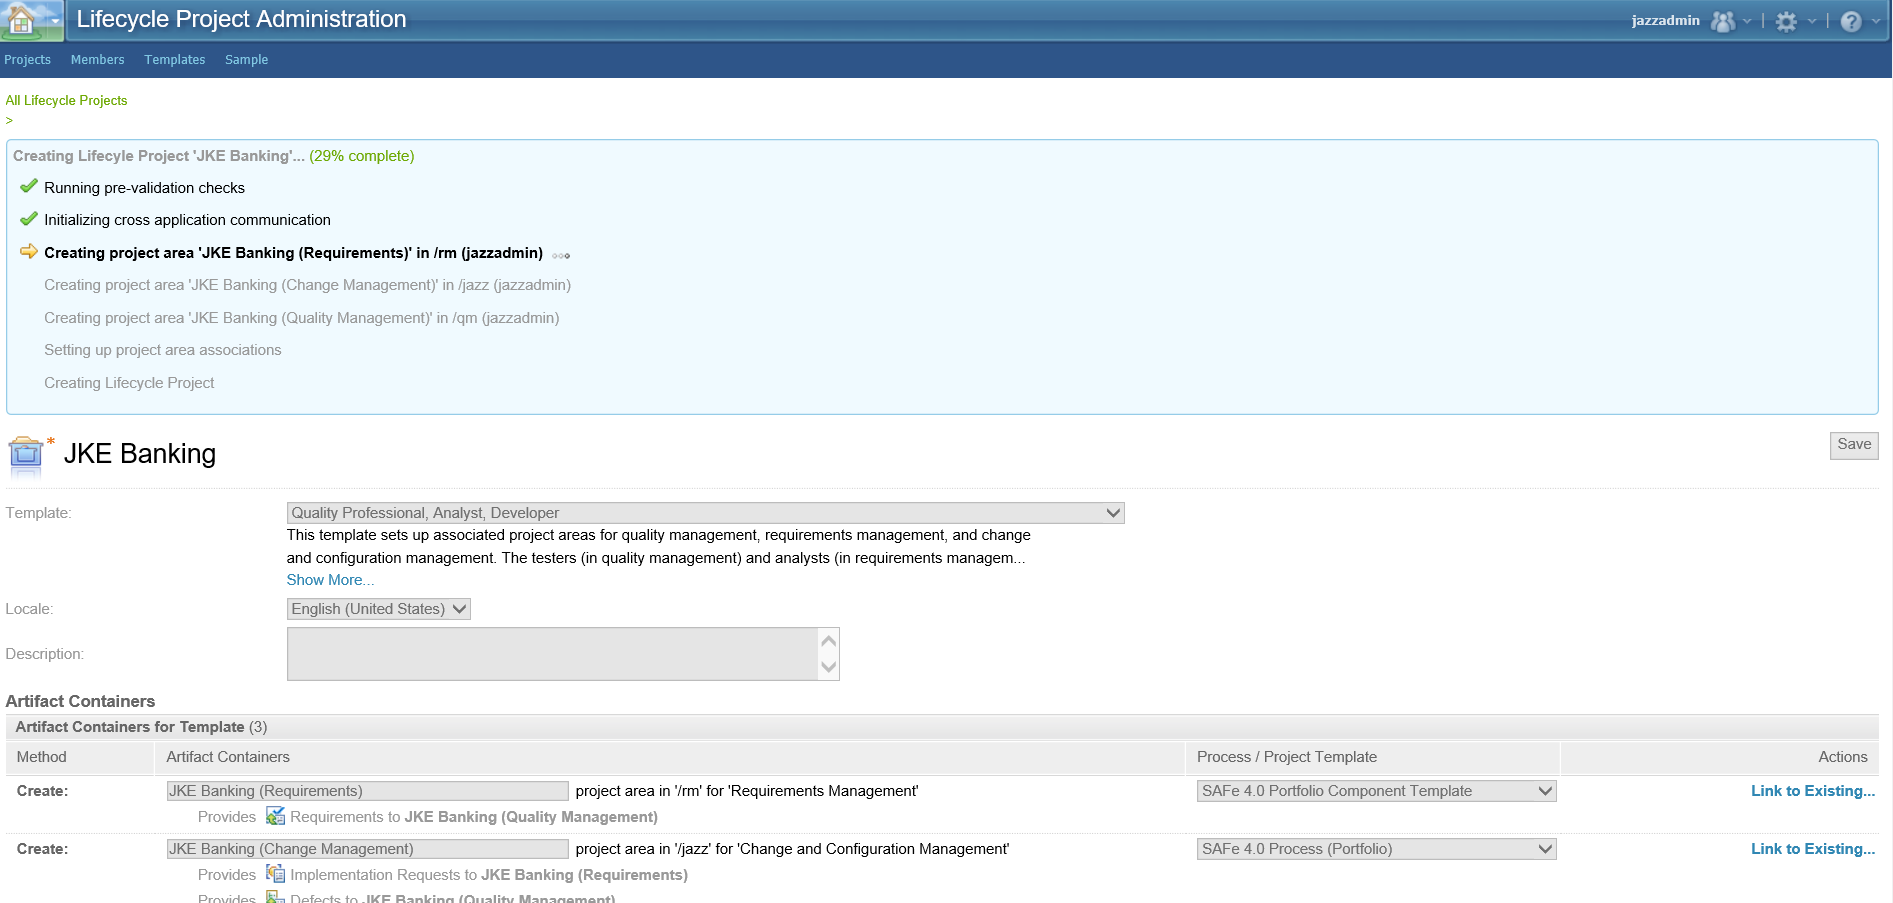
To create a project in CCM, click Create Lifecycle Projects, provide the
project name and click Save.
-
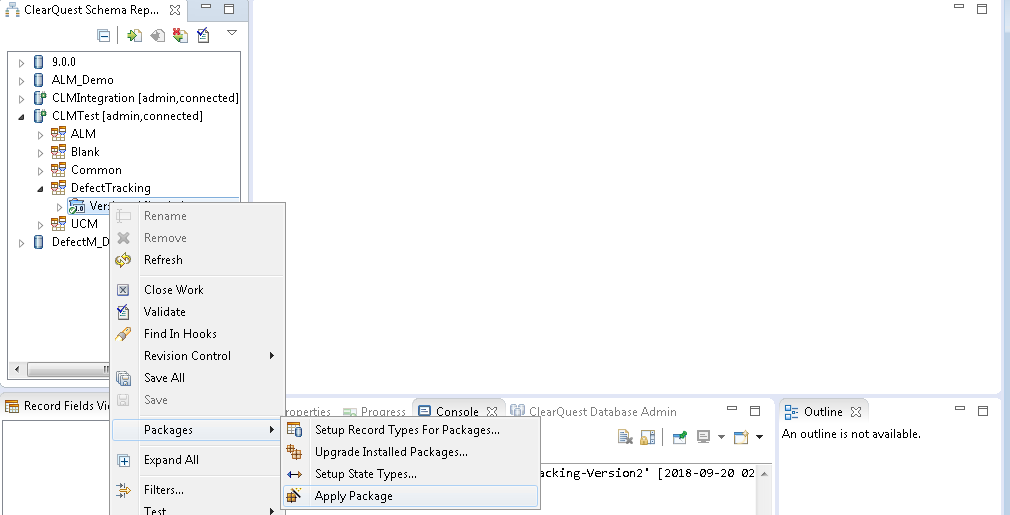
To apply the OSLC package to ClearQuest, open the ClearQuest Designer, and select
Repository Checkout version. Once the checkout is done, select
Apply Package.
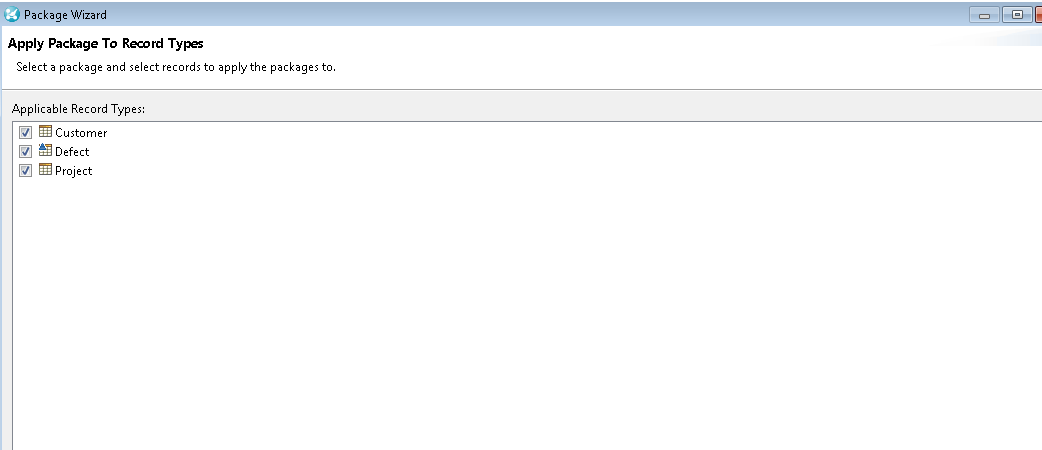
Select OSLI Links version and click Next.

Select All and click Finish.
Checkin and upgrade the database. Now you will be able to see Links tab on ClearQuest records.
-
Create a cross-server communication from ClearQuest by clicking on Site
Administration on the top right of the ClearQuest Cross Server Communication window.
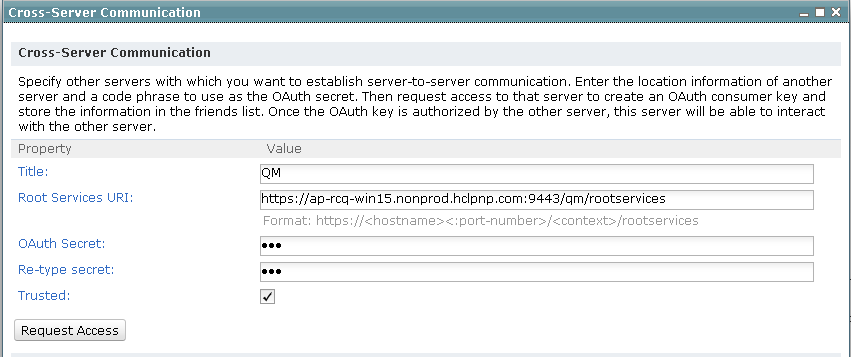
The hostname in the URL corresponds to the hostname of the machine where CLM is installed.
-
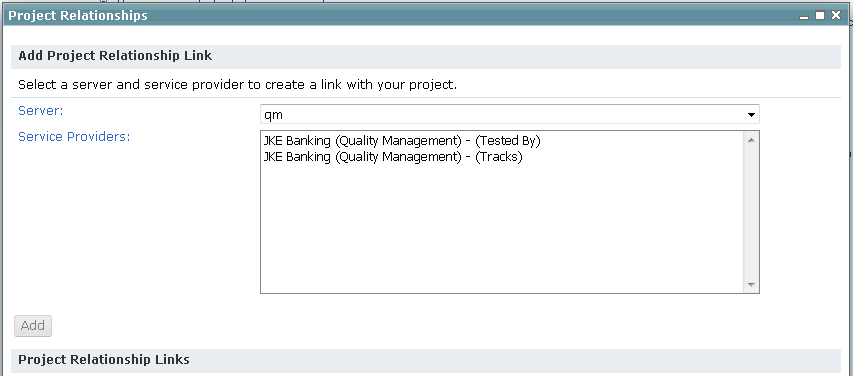
To create a project relationship, click on Site Administration. Another
window opens where you can select the project that you created on the CLM server. Click
Add.
-
To integrate from the CLM server:
- Launch https://ap-rcq-win15.nonprod.hclpnp.com:9443/qm/admin on another machine, and change the hostname as per your machine that you used for the previous steps.
- Click on Friends (outbound) on left pane, and click Add
Friend on top right for another window to open.
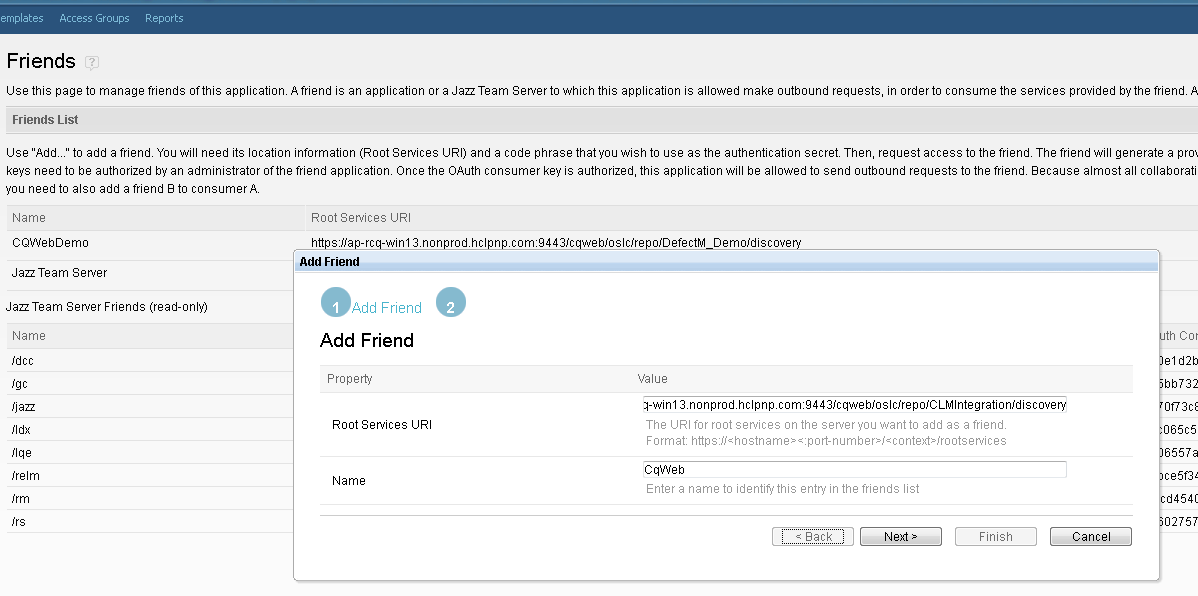
- Provide the URL and the name to create a friend. Click Next.
Note:The URL must be in pattern of: https://ap-rcqwin13.nonprod.hclpnp.com:9443/cqweb/oslc/repo/CLMIntegration/discovery or https://<hostname of CQ web>:9443/cqweb/oslc/repo/<Repository_name>/discovery. It must be https and not http.
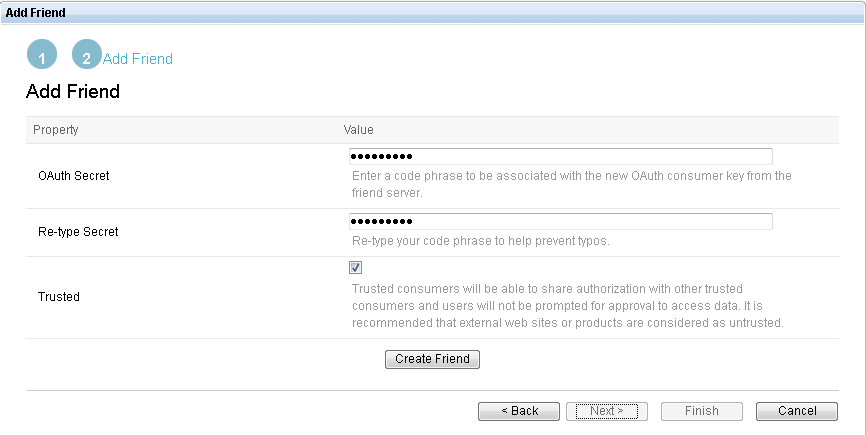
- Provide the secret key, and click Create Friend.
-
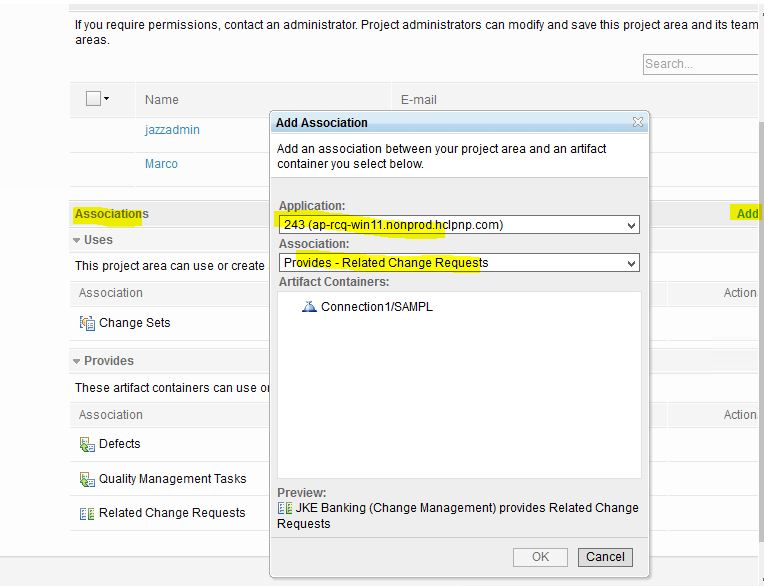
Select such as JKE Banking(Change Management). Scroll down and find Associations and click
the Add on the right corner. Select the friend name just added and a window
opens that asks for a username and password.
 Note: Ensure that the pop up window is not blocked by browser.
Results
Verify by logging into ClearQuest, create a new defect under the Links tab, and click Related Artifacts. Select any value from the drop down list, and the new content is displayed in the pop-up window.