WebSphere Commerce EnterpriseFeature Pack 4Feature Pack 3WebSphere Commerce Professional

Creating dynamic kit price rules

A price rule is a set of instructions you create to set prices on your storefront. Using the Catalog Filter and Pricing tool, business users can create price rules to dynamically adjust price lists by using calculations and built-in decision-making logic.

About this task

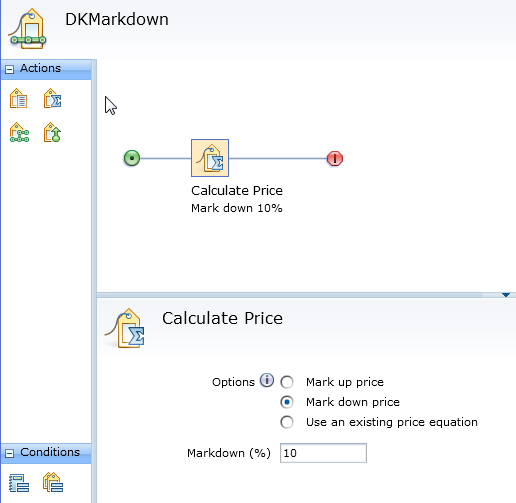
This procedure shows you how to create a price rule so that all dynamic kits in the store have a 10% mark down. All other products in the store are sold at regular price. If you do not use price rules, the price of a dynamic kit is the sum of the component prices. By using a price rule that you can offer the kit at a discounted price.

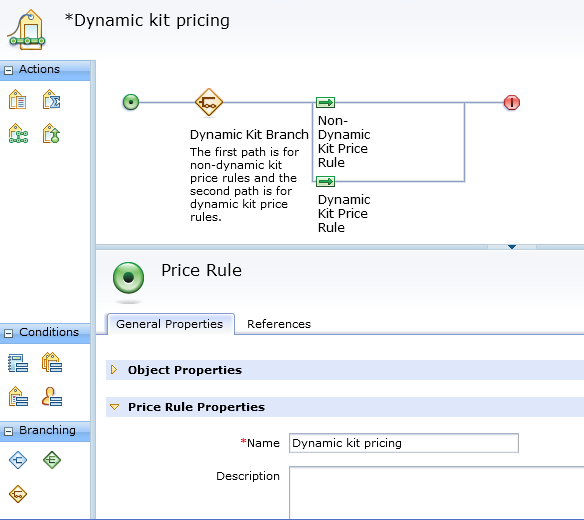
When the price of a dynamic kit is calculated by using a price rule, the rule engine determines the component price then enters the rule to calculate the dynamic kit price. For example, the following screen capture shows a 50% discount on the Non-Dynamic Kit Price rule and a 10% discount on the Dynamic Kit price rule. The resulting price is (total price of components * 50%)* (1-10%).
Screen capture that shows two dynamic kit price rules

In general, set a discount on either the components, or on the dynamic kit.

Procedure

  1. Open the Catalog Filter and Pricing tool.
    The Price Rules - list is displayed showing the price rules for the store.
  2. Create a price rule to mark down prices by 10%:
    1. From the toolbar, click the arrow on the right side of Create New; then select Price Rule.
    2. Set the price rule properties:
      Name Type a name for this price rule. This name displays beneath the price rule in the Price Rules - List page.
      Description Enter the text that explains what the price rule is intended to do.
      Tip: To edit the name and description for a price rule, click the green circle at the start of the price rule.
    3. Drag the Calculate Price action icon to the flow.
    4. Complete the details.


    5. Save and close the price rule.
  3. Create a Dynamic Kit Branching condition.
    1. From the toolbar, click the arrow on the right side of Create New Create New; then select Price Rule.
    2. Set the price rule properties:
      Name Type a name for this price rule. This name displays beneath the price rule in the Price Rules - List page.
      Description Enter the text that explains what the price rule is intended to do.
    3. Drag the Dynamic Kit branch icon to the flow.
      For example, Dynamic kit price rule
    4. To the right of the Non-Dynamic Kit Price Rule, drag the Apply Nested Price rule to the flow. In the properties view, add the Offer price rule.
    5. To the right of the Dynamic Kit Price Rule, drag the Apply Nested Price rule to the flow. In the properties view, add the price rule that you created in step 2.
    6. Save the price rule.

What to do next

Before the site can use the new dynamic kit price rule, you must activate it.

Activating a price rule

Assign the price rule to the store default contract.

Procedure

  1. Open the WebSphere Commerce Accelerator, and select the correct store.
    Tip: If you are using Internet Explorer, you can open WebSphere Commerce Accelerator from Management Center. Click Management Center Tools WebSphere Commerce Accelerator.
  2. Click Merchandise > Catalog Filter and Price Rule.
  3. Click the Price Rule tab.
  4. In the Property Value column, select the price rule to assign to the store contract.
  5. Click Save.