Generating code from an SDO genmodel file
Once you have an SDO genmodel file, you can generate the service data objects in WebSphere Commerce Developer
Before you begin
About this task
To generate the code from an SDO genmodel file:
Procedure
- Double-click the MyServiceModule.genmodel
file to open it.
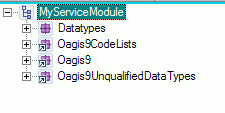
- In the Properties view, change the prefix from Datatypes
to the factory name that you want. For example, MyServiceModule.
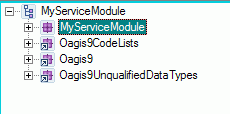
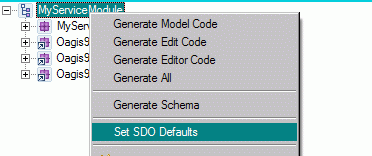
- From the genmodel file, click the root of the tree (the
highest node in the order tree from the image above). Right-click,
and select Set SDO Defaults and save it. Important: If
you do not perform this step, then your project classpath will be
corrupted when you generate the code.
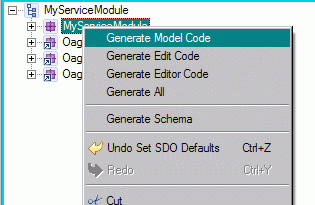
- Now, select the schema namespace entry for your component.
Right-click, and select Generate Model Code.
- in the
srcdirectory of your DataObjects project, you can now see the generated SDO files for this namespace.Three packages are generated:
- The datatypes directory that provides interfaces to all of your SDO objects
- A datatypes.impl directory that provides the static SDO EMF implementation
- A datatypes.util directory that provides the factory and resource helper classes

Results
Note: Generating SDO code may break functionality in your
DataObjects project by removing entries from your Java build path
(in the Projects and Order and
Export tabs). The following steps may be required to correct
your settings:
- Right-click on the source project and select Properties.
- Click Java Build Path and then the Projects tab. Ensure that the projects you require for compilation are selected.
- Click on the Order and Export tab and ensure that the projects you require for compilation are checked
- Click OK.